Hours per day
Introduction to clocking hours
BaseNet offers three ways of clocking hours
- Clocking hours manually
- Clocking hours using the stopwatch widget
- Clocking a series of hours through the multi-hour input window
This chapter will elaborate upon all the above mentioned methods.
Setting an hourly rate
Hourly rates are decided into four classifications.
- Employee rate per project
- General rate per project
- Employee rate
- Office rate
The system first inspects whether level 1 has been filled in, if so, than that classification is applied. When level 1 is not filled in, the system will automatically seek for the following classification, level 2. Level 3 and level 4 can only be modified by employee’s/ employers holding Administration Rights. They can then go to Company Settings -> Hours -> “Default hourly rate” (level 4) or “Hourly rate per employee” (level 3).
Separate hourly rate input
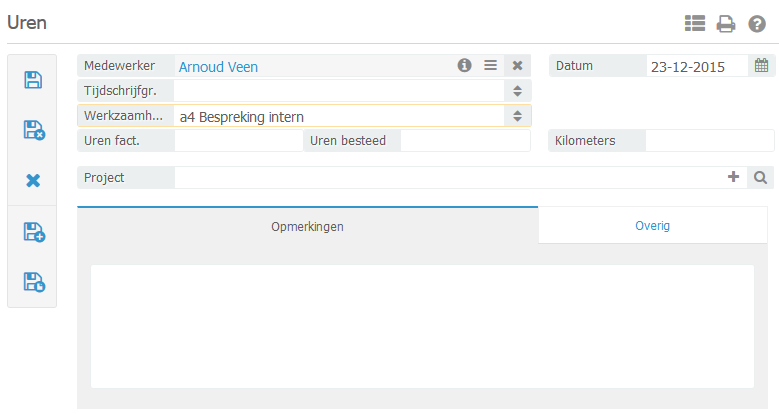
Hours / Projects ➤ Hours per day
Company settings > Hours > Activity type
Company settings ➤ Billing ➤ Billing settings
Here you can set whether you work based on a per distance rate or a fixed rate per consult.
Link a project (or dossier) and a company and click on Save/ Close in order to save the hour field.
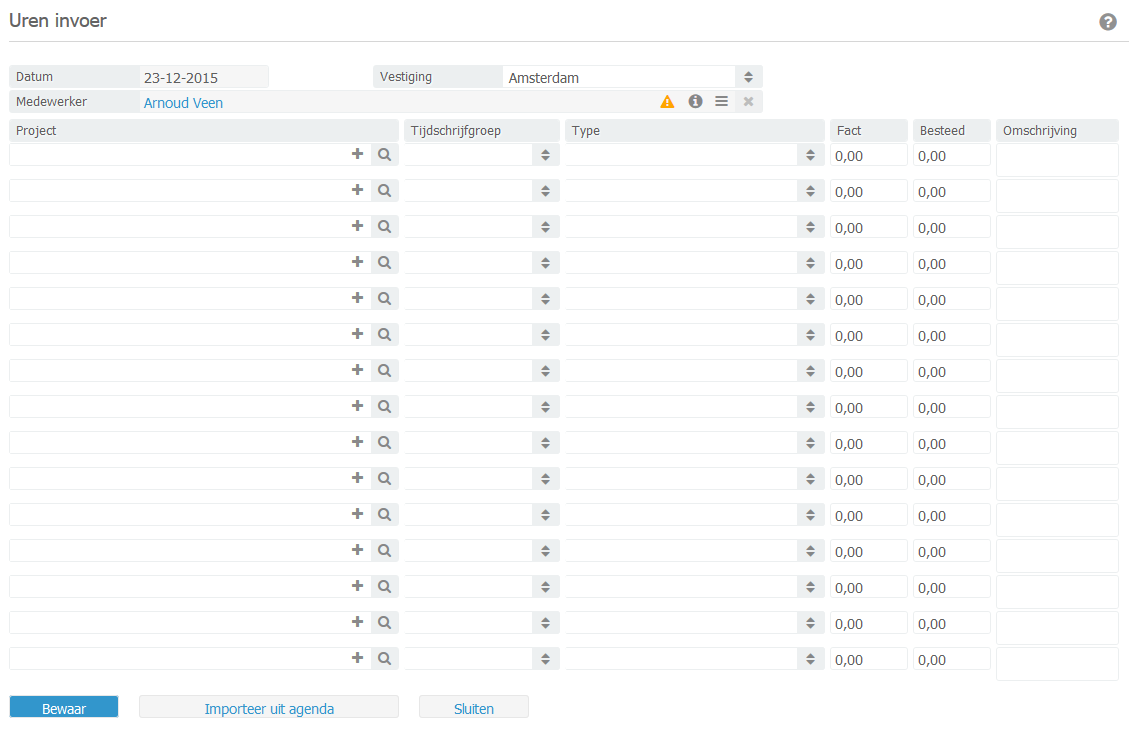
Quick hour input (multiple hours screen)
Hours / Projects ➤ Hours per day ➤ Enter multiple hours or straight from BaseNet's main menu (click on a particular day to open the window).
The multiple hours screen offers the possibility for a quicker input of hours from within BaseNet. Select a particular day by hitting the “tab” key on your keyboard to navigate to the following field.
Company Settings ➤ Hours ➤ Hours per day
Company Settings ➤ Hours ➤ Current set hours through the multiple hours screen
Amount of clocked hours per day This setting indicates the amount of default hours per day and sets the colour of the input screen. The hours are set to eight by default. This means that in reality the concerning day will be displayed in orange and an exclamation mark in the hours screen. If more than eight hours are set the day will be marked green with a “v”.
Clocked hours can be adjusted through the multiple hours input screen Through this option you can indicate whether you wish to adjust clocked hours through the “multiple hours” screen. Doing this has the advantage of being able to easily adjust clocked hours. The disadvantage is that only fifteen hour fields per day can be set through the “multiple hours” screen. If you clock an average of fifteen hours per day or above we recommend to turn this setting off.
Hours input
In order to enter hours click on a particular day in the start up screen of BaseNet’s Online CRM and subsequently go to: Hours/ Projects -> Hours per day -> Enter multiple hours, after which the following window will appear as shown in the illustration bellow: