Contacts ➤ Contact selections.
Contact selections serve as a means of filtering your Rolodex based on varied specific properties. After which the selection can be used for exporting an overview or using an addressee listing when composing a mailing. In this chapter, we shall touch upon the dynamics of this component through the following steps.
Procedure 4.4. Creating a selection and mailing
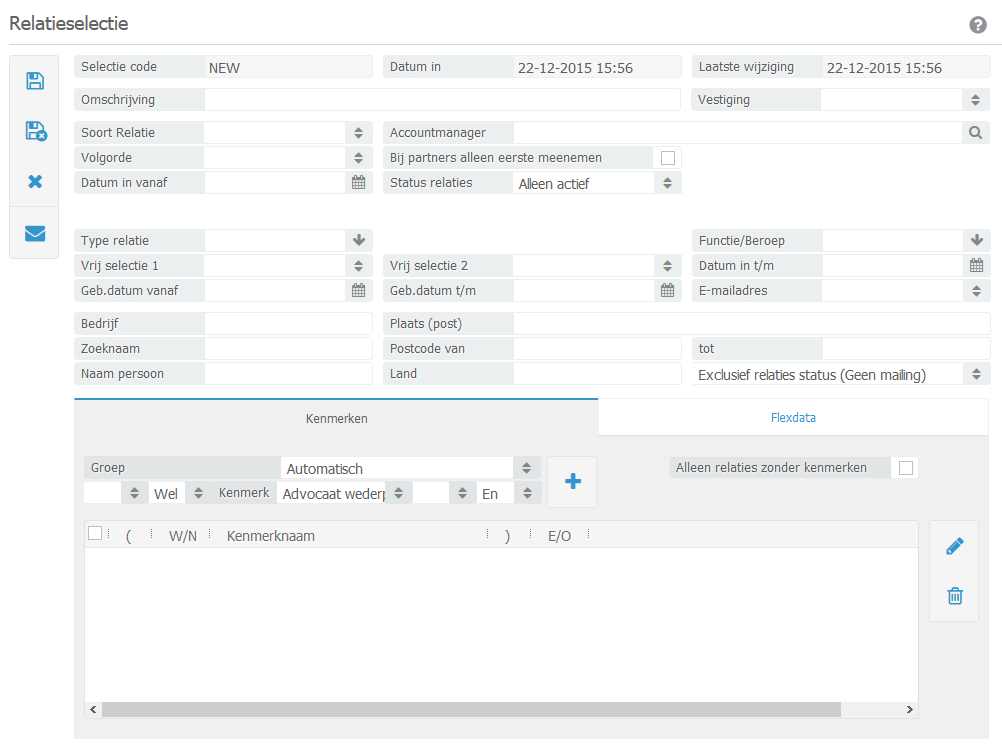
Click on New, resulting a new window to appear as shown below:
![]()
Within this window the criteria can be specified appertaining to what you wish to select.
Selection. Within this field you can give the selection a name. This serves for future reference when trying to retrieve the selection for later use.
Contact type. In this field you can differentiate within the selected contact. If you wish you may use open fields at this stage.
Starting date. This field provides a selection of contacts which have been generated within a certain period.
Account manager. Here the contacts of a particular employee can be selected. In order to retrieve all contacts leave this field free.
Attributes. Here the attributes which have already been entered/ generated can be applied for a more defined selection. It is possible to combine different attributes or exclude certain attributes within a selection.
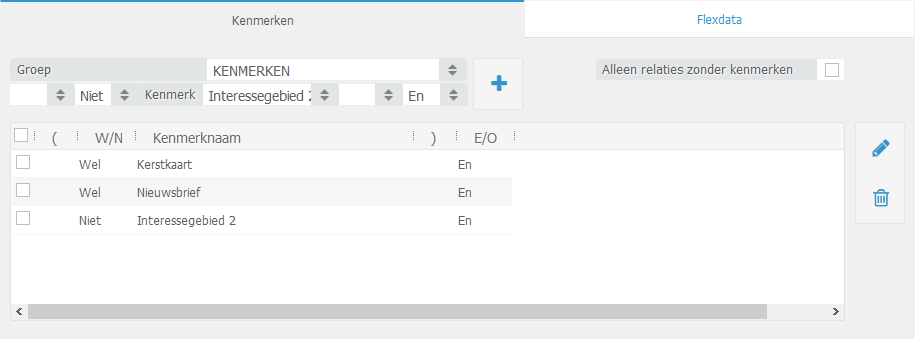
For example if you wish to create a selection of all contacts which have “Christmas post card” and “Newsletter” as an attribute and not attribute “Field of interest 2” the selection should show as followed:
![]()
In case of such a selection parentheses should be used.
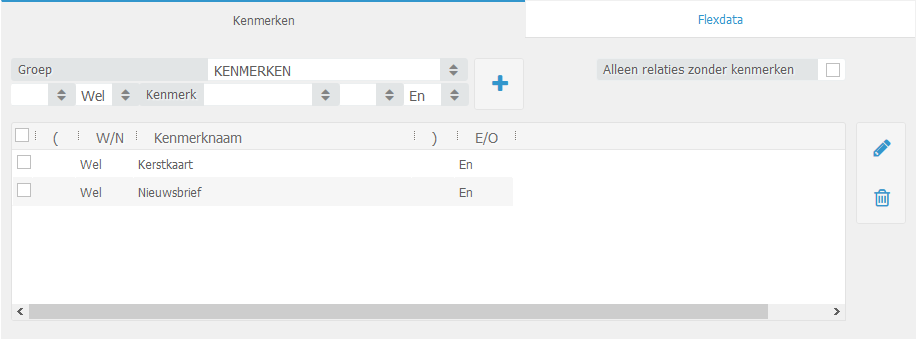
If you wish to make a selection based on several attributes without exceptions you do not have to use parentheses. For contact selections which have both the “Christmas post card” as well as the “Newsletter” attributes a selection would look as followed:
![]()
Proof reading the selection: Double check the selection which you have created. Click on the Save button and subsequently on the Create Mailing button. A window appears titled ‘Show Selected Contact’ Data. This window consists of two segments. An overview of all contacts that categorize within a particular selection and tabs of which each show a type of mailing, such as Text messaging, Letter, Email, etc.
Now select the type of mailing which you prefer.
![]()
Email. In this tab you can send customised Email mailings. To do this select a template and enter a subject.
Letter. Here you can select a letter template in order to make a letter mailing.
Text Messaging. Text Messaging offers the possibility to send Text Message mailings. Additional fees will apply to this component.
Labels. Here you can print out labels. Select a label format and click on Print Labels to print out the Labels.
Attributes. Add an attribute to the selection. Click on the Attributes tab after sending a mailing to add a new attribute to the entire selection. For example, “Newsletter January 2008”, this way at a later time and juncture you can easily search to see who has received a particular mailing.
The step as shown below is only applicable when sending Email newsletters, i.e. mailings.
Inspect the status/ history of mailings. Return to the Menu: Contact Management > Contact Selections. Here you find a “View Status/ History Email mailings” button. By way of this button, you can retrieve the status and history of mailings which have been sent out in the past.