
| This knowledge base article will guide user on how to set up a size color matrix using the PRISM DESKTOP. |
|---|
PRISM has a feature called the color size matrix which allows the application to group product items (see
screenshot)
Using this feature we can group an item by size,color or the combination of both.
Screenshot below shows the Item XBOX live have 2 other available color ( BLACK AND RED )
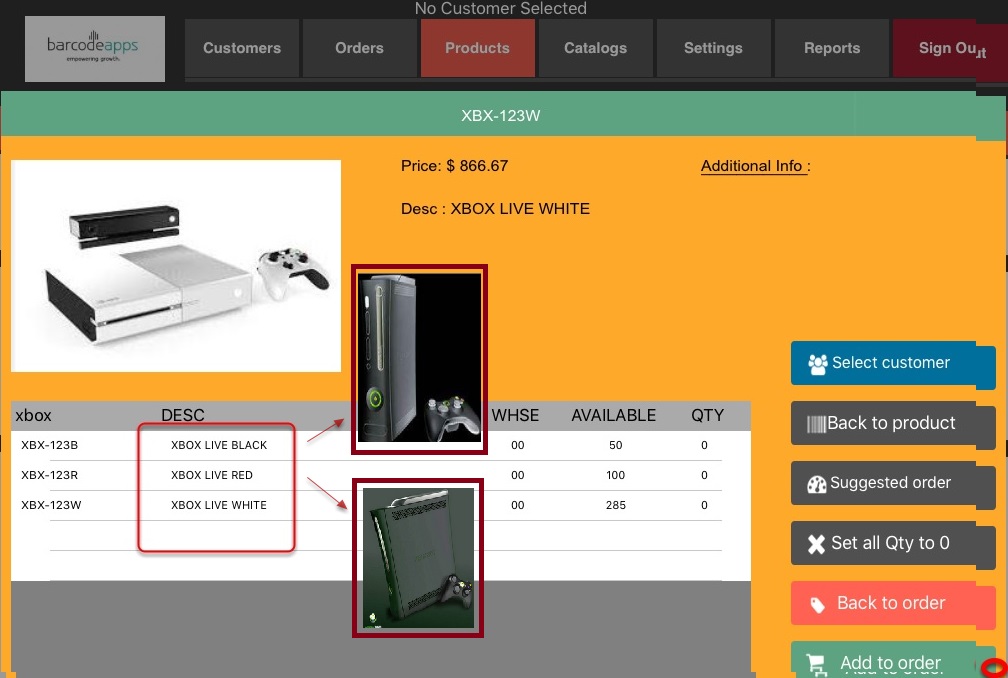
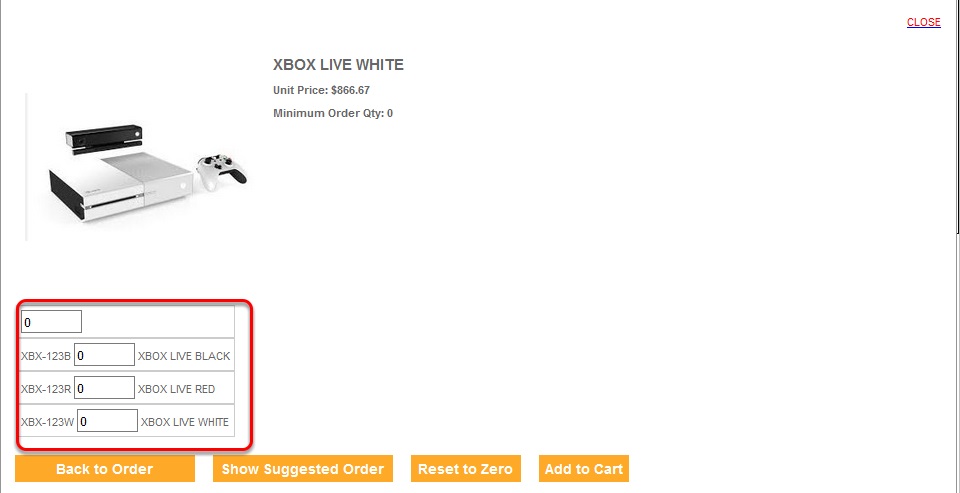
The same results will also show on the web store.
VIA PRISM DESKTOP
Before getting started. We have to make sure that all items that will be part of the matrix
are in PRISM.
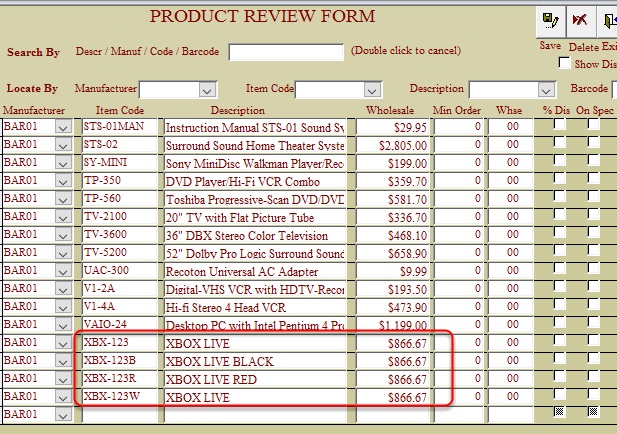
There are 2 ways to set up the matrix inside the PRISM DESKTOP
1. Modifying item properties inside the PRISM DESKTOP
2. Modifying item properties via excel
To modify the item properties inside the PRISM DESKTOP. Click the item , click on the size color matrix tab.
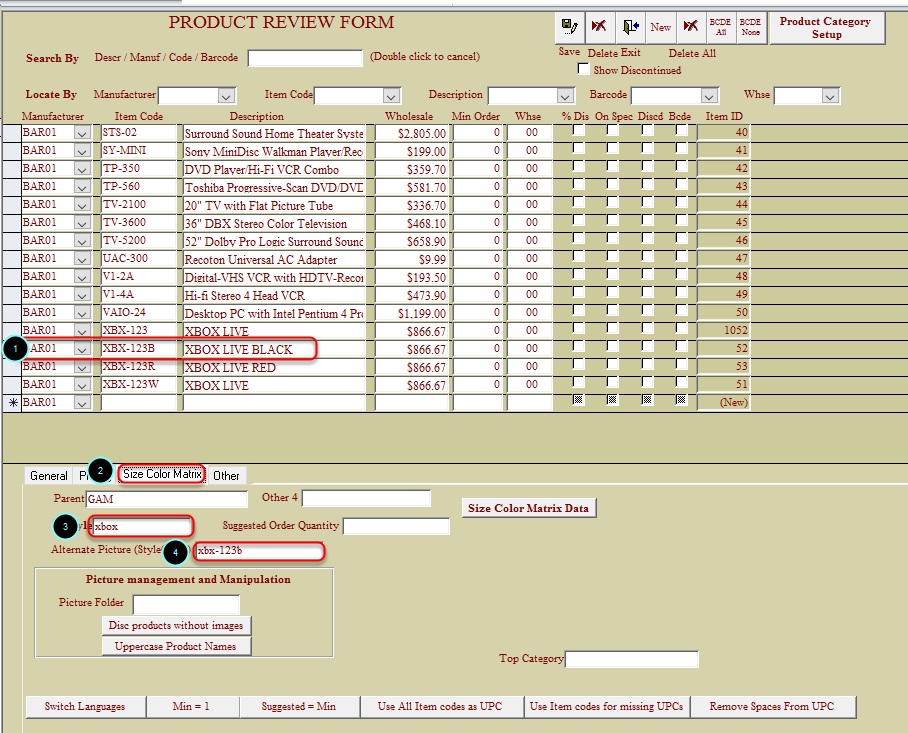
USING PRISM DESKTOP VIA ITEM PROPERTIES
To modify the item properties inside the PRISM DESKTOP.
1.Click the item ,
2.Click on the size color matrix tab.
3.Define the Style
4.Define the name of the Image that will be used.
USING PRISM DESKTOP VIA EXCEL TEMPLATE
To modify the item properties via excel. Click on settings on the main window.

Click on Export.

The confirmation will show the location of the Exported file (XLFILE) now Click on Ok
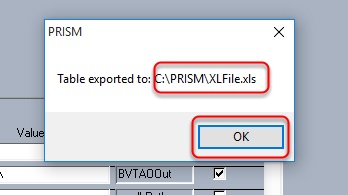
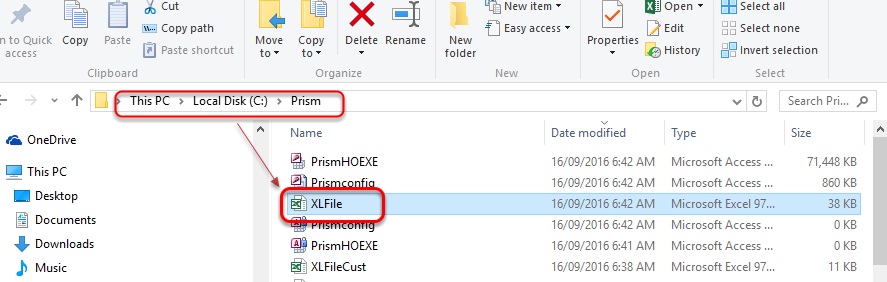
Open the XLFILE in C:\PRISM\XLFILE .xls
Locate the item that will be part of the matrix.

On the Picture Name column. We have to Key in the name of the image that the item will use.
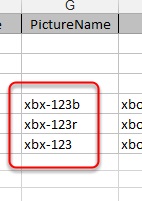
NOTE: If this field is left BLANK. It will follow the standard logic where the system will use the equation (Item name=Image name).
On the Style Column. We have to indicate in there the name of the GROUP name.

Once done. Save the changes on the excel file.

To upload the changes back to PRISM. The excel file On the setting window, click on the button with the three dots on it.
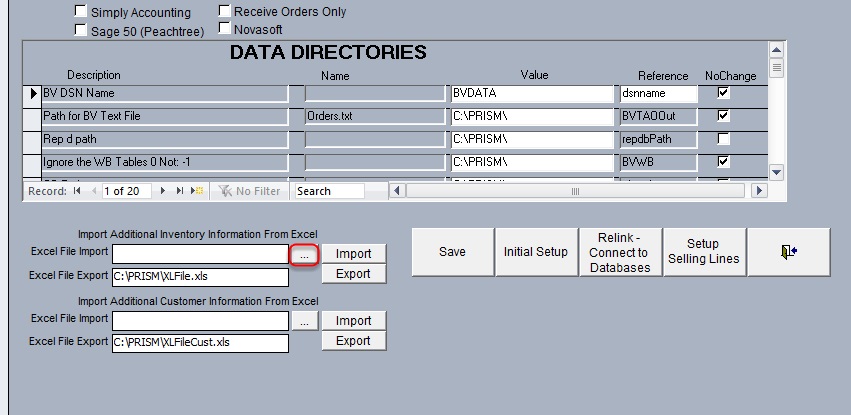
Click on the XLFILE and then click on open.
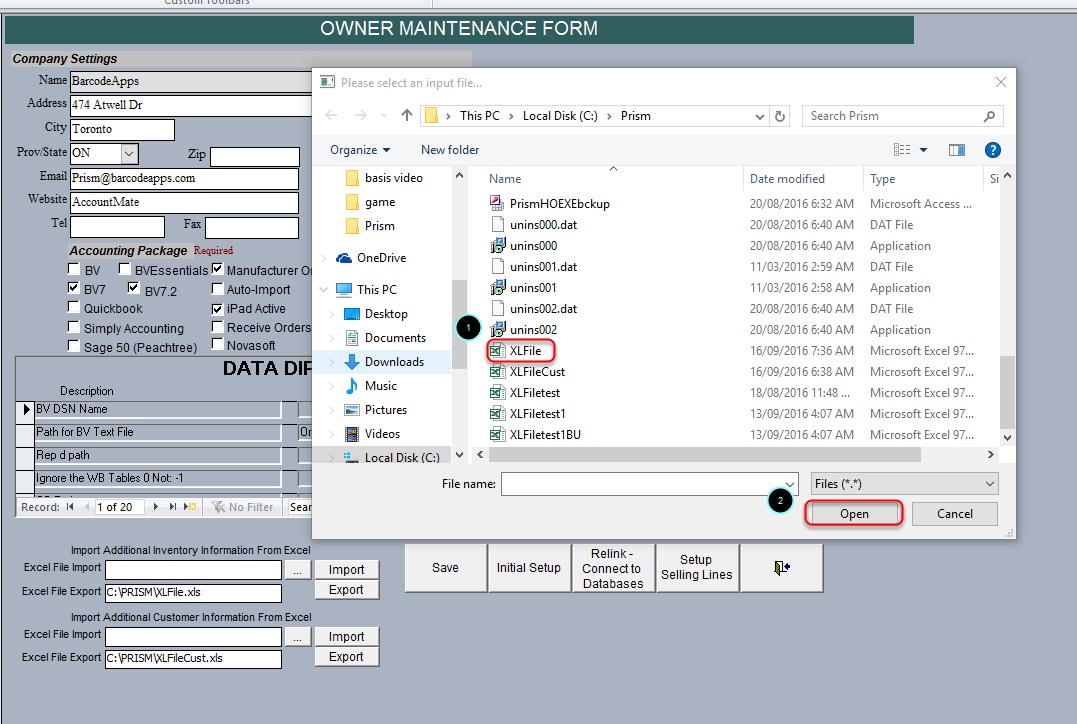
On the settings window. We can here verify the import path and then click on IMPORT.

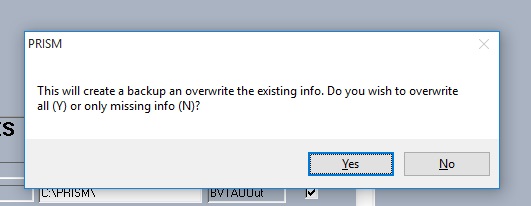
A notification will show that PRISM will create a back up copy of the XLFILE. Just click Yes to Overwrite ALL info. Otherwise No if you just need to update the info.
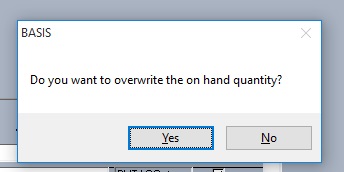
Click yes to Overwrite On hand Quantity
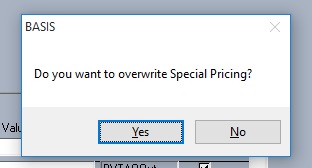
Click Yes to overwrite Special Pricing
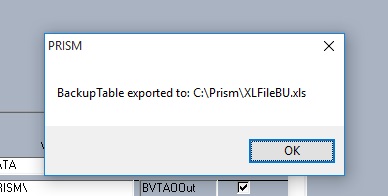
Last notification will show the location of the Back up file. just click on Ok.
After the Import is complete. A product sync (SEND PRODUCTS TO CLOUD) can now be done on the PRISM DESKTOP
To Sync the iPAD. Just do a PRODUCT SYNC AND AN IMAGE SYNC and everything will be good to go.

BarcodeApps © 2016
Post your comment on this topic.