
| This knowledge base will guide user on how a purchase order is being processed with the help of the BASIS APP. |
|---|
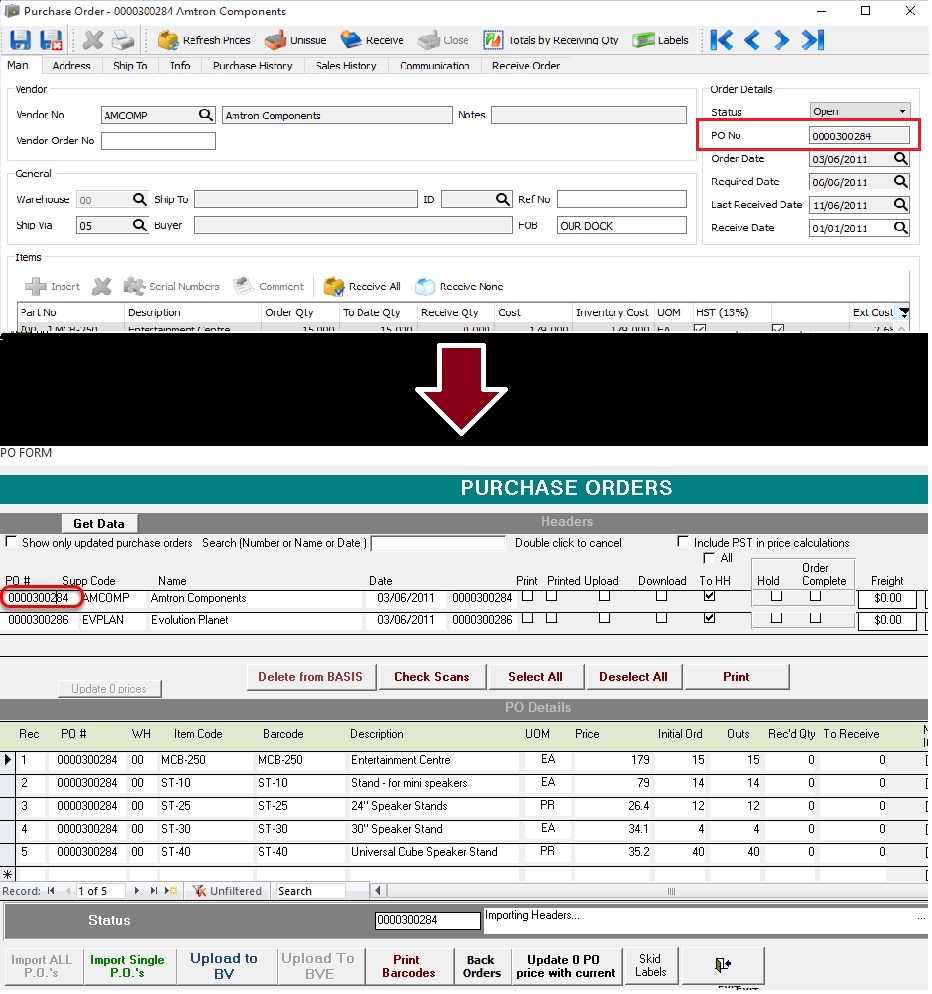
To process a purchase order using the BASIS App. We have to make sure that the processed order is imported from BV to the BASIS DESKTOP
There are 3 ways to import an order from the accounting package.
1. SINGLE IMPORT
2. IMPORT ALL
3. AUTO IMPORT
Once import is finish we can now proceed on scanning the items
It’s also a best practice that we familiarize the process of checking the order on the cloud
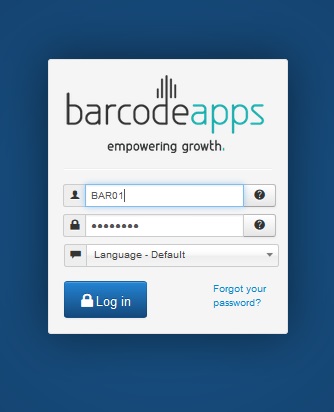
To do this. Login to the Joomla website using an admin credential
Click on BASIS and then Purchase Order
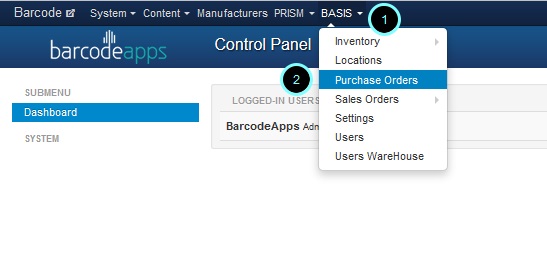
From here we can verify if the PURCHASE ORDER is imported successfully from the BASIS DESKTOP
Scanning an item from a Purchase Order
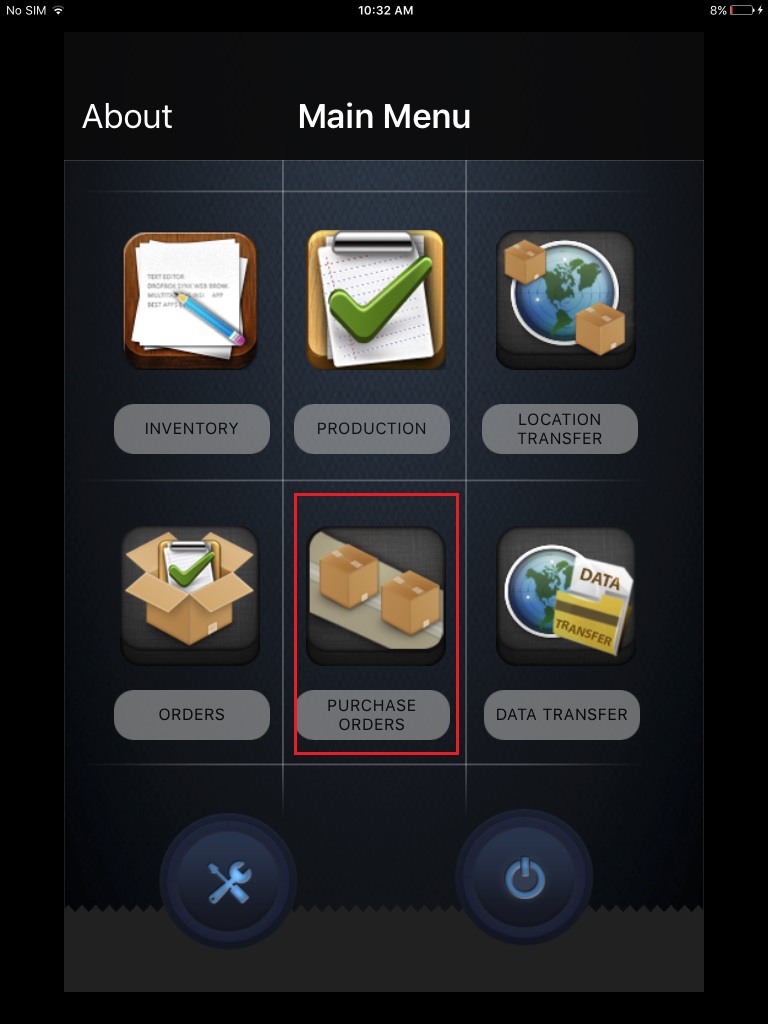
To Access the Purchase order module. From the BASIS App Main Window. Tap on Purchase Orders.
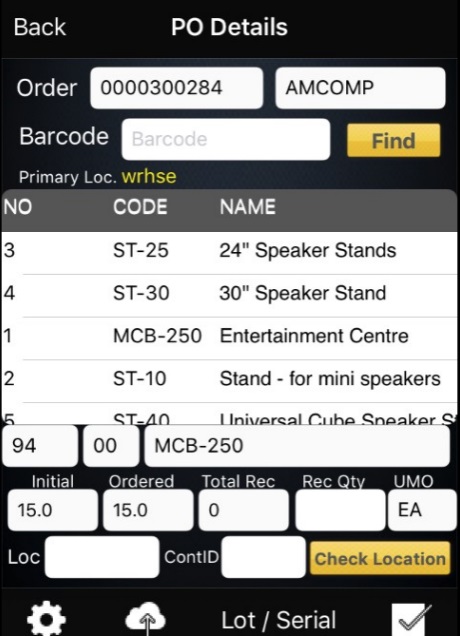
Type in the Purchase order number in the search field and then tap on find

Tap on the Purchase order number

to open the PO details window
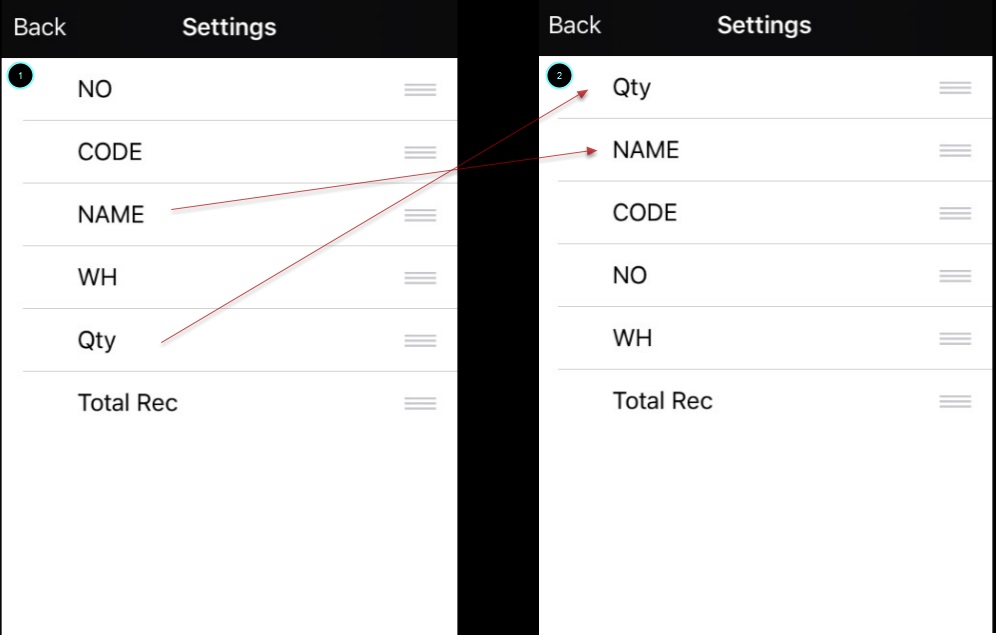
To do this tap on 
Tap on PO DETAILS COLUMN.

From here we can make the quantity column as the first column by simply doing a tap,hold and drag action on the screen.
Before getting started receiving a purchase order.
Define the location on where the item will be received
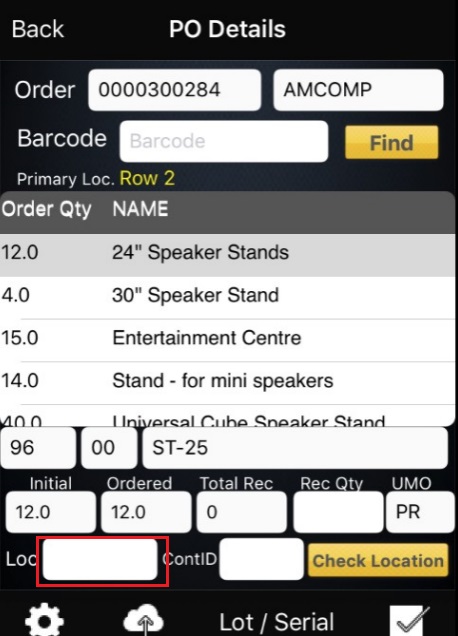
In our example. In most cases the receiving area is a common place in a warehouse. So we will tag it as receiving

Note: If you wish to keep a single location on all items in the Purchase Order. Just tap on settings and make sure the Persist Location is Enabled

To start receiving an item, we have two ways to do it
1. Scanning an item via a Bluetooth scanner
2. Manually tapping on the product from the PO details window
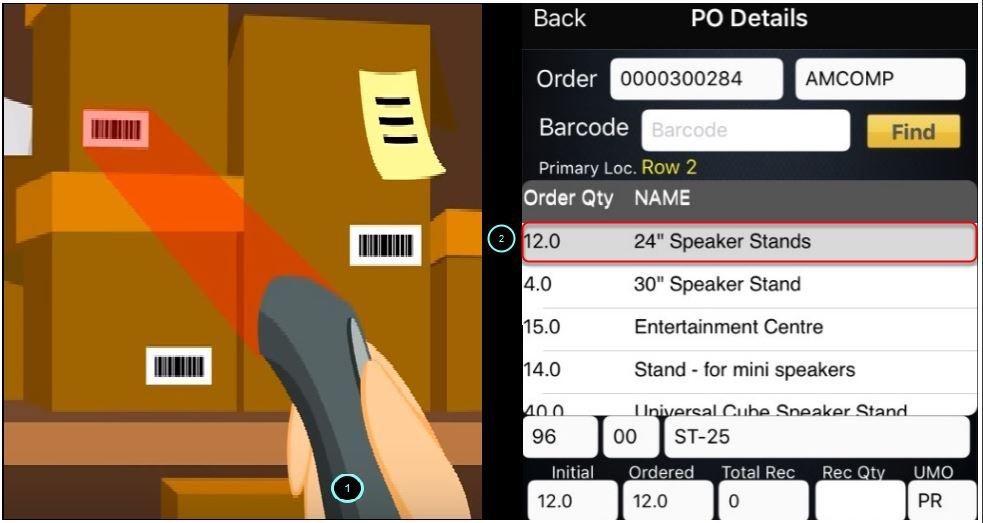
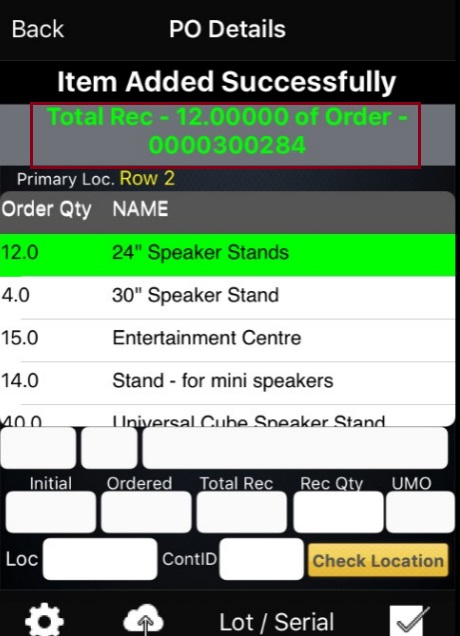
Next step is to enter the quantity of the item

Optional: Enter the CONT ID/ SKID ID of the item

CONT ID/SKID ID is another feature of basis that will allow the application to group an item of the same kind for easy search and management. When using this feature make sure that CONT ID is enabled under general settings.
Then tap on the Check button  to confirm the data.
Once confirmed a notification will show once the transaction is successful
Just repeat the same process to all other items until all are scanned
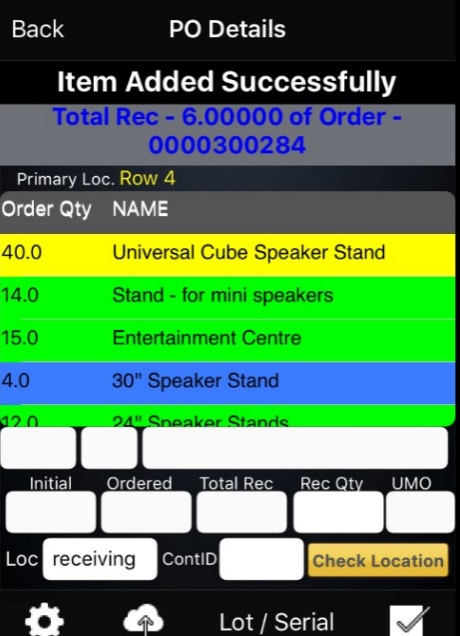
| GREEN | ordered item = scanned item |
|---|---|
| BLUE | ordered item < scanned item |
| YELLOW | ordered item > scanned item |
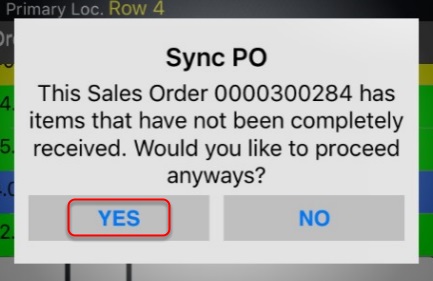
To send the data back to the cloud. tap on the cloud icon  and a notification will pop up to confirm if the upload is successful

REVIEWING SCANNED PO ITEM VIA PRISM JOOMLA WEBSITE
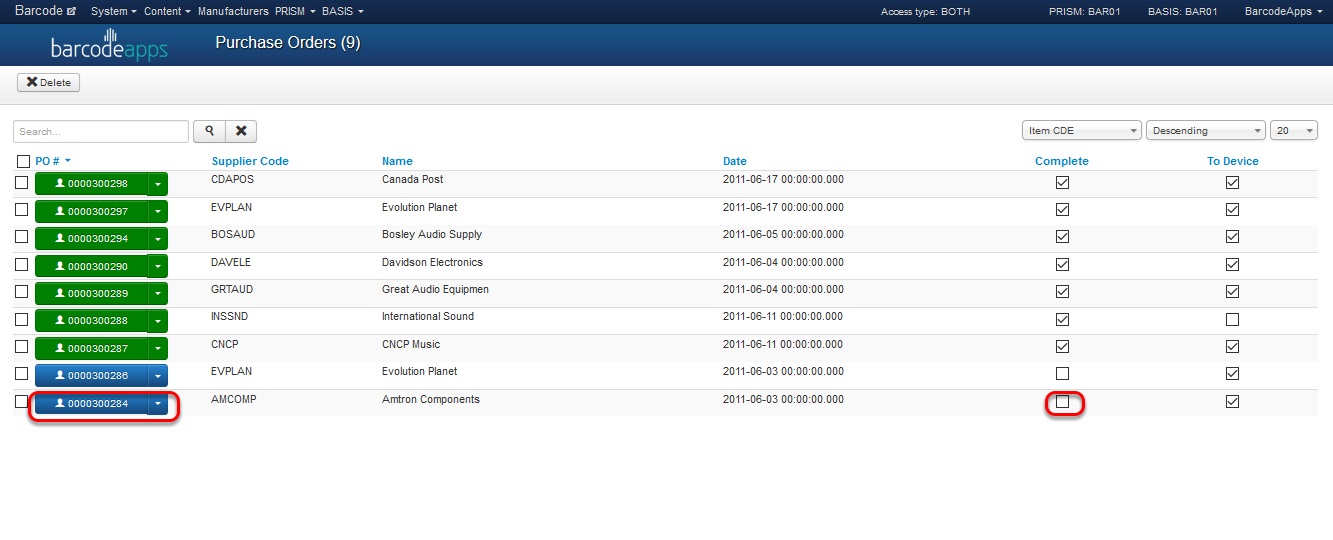
All orders sent to the cloud can be directly check on the Joomla Website. To do this login to the website, click on Basis and then Purchase Order. The PO will now be green which means that the order is now received or completed.
REVIEWING SCANNED PO ITEM VIA PRISM DESKTOP
To review scanned PO’S. click on the get data button to import the data from the cloud and then check the tick box “show only updated order” to filter all updated items.

Retrieved orders will be color coded base on their status, to help users identify the order more quickly.

| GREEN | Scanned Purchase Orders |
|---|---|
| YELLOW | On Hold Purchase Orders |
| NO HIGH LIGHT | Not Scanned |
to check the details just click on the order and the PO details will show on the bottom

Received quantity will also be color coded
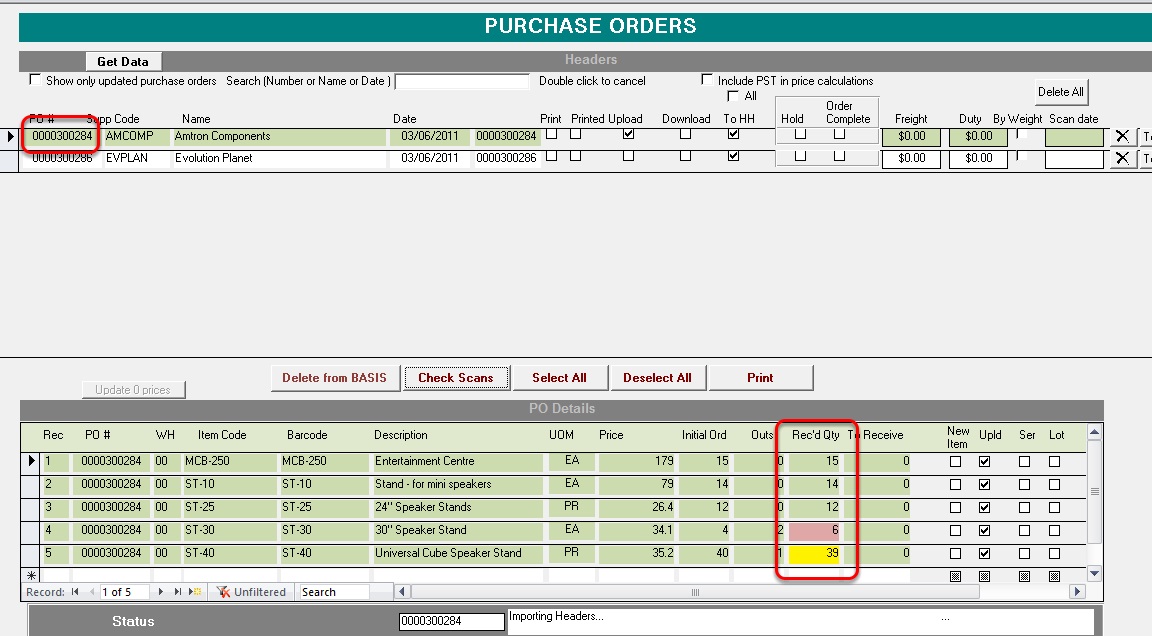
| GREEN | ordered item = scanned item |
|---|---|
| RED | ordered item < scanned item |
| YELLOW | ordered item > scanned item |
New items, Serialized and Lotted items will also be tagged to make identification more easier.

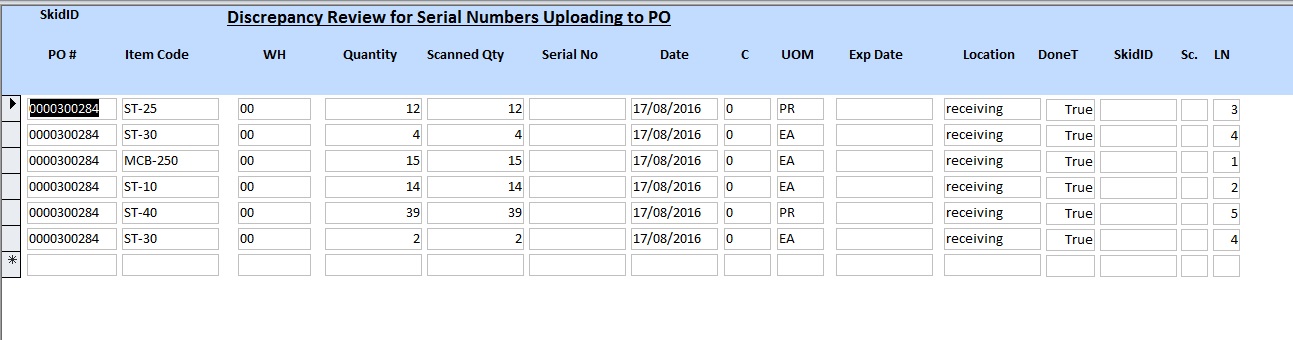
Another way to review scanned order is the check scans feature. To do this. Just select an order and then click on check scan.

This will show a more detailed result for each item scanned
Making Changes on the PO
Some changes on the Purchase Order may be needed to meet the targets
To make changes on the PO. Select the Purchase order and then under PO details window , click on the section that needs to be edited
Uploading the Data back to BVESS
Once all items are received the update can now be sent back to the accounting package. To send the data back to the accounting package click on the UPLOAD to BVE button.
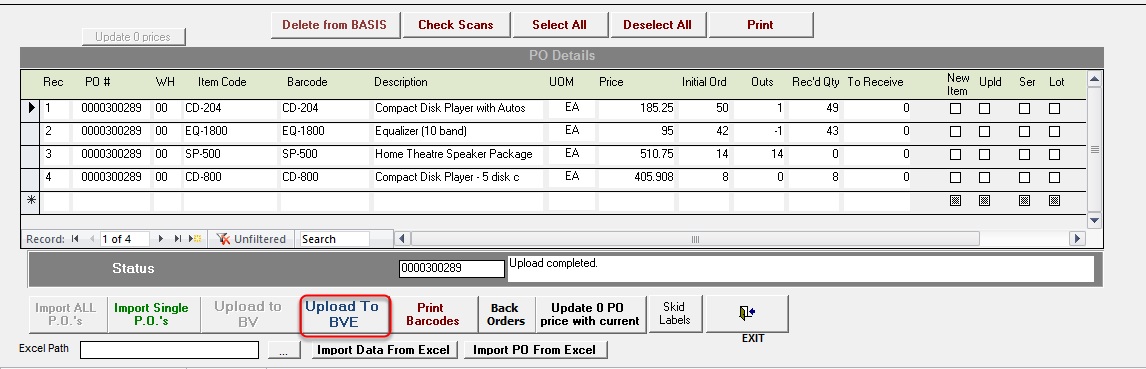
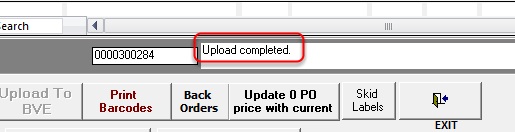
the upload completed status will show once the upload is finish
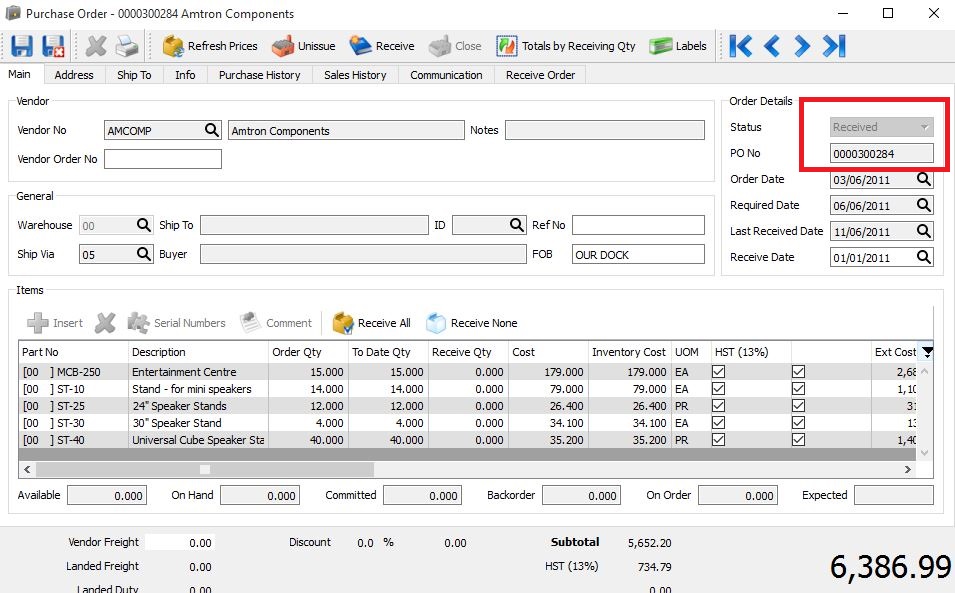
We can now go back to BVESS to check and receive the purchase order
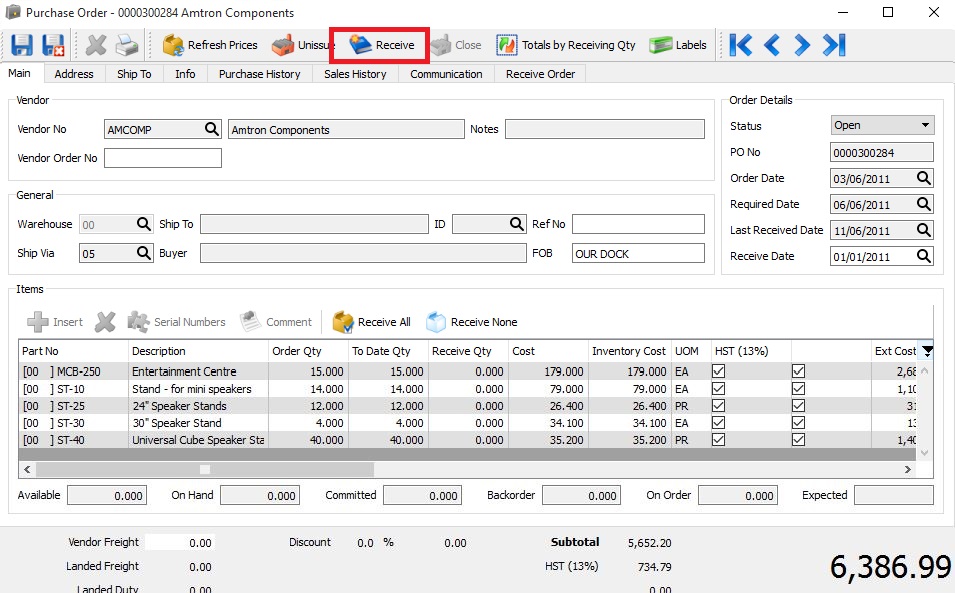
To do this open the purchase order and after validation that all is received. Just click on the receive button to complete the receiving of the PO.
BarcodeApps © 2016
Post your comment on this topic.