
Setting up the Eclipse Java IDE
This description assumes that you have already activated the ROB-EX Scheduler API Development Kit as described in the API Developers Kit requirements section
Download and install the latest Eclipse IDE for Java Developers from – select the package “Eclipse IDE for Java Developers”.
Unzip the downloaded zip-file to any location you choose, e.g. c:\program files\eclipse. It is important to unzip preserving the directory structure of the zip-file.
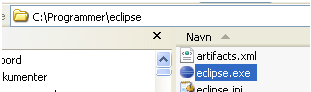
After extraction of the Eclipse zip-download create a shortcut to the eclipse.exe file located in the eclipse folder
Run Eclipse using the shortcut and accept the default suggested location of the workspace.
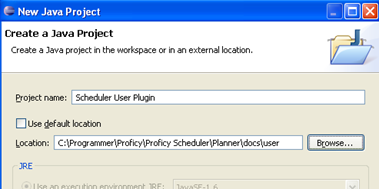
Select File->New->Java Project. As project name enter “Scheduler User Plugin” and remove the checkmark from “Use default location” and select the path to “docs\user” as shown below
Press “Next” followed by “Finish”. Press “Show Workbench” on the welcome screen.
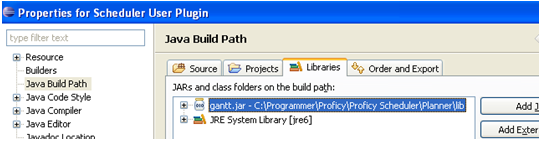
In the left side Package Explorer panel, right click on the top project node “Scheduler User Plugin” and select “Properties”. Select “Java Build Path->Libraries” and click the “Add External JARs…” and navigate to the lib\gantt.jar located in the Scheduler client install dir
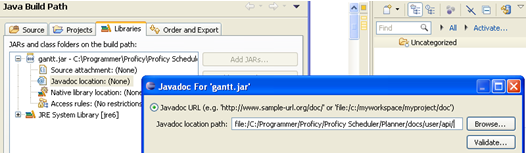
After adding gantt.jar specify where the API documentation for gantt.jar can be found – expand the gantt.jar node and click the Edit button for “Javadoc location” and navigate to the docs\user\api directory of the client installation.
Click OK twice to close the Properties window. Finally you need to setup the usage of the ant build environment from within Eclipse (this environment will build and copy the binary file user.jar to the correct location within the Scheduler client). To do that select
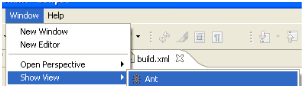
In the Ant window that now appears docked typically in the right side, click the button to add build files and navigate to
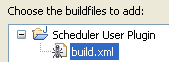 .
.
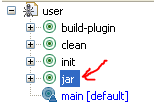
Expand the Ant tree and try double clicking on the jar target
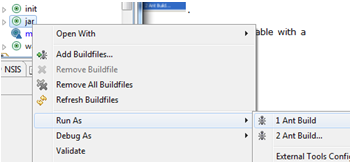
If you get an error like “Error running javac.exe compiler” you need to instruct Ant where to find the JDK compiler. Do this by right clicking the jar node and select “Ant Build…”.
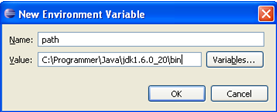
Next select the “Environment” tab and click “New…”. Add the path environment variable with a value pointing to the bin directory of your JDK installation, e.g.
Press “OK” and try double clicking again on the Ant jar target.
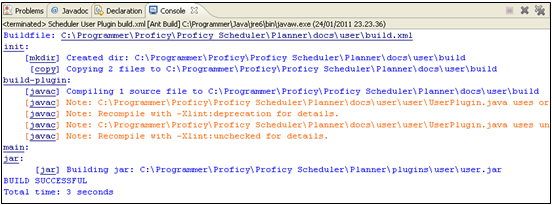
On successful build you will see something like this in the console output window
The full Eclipse IDE at this point will look something like this screen dump, with the example source file UserPlugin.jar open in the editor:

If you start your Scheduler client you should have the new menu option “Help->About User plugin” which will show the version number of the UserPlugin just build.
Post your comment on this topic.