
Most tables in ROB-EX will allow a user to individually add or remove columns according to the user’s own preferences. In this section, we will show how to add table columns, remove table columns and specify the field name.
Add table columns
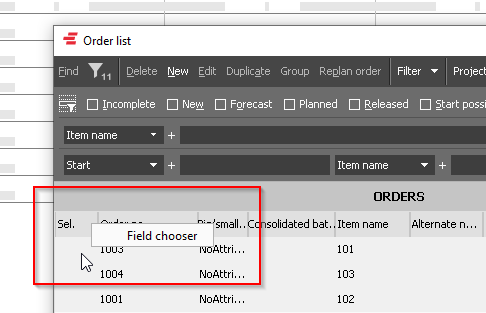
1. In order to add columns, right-click anywhere in the table header and select the “Field chooser” option.
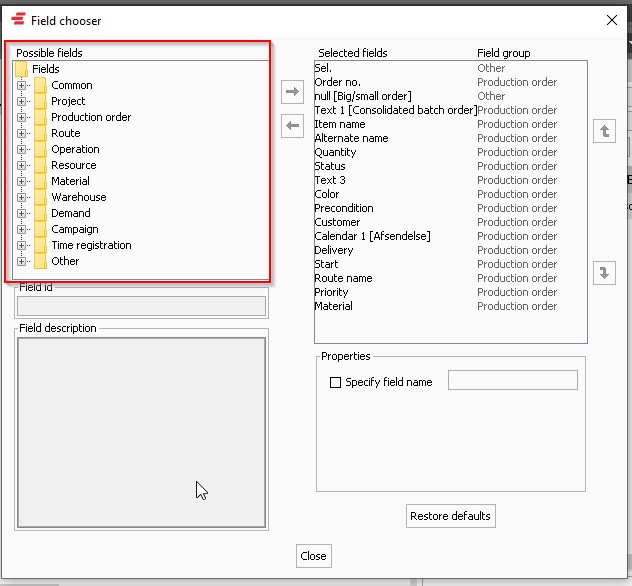
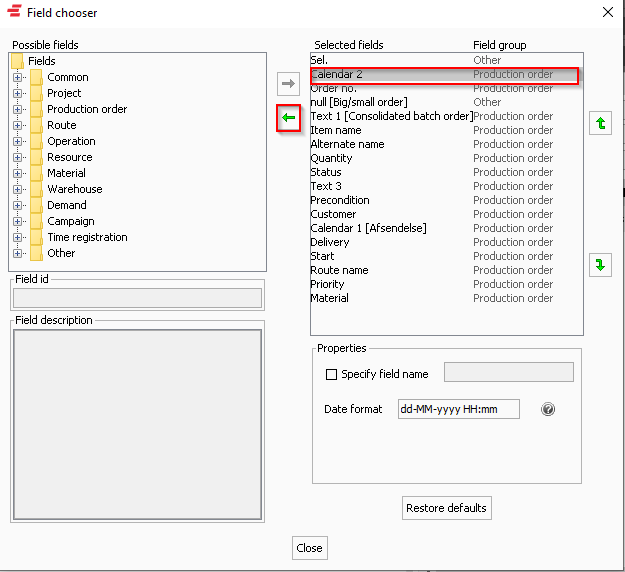
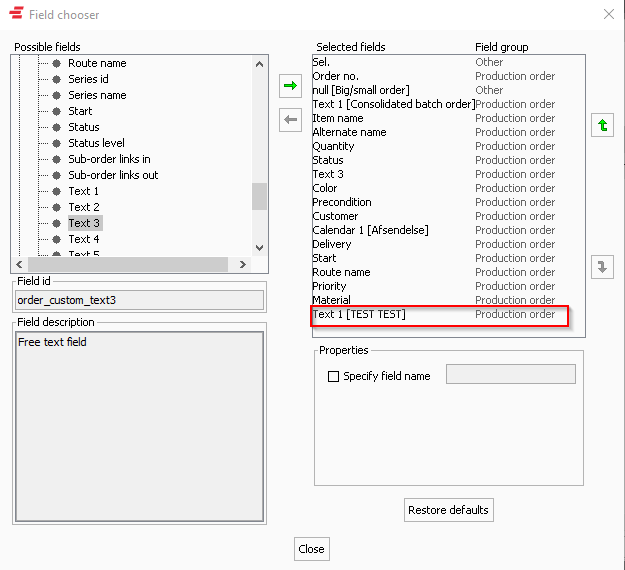
2. The field chooser has a tree structure, where the different tree folders indicate if the field belongs to the production order, the operation, etc. See the picture below where the tree structure is shown on the left side of the picture.
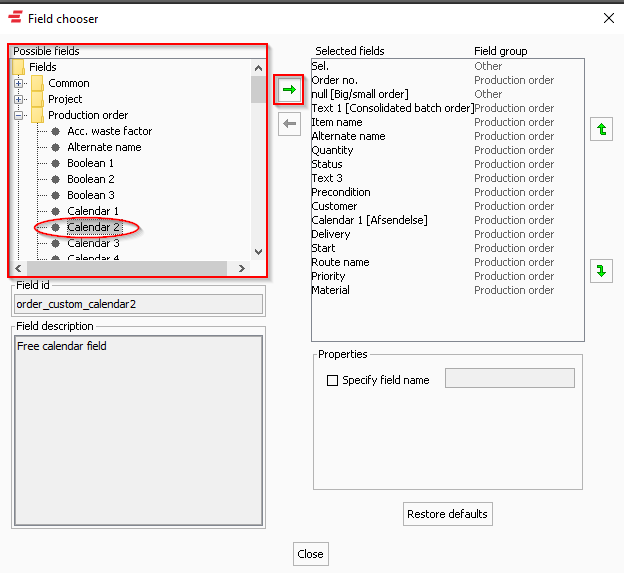
3. To add a column select a field, in the Possible fields. In the picture below Calendar 2 is chosen. To add the column Calendar 2, use the arrow.
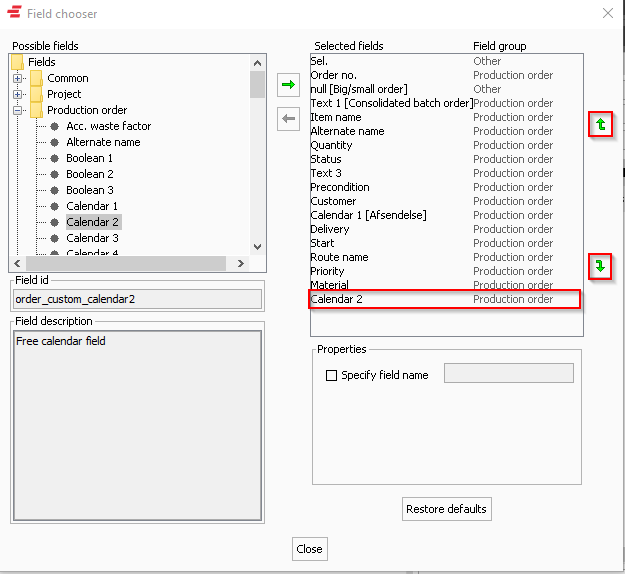
4. In the area Selected fields Calendar 2, is shown. To move the column up, use the arrow to the right.
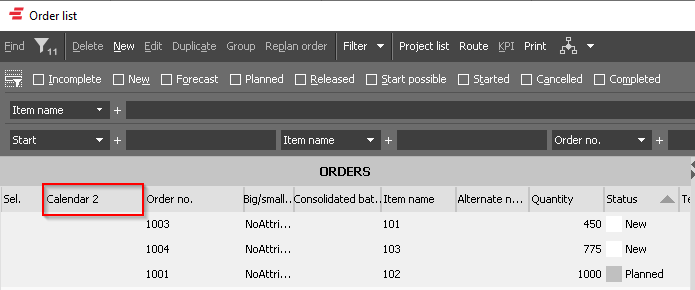
5. Close the Field chooser and see the new column in the table header. The mouse can be used to further change the position and width of the column. Any change made to a table is remembered after a restart of the client.
Remove table columns
1. To remove a column from a table, select the field in the right side table and click the “back” button.
2. Close the field chooser. Any change made to a table is remembered after a restart of the client.
Specify field name
It is possible to specify a table column, follow the steps below.
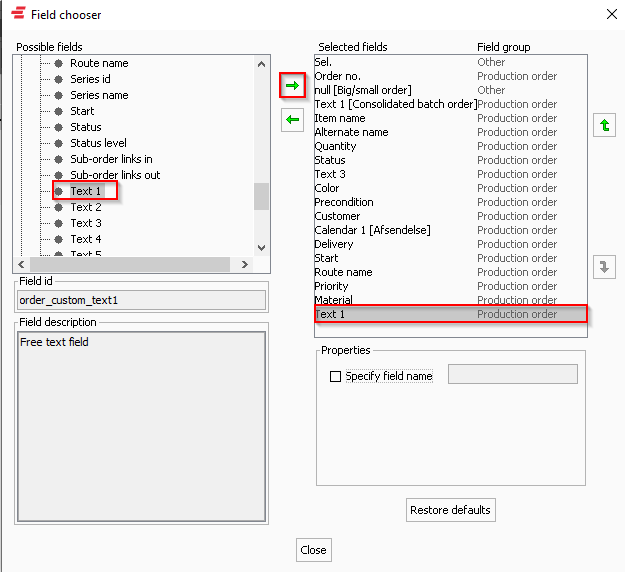
1. In the field chooser, select the field you want to specify and add it to the Selected fields.
2. Check the box Specify field name and add the name for the field.
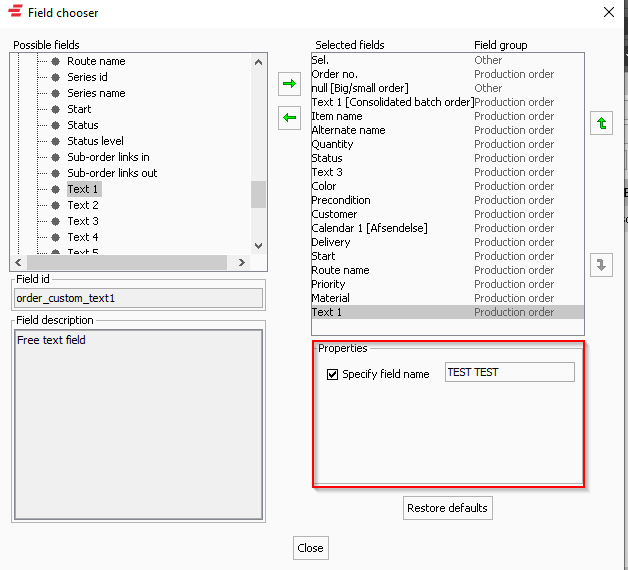
3. The text is now showing in the line after the field name. To move the column up, use the arrow to the right.
4. Close the field chooser. Any change made to a table is remembered after a restart of the client.
Post your comment on this topic.