(Located on the left-hand side of the document display window in Image Inquiry.)
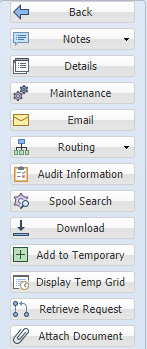
The available options will depend upon the type of document being viewed and the established security.
 |
The Spool Search button is only available when displaying spool files. |
 |
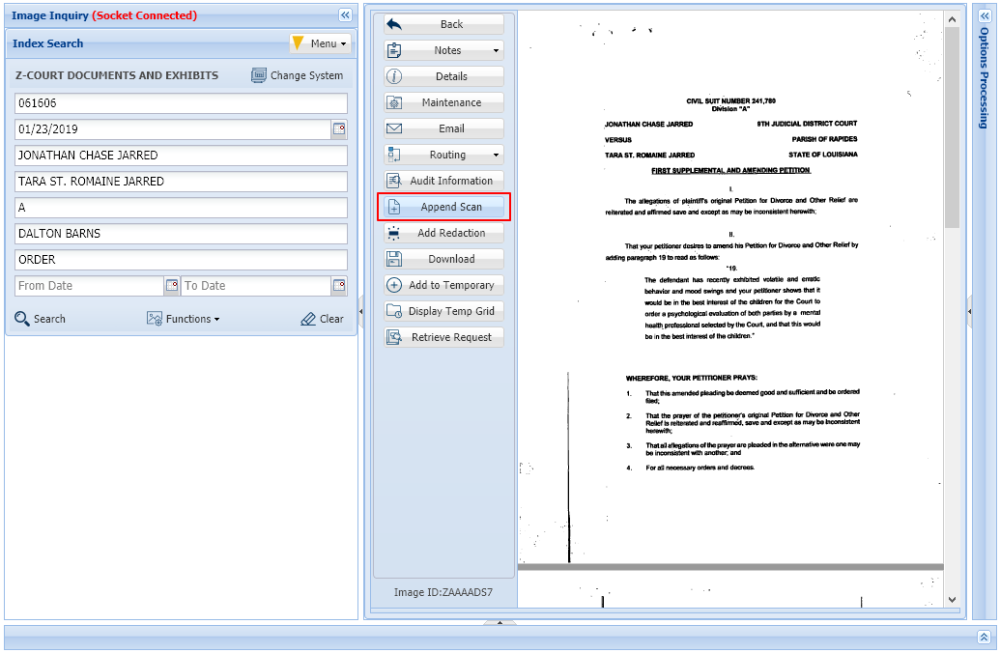
The Append Scan button is only available when displaying scanned images. The Stapling and Linking buttons will only appear when the document in the window has been stapled or linked to other documents. |
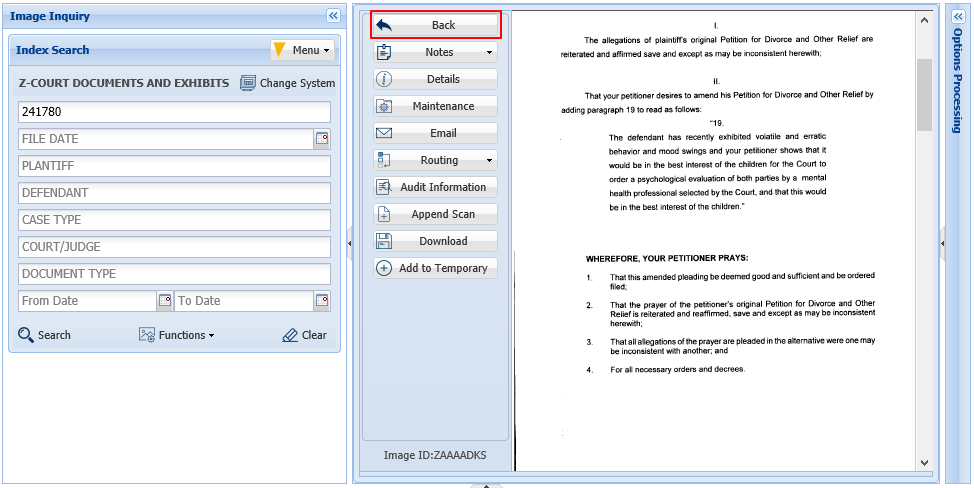
Back: Returns to the search results of the last image inquiry. You can change your search or choose to view another item from the current list.
 |
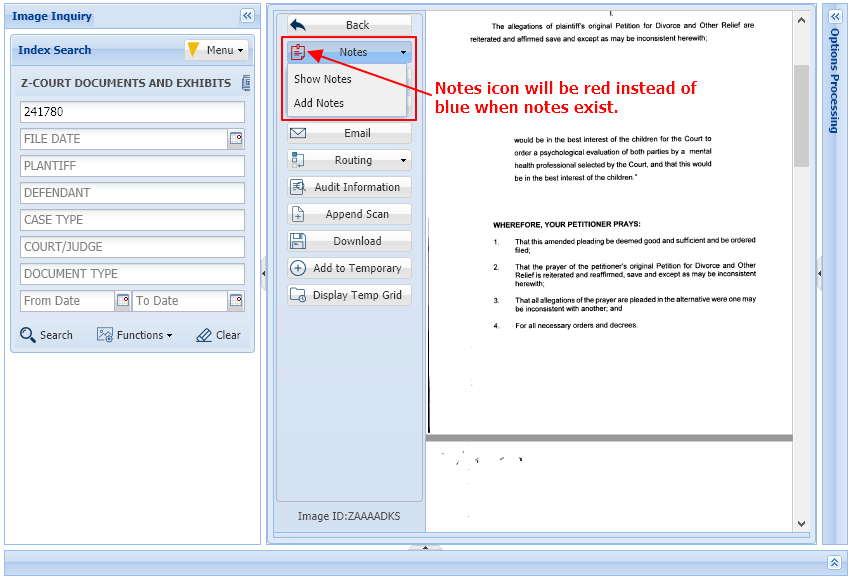
Notes: Add notes or view existing notes for the document being displayed. When notes exist, the Notes drop down icon will be red. (Show Notes will only appear if the document already has notes.)
 |
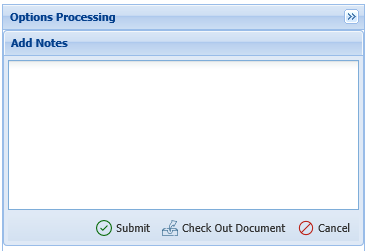 |
When adding notes, the record can be ‘checked out’ to ensure no conflicts occur between multiple users attempting to add notes to the same document.

Once the note is complete, select 
Once a Note is Added:
- The option to Show Notes will be available.
- When notes exist, the system will display ‘N’ next to the record.
Details: Shows the details (filename, path, page count, create date) of the document being displayed.
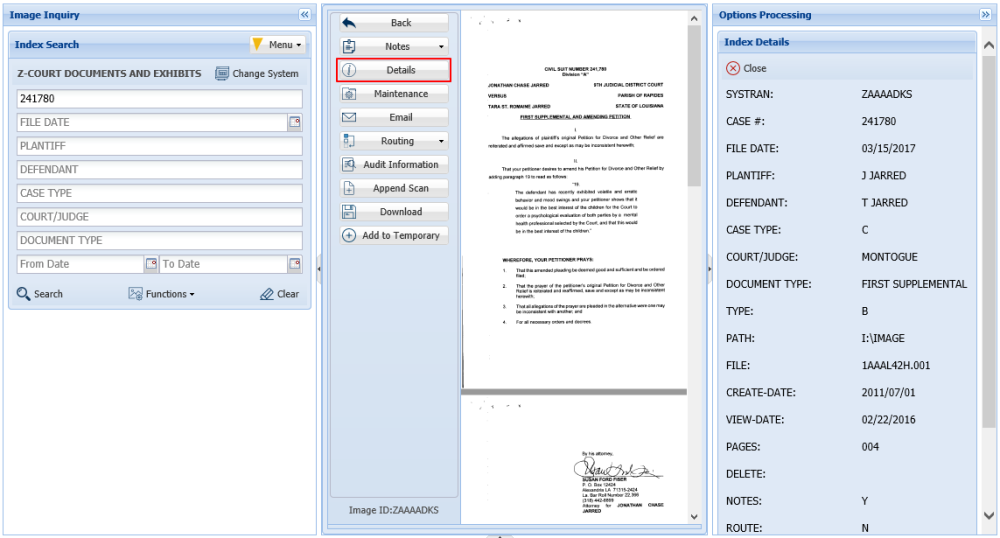 |
This information is helpful for troubleshooting. Use this information to identify the filename and location of the file when reporting problems to RVI Support.
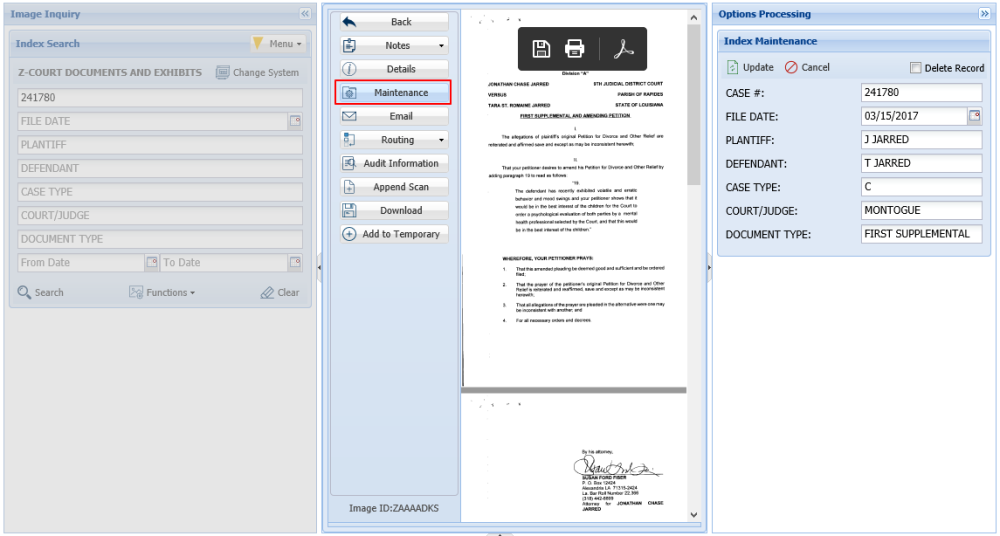
Maintenance: Allows the updating of index values and the deletion of the record.
 |
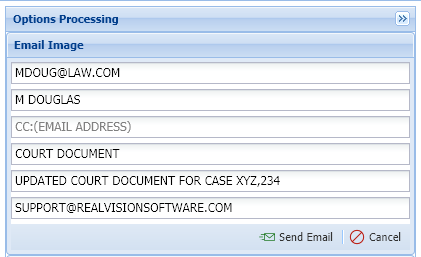
Email: Provides an email dialog box with the image automatically attached. An email contact list will appear with those email addresses that have been setup on the server.
 |
Fax: Fax the document being viewed. Customer must have a fax adapter installed. Contact Real Vision Software support for details on faxing requirements when using One Look.
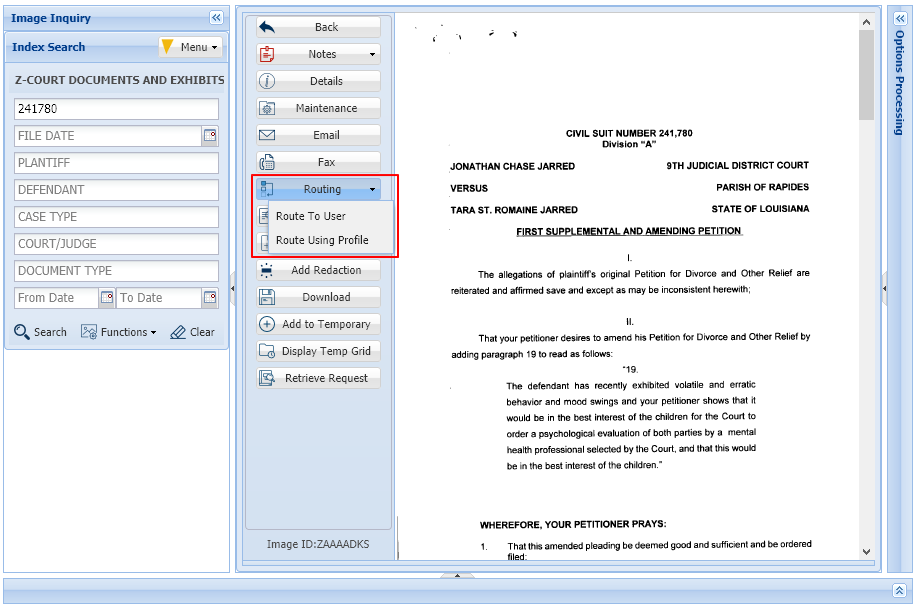
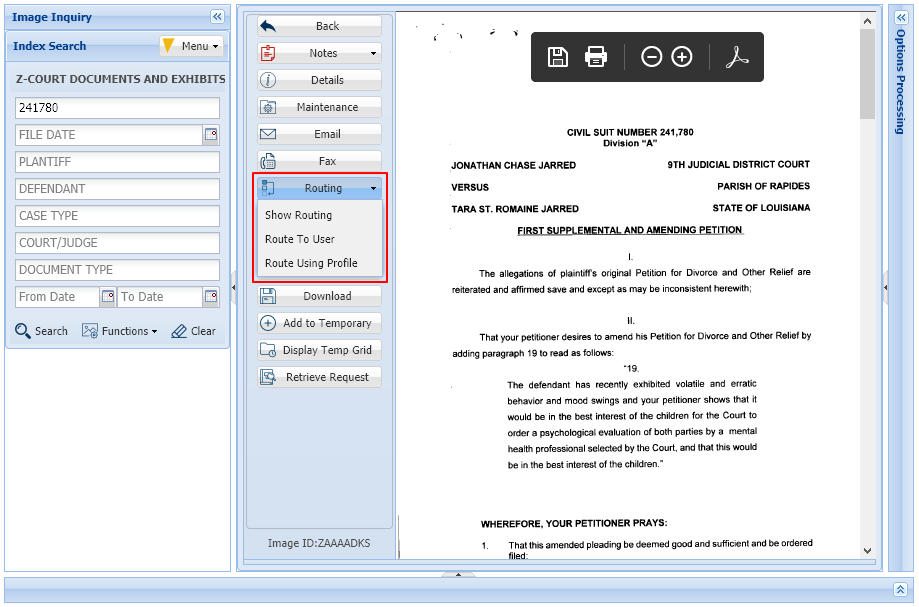
Routing: Sends the document to another user/profile based on the routes setup on the IBM i server. (The routing profile is setup by your system administrator.)
 |
Once a document is Routed:
- The system will display ‘R’ next to the record.
After the document is routed, the option Show Routing will appear under the Routing drop down list.
 |
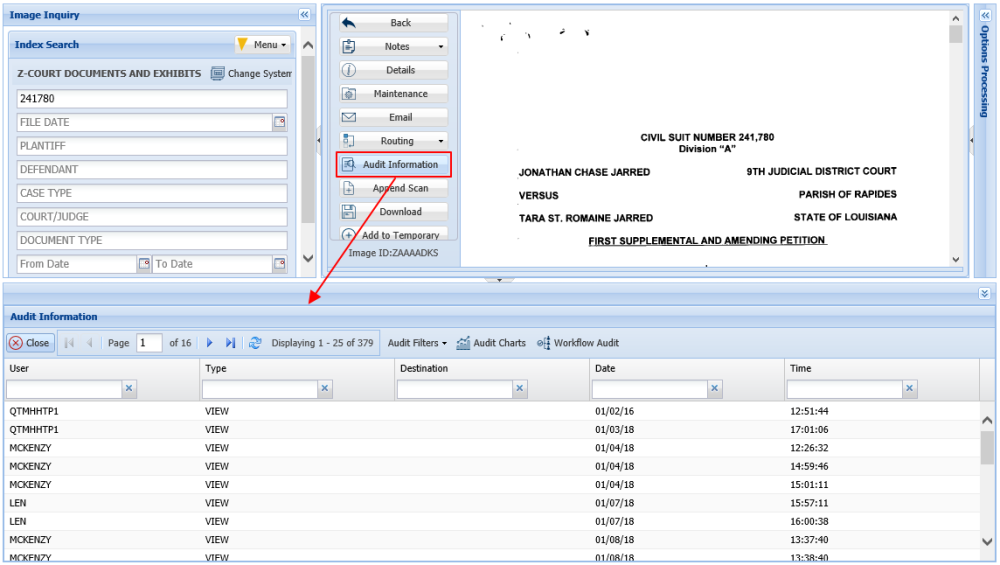
Audit Information: Provides the ability to view all activity for the document being viewed.
Available filters: View, Print, Email, Change, Route, Fax, CD, Signature
 |
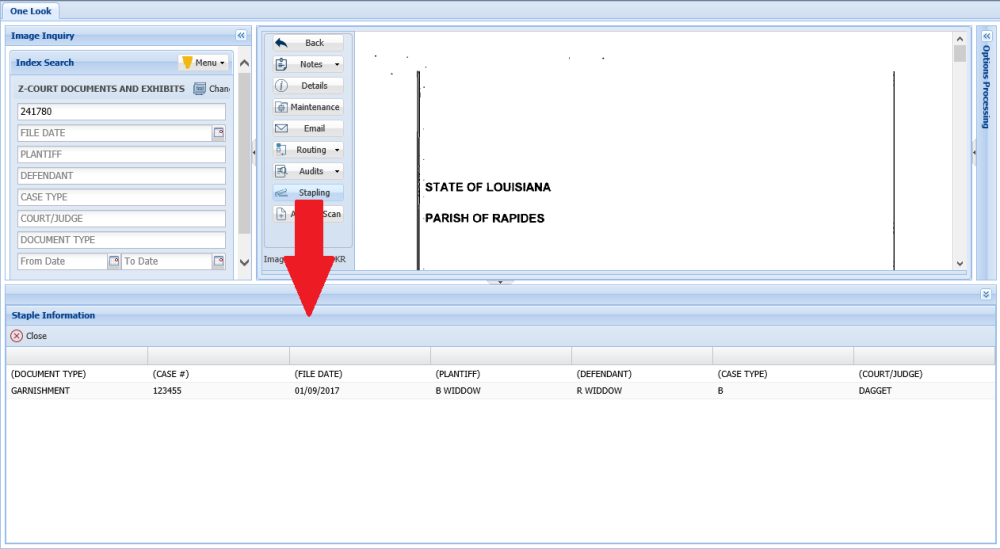
Stapling: Allows for the automatic grouping of images into a bundle. The bundling process occurs at scan-upload time or during batch-indexing. This option displays a list of the images that are stapled to the primary document. (The staple profile is setup by your system administrator.)
If the primary document is stapled to another image:
- The system will display ‘S’ next to the record.
- The button
will be available.
- Click the Stapling button to see a list of the documents that are stapled to the primary document. Double click the record to view the stapled documents.
 |
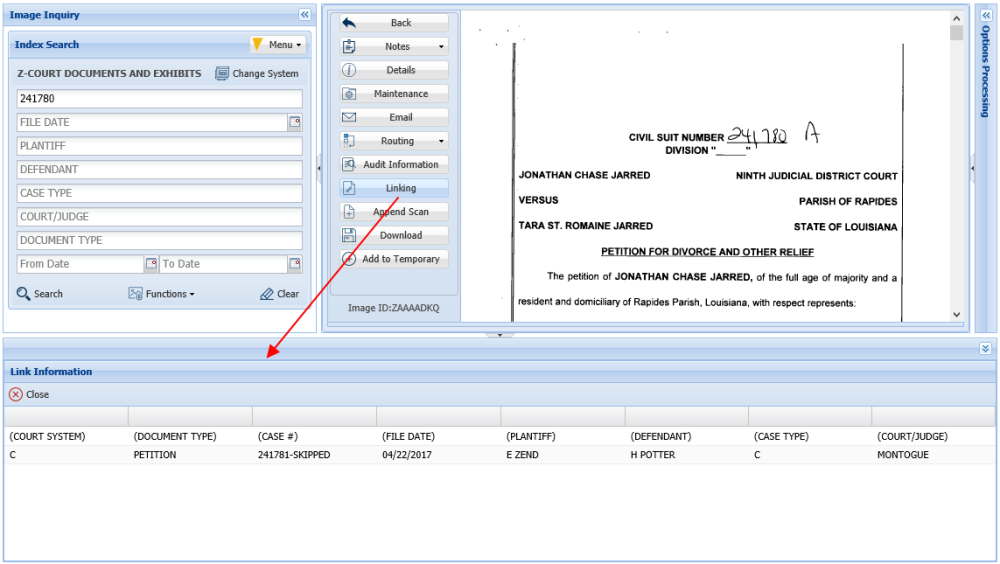
Linking: Provides the ability to establish a primary document with a link to other documents in different RVI imaging systems. This option assumes that if the user has security to the HR system that they also have security setup for the employee payroll system. (The linking profile is setup by your system administrator.)
For example, the primary document in HR could have a link to a document in the employee payroll system.
If the document’s indexes satisfy a linking rule that is setup for this image system:
- The system will display L next to the record.
After displaying the image:
- The
button will be available.
- Click the Linking button to see a list of the documents (if any) that are linked to the primary document. Double click the record to view the linked documents.
 |
Append Scan: Adds pages to the end of an existing image. The scan process is automatically initiated when the Append button is selected.
 |
Add Redaction: Redact an area of an image using an opaque highlighter.
Display an image then select Add Redaction.
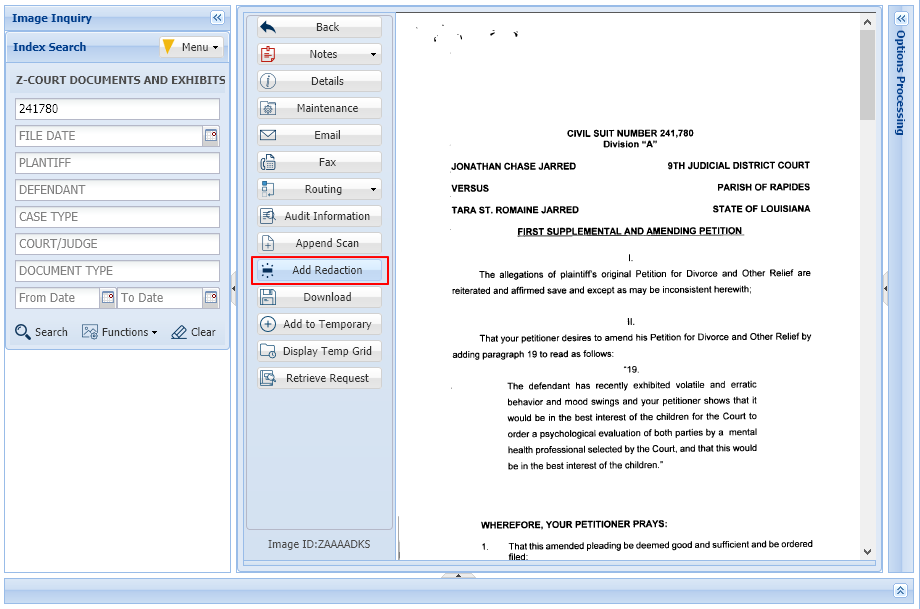
Once the image is displayed in the RVI PC Viewer, select the Redaction button then draw the redaction(s) onto the image. When complete, Accept or Do Not Accept the changes. The image will automatically be uploaded.

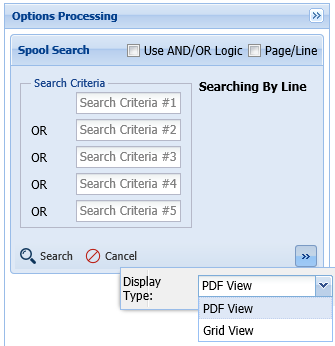
Spool Search: Allows for searching a spool file report based on multiple search criteria. This option will only be active when viewing a spool report (Image Type = T).
 |
The results of the search can be displayed in PDF or Grid format.
 |
Download: Ability to save a PDF copy of the document. Users will be prompted to Open, Save, Save As, Save and Open, or Cancel.
Add To Temporary: From image inquiry, temporarily store then view documents from any authorized system. The temporary storage folder is accessed through the Display Temp Grid button or Display Options, Display Temporary Grid in the upper right corner of the One Look Image Inquiry window or click 
(The temporary grid is cleared automatically when the user logs off.)

Display Temp Grid: Display a listing of files stored from any authorized system in the temporary folder.

Retrieve Request: Manual information retrieval through a CUSTOM INTERFACE with the IBMi green screen used for One Look functions (View, Scan, Import, Upload) when polling or sockets is not used. Using the IBMi green screen, the user will navigate to and execute the CUSTOM function then press the Retrieve Request button from One Look to complete the request.
For example, the user takes the V-to-view option from the IBMi green screen to view a document then presses the Retrieve Request button from One Look to complete the request and display the document inside of the One Look frame.
Retrieve Request is typically used by customers experiencing performance issues, customers that do not want to run sockets, or customers not running DataQue code for polling.
Attach Document: Choose a file(s) to attach to the existing document on display. Once a file is attached, it will be stapled to the original document and displayed automatically when the original is viewed. The user can maintain the stapled documents by clicking the Stapling button 

Sign Document: Apply a signature or finger print to a document. Customer must have a signature pad installed. Contact Real Vision Software support for requirements.
Extract Pages: Select the desired PDF page range to be viewed.





 will be available.
 button will be available.
Post your comment on this topic.