
In the Execute the Action Items form, users can request an extension on the deadline for the action item.
If selected, the Extension checkbox will display the following:

To send an extension request, first click on the ![]() button next to Request Extension. This will open a new form in a pop-up window.
button next to Request Extension. This will open a new form in a pop-up window.
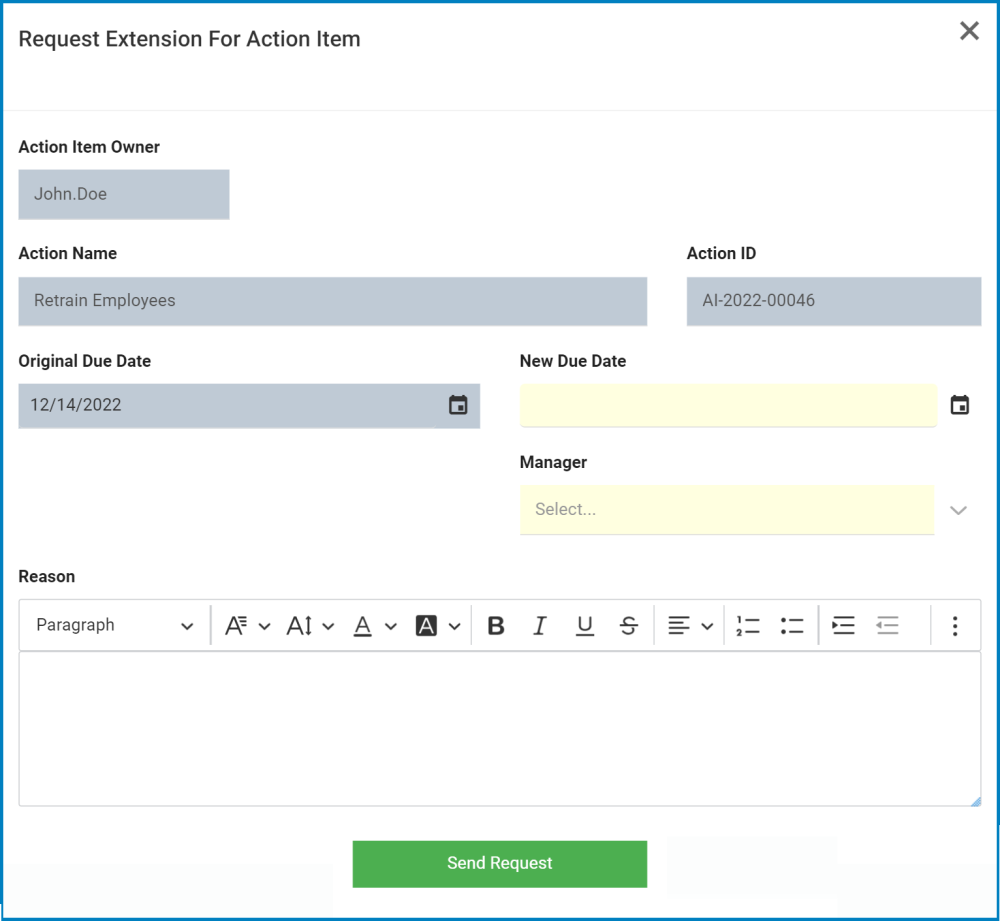
- Action Item Owner/ Action Name/Action ID/Original Due Date: These fields are all automatically populated based on the information in the Add Action Item to Quality Event form.
- New Due Date: This is a date picker that allows users to input/select the new due date for the action item.
- Manager: This is a single-select dropdown field that retrieves the list of users. The user selected will be assigned as the manager to which the extension request will be sent.
- Reason: This is a rich text field that allows users to input the reason for the extension request.
- For more details on this field, click here.
- Send Request: This button allows users to send the request to their manager.
- Once selected, the following message will appear:
![]()
- To close the window, click on the Exit (X) button in the top-right corner.
- To apply changes, click on the Apply button at the bottom of the Execute the Action Items form.
- Once selected, the following message will appear:

Once the Request Extension for Action Item form has been sent, the manager will receive a notification in their Pending Tasks informing them that they need to either approve or reject the request.

They will also receive an email with the details.
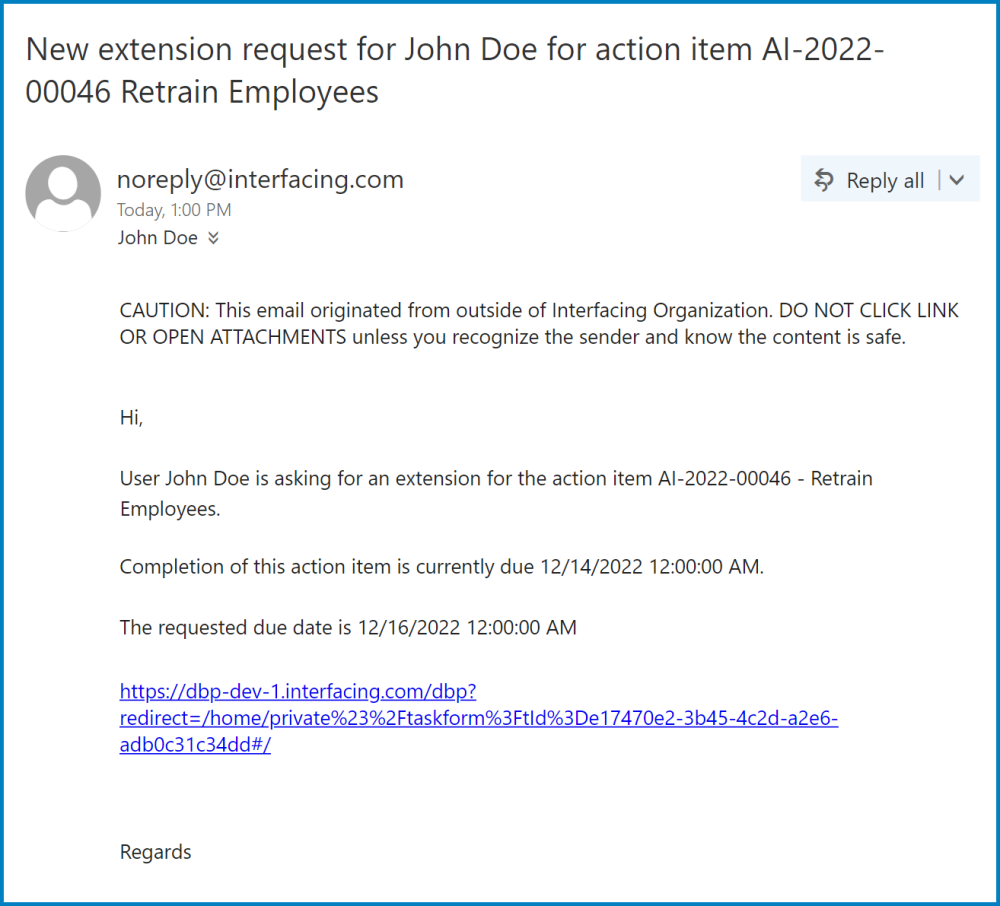
Clicking on either the subject in Pending Tasks or the link in the email should direct the manager to the Approve or Reject Extension Request form.
Post your comment on this topic.