
If the Edit button is selected in the Correct the Issue with Actions form, it will open a pop-up window with the Execute the Action Items form. This form can be divided into three main sections: (1) Action Details, (2) Action Type Details, and (3) Enter the Observations and/or Evidences.
1. Action Details
In this section of the form, users can make some modifications to the action details (as indicated below). Users can also download any attached files.
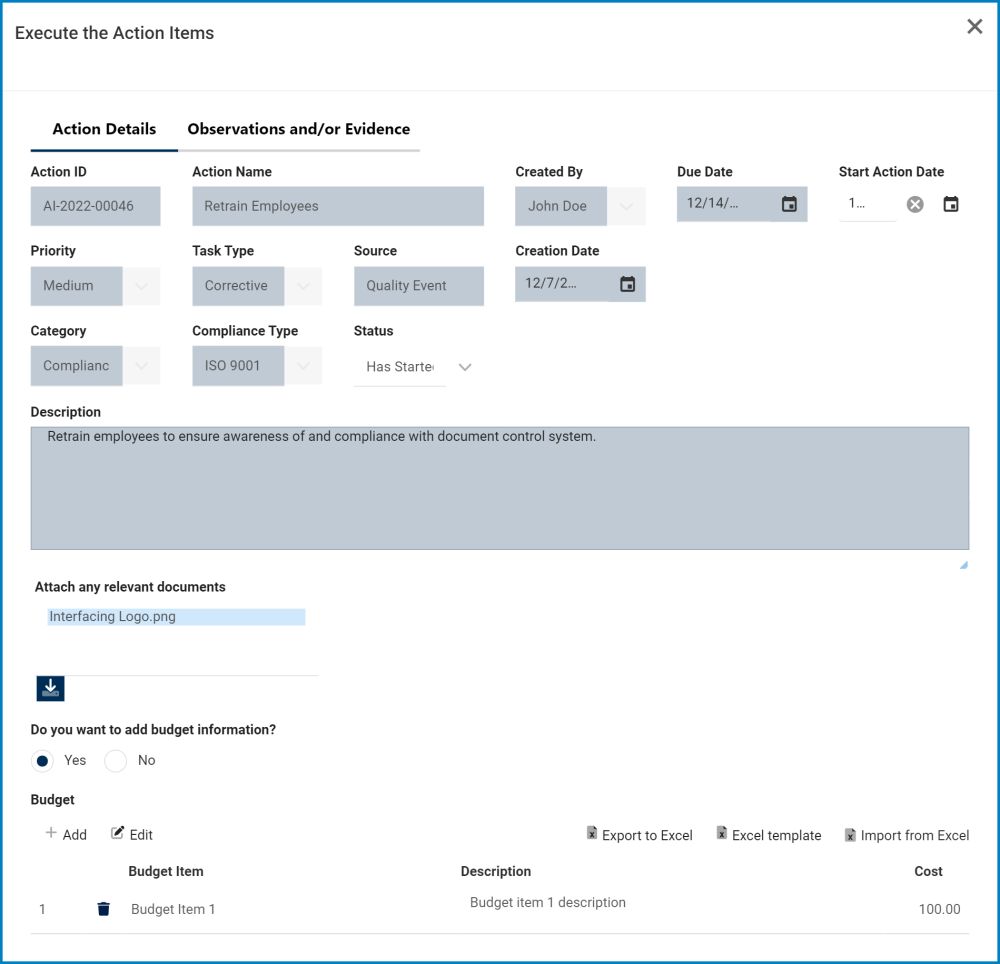
- Start Action Date: This is a date picker that allows users to input/select the start date for the action.
- Status: This is single-select dropdown that displays the list of statuses. It allows users to select the current status of the action item.
- Statuses: Not Started, Has Started, In Progress, Completed.
- Do you . . . budget information?: This is a radio button that allows users to select only one option from a set of mutually exclusive options. Users can choose whether or not they want to add budget information to the action item.
- If Yes is (or has previously been) selected, the Budget grid will be displayed in the form.
- Export/Template/Import: These buttons allow users to perform Excel-related activities.
- For more details on these functions, click here.
2. Action Type Details
Below the attachment field, the page display will vary depending on which internal action type was selected in the Add Action Item to Quality Event form.
3. Observations and/or Evidence
In this section of the form, users can provide observations and/or evidence relating to the action.
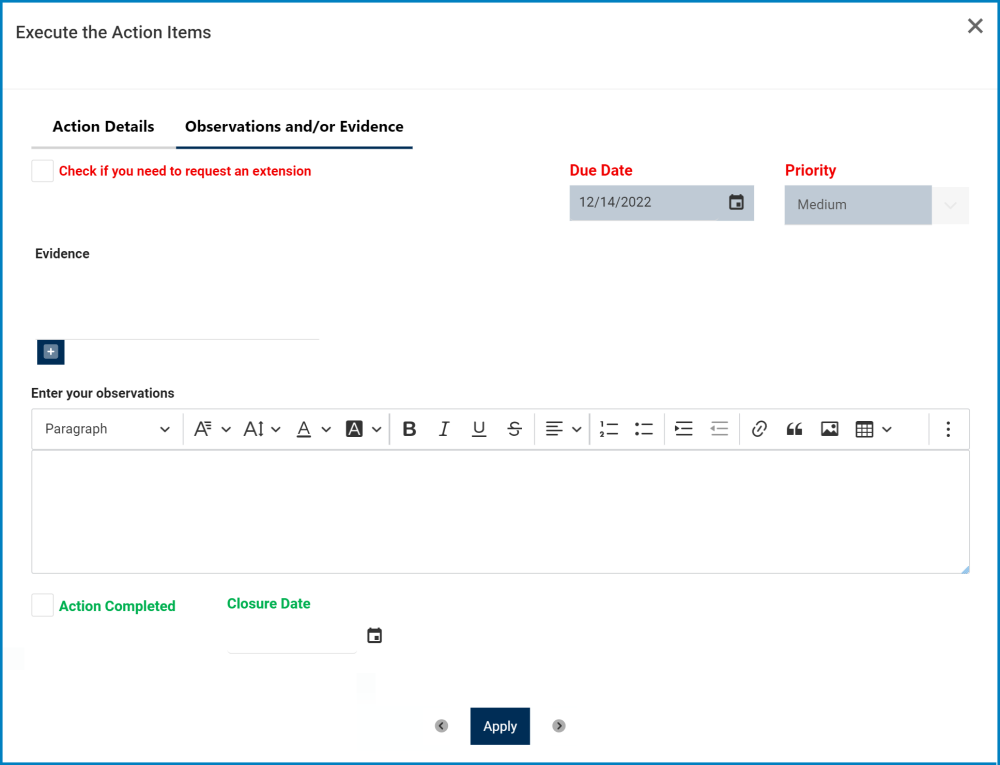
- Check . . . extension: This is a checkbox which, if enabled, allows users to send an extension request.
- For more details on this option, click here.
- Evidence: This is an attachment field that allows users to attach files as evidence.
- For more details on this field, click here.
- Enter your observations: This is a rich text field that allows users to input their observations.
- For more details on this field, click here.
- Action Completed: This is a checkbox which, if selected, allows users to mark the action item as completed.
- If selected, it will cause for the Closure Date field to become mandatory.
- It will also switch the Status to Completed.
- If selected, it will cause for the Closure Date field to become mandatory.
- Closure Date: This is a date picker that allows users to input/select the closure date for the action item.
- If the Action Completed checkbox is selected, the Closure Date will automatically input itself as today’s date. This entry, however, can be manually modified.
- Apply: This button allows users to save their changes.
- Users can navigate between action items by using the arrows on either side of the Apply button.
Post your comment on this topic.