
Once the evidence request has been sent, the assigned user will receive a notification in their Pending Tasks prompting them to attach the necessary documents.

They will also receive an email informing them of the assigned task.
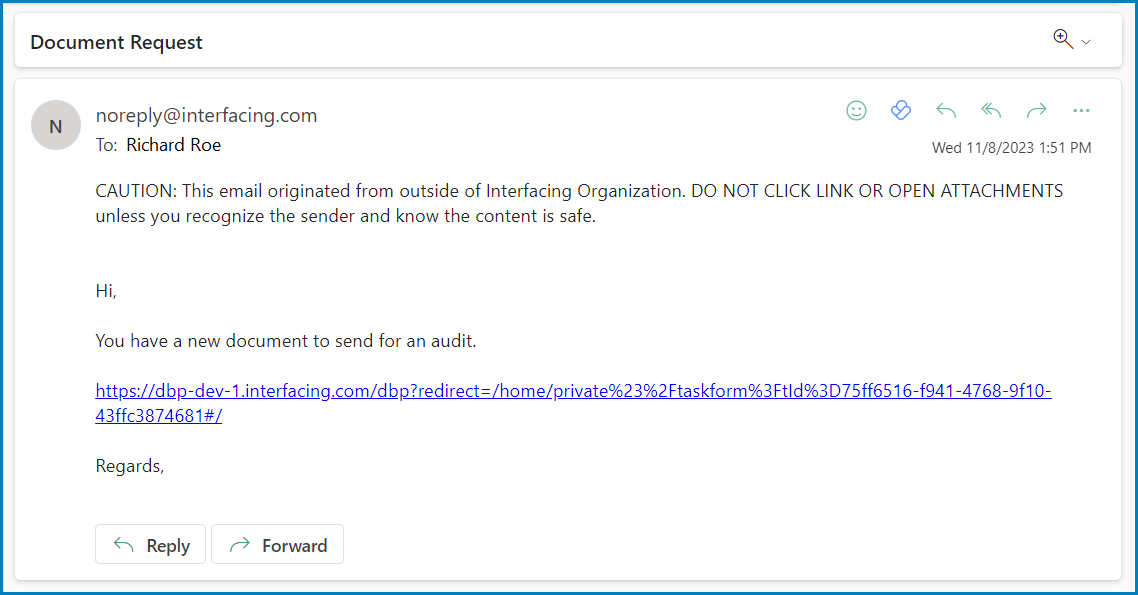
Clicking on either the subject in Pending Tasks or the link in the email will direct the user to the Attach Evidence form.
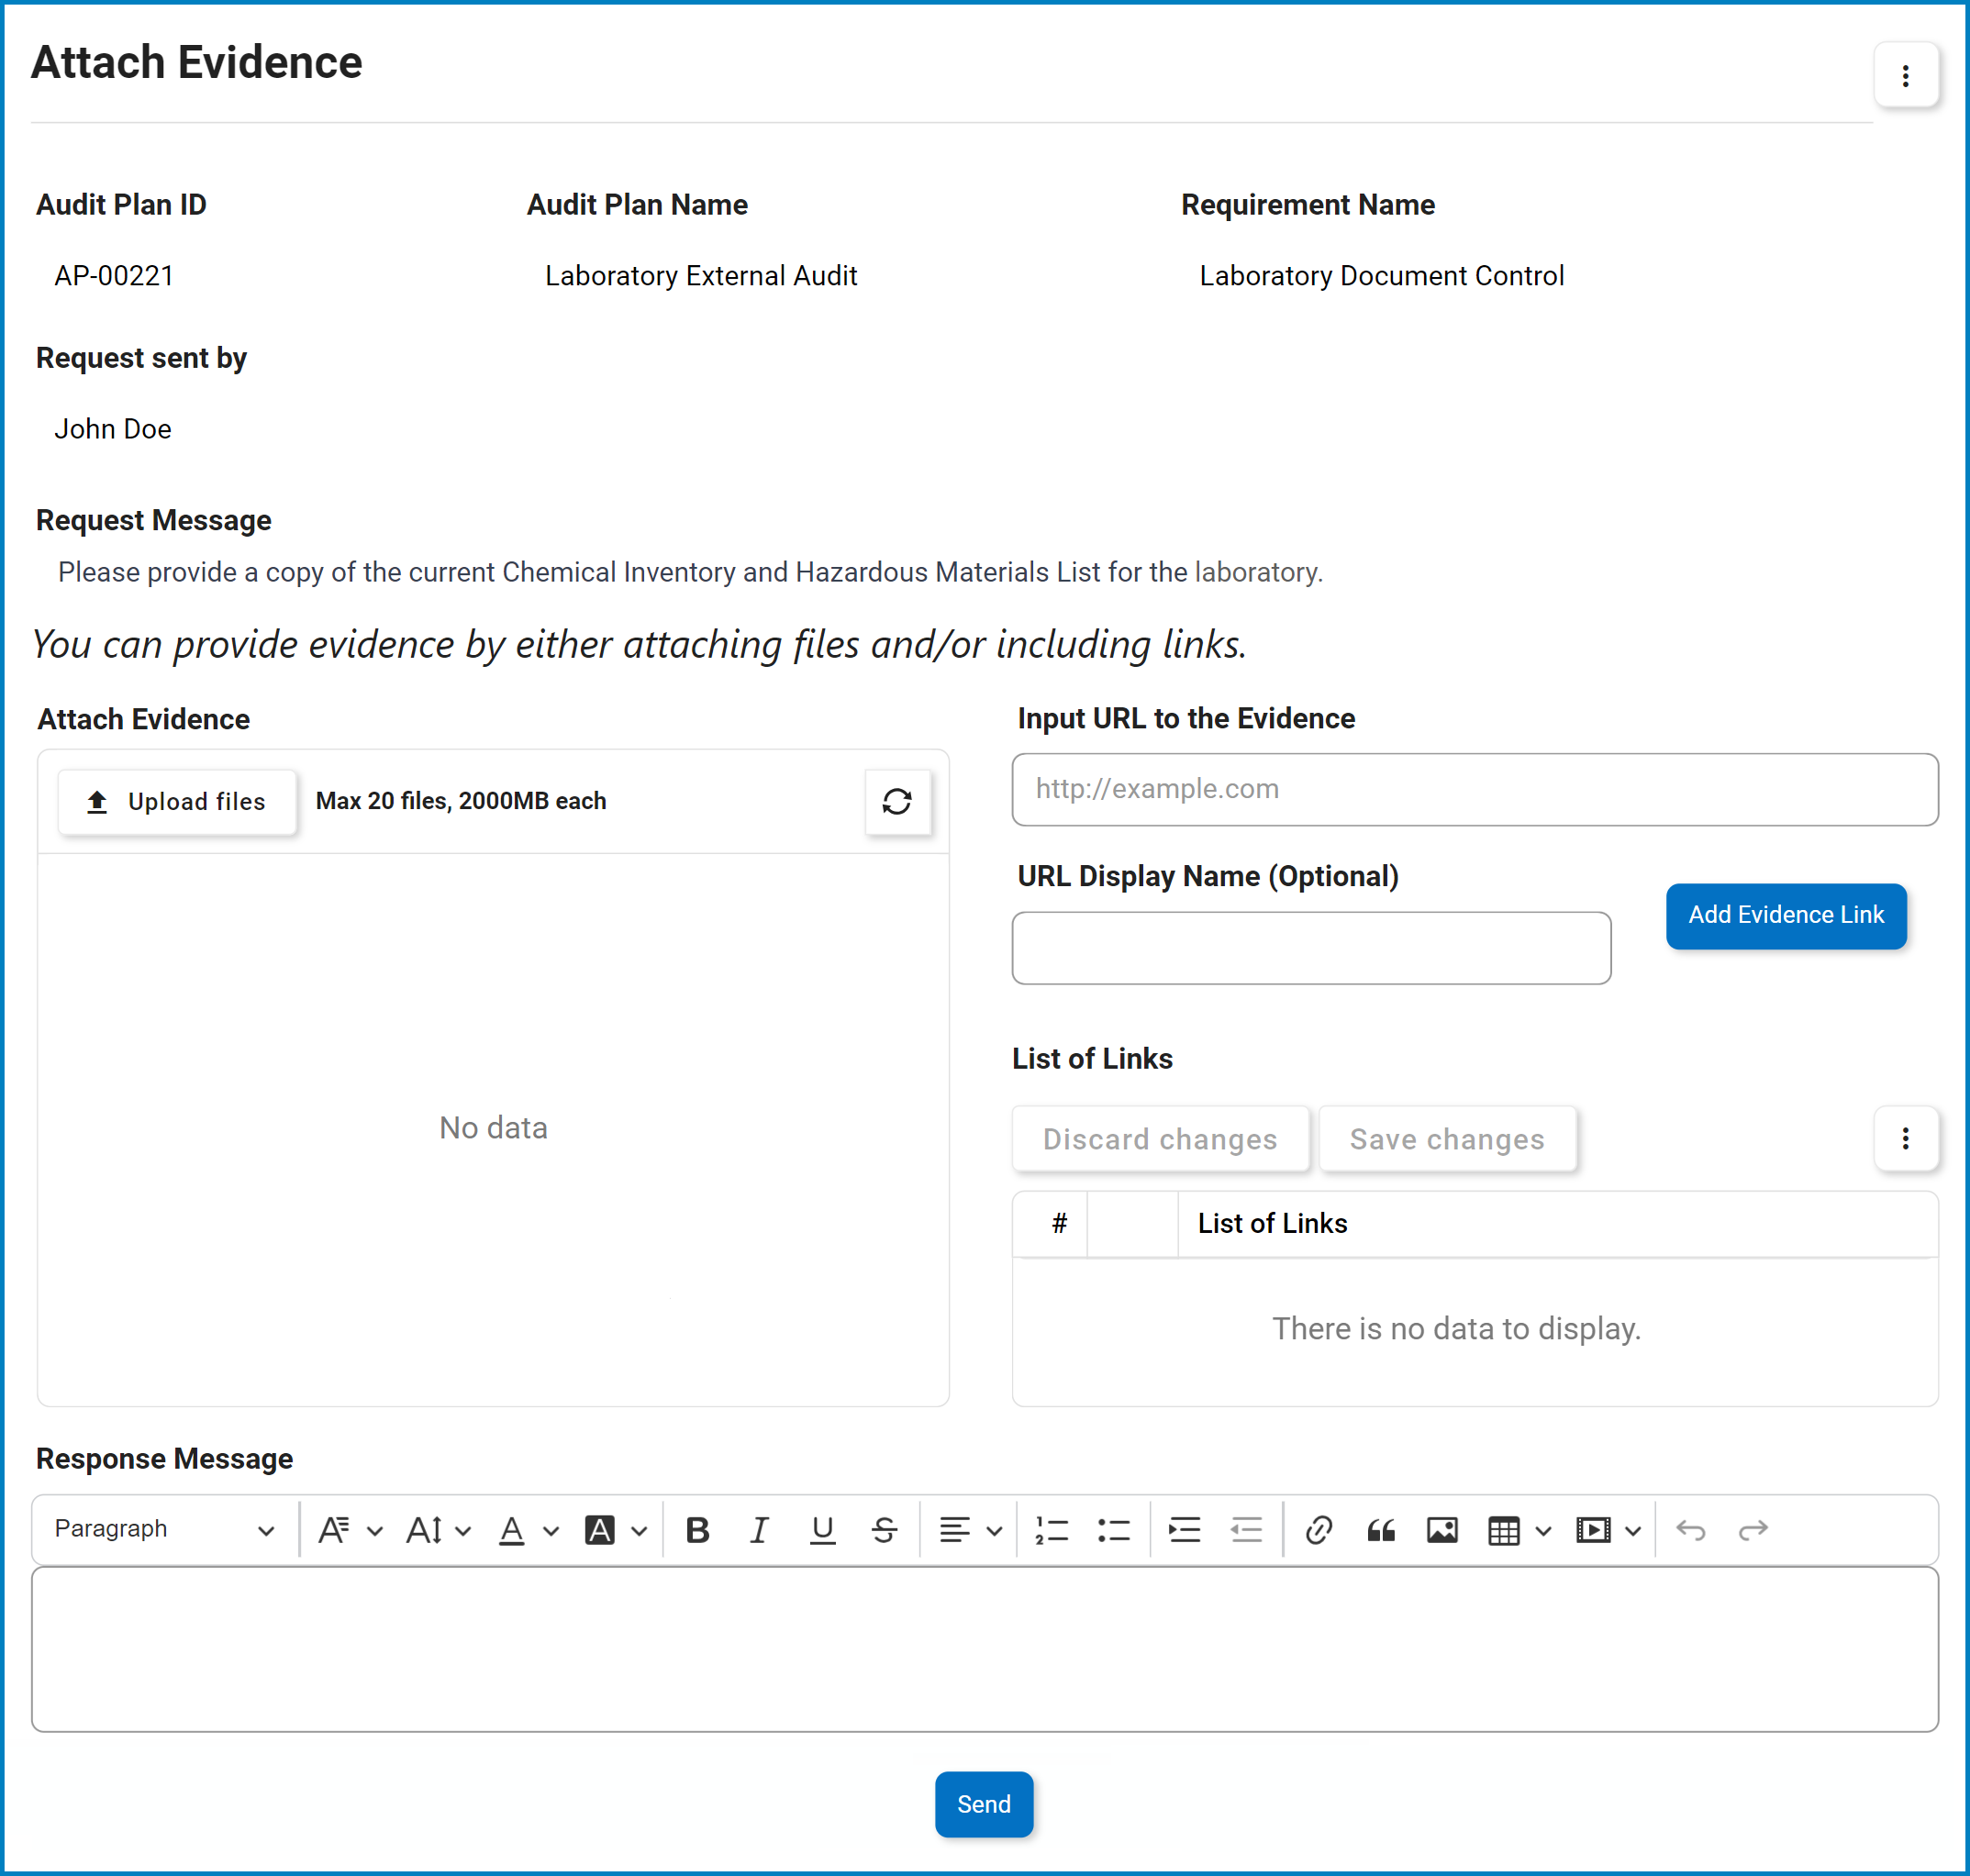
- Attach Evidence: This is an attachment field that allows users to upload the requested evidence.
![]()
- Input URL to the Evidence: This is a text field that allows users to input the URL for the requested evidence.
- The expected format for the URL is ‘http://example.com’.
- URL Display Name: This is a text field that allows users to specify a display name for the URL.
- Add Evidence Link: This button allows users to add the linked evidence.
- As links are added, they populate the below grid.
![]()
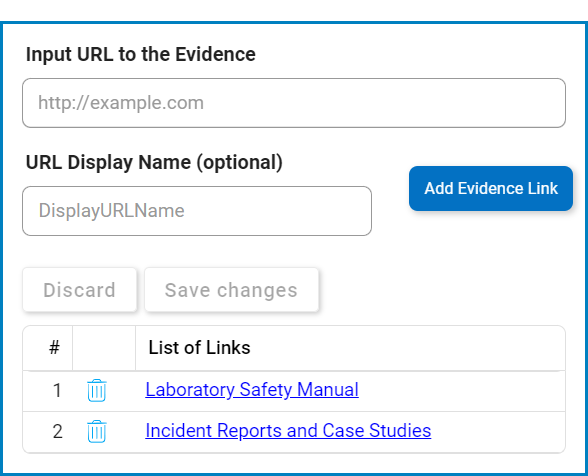
- To delete a link, select the corresponding Delete (
![]() ) icon.
) icon.
**To confirm the deletion of items in the grid, click on the Save Changes button or simply click outside the grid. To undo deletion, click on either the Discard Changes button or the Undo (
![]() ) icon.
) icon.
- To delete a link, select the corresponding Delete (
- As links are added, they populate the below grid.
- Response Message: This is a rich text field that allows users to provide their response to the evidence request.
- Send: This button allows users to send the requested evidence.
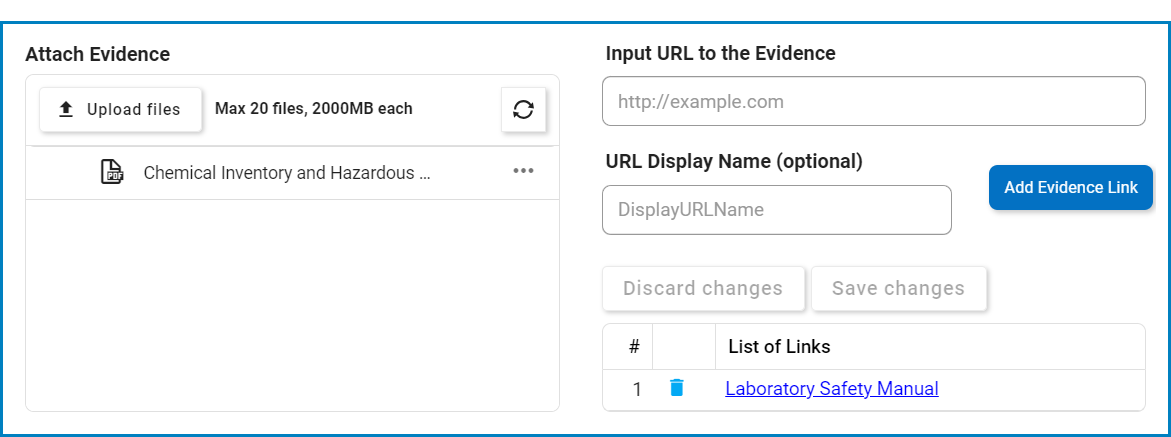
- Once sent, the requested evidence is integrated into the Validate Requirement form based on its type: files appear in the Attach Evidence field, while URLs are added to the List of Links grid.
![]()
- Furthermore, an overview of the evidence exchange is presented in the Evidence Summary grid.
![]()
- Once sent, the requested evidence is integrated into the Validate Requirement form based on its type: files appear in the Attach Evidence field, while URLs are added to the List of Links grid.


Post your comment on this topic.