
In the New Audit Plan form, users can create and customize the audit plan to align with their specific needs and preferences.
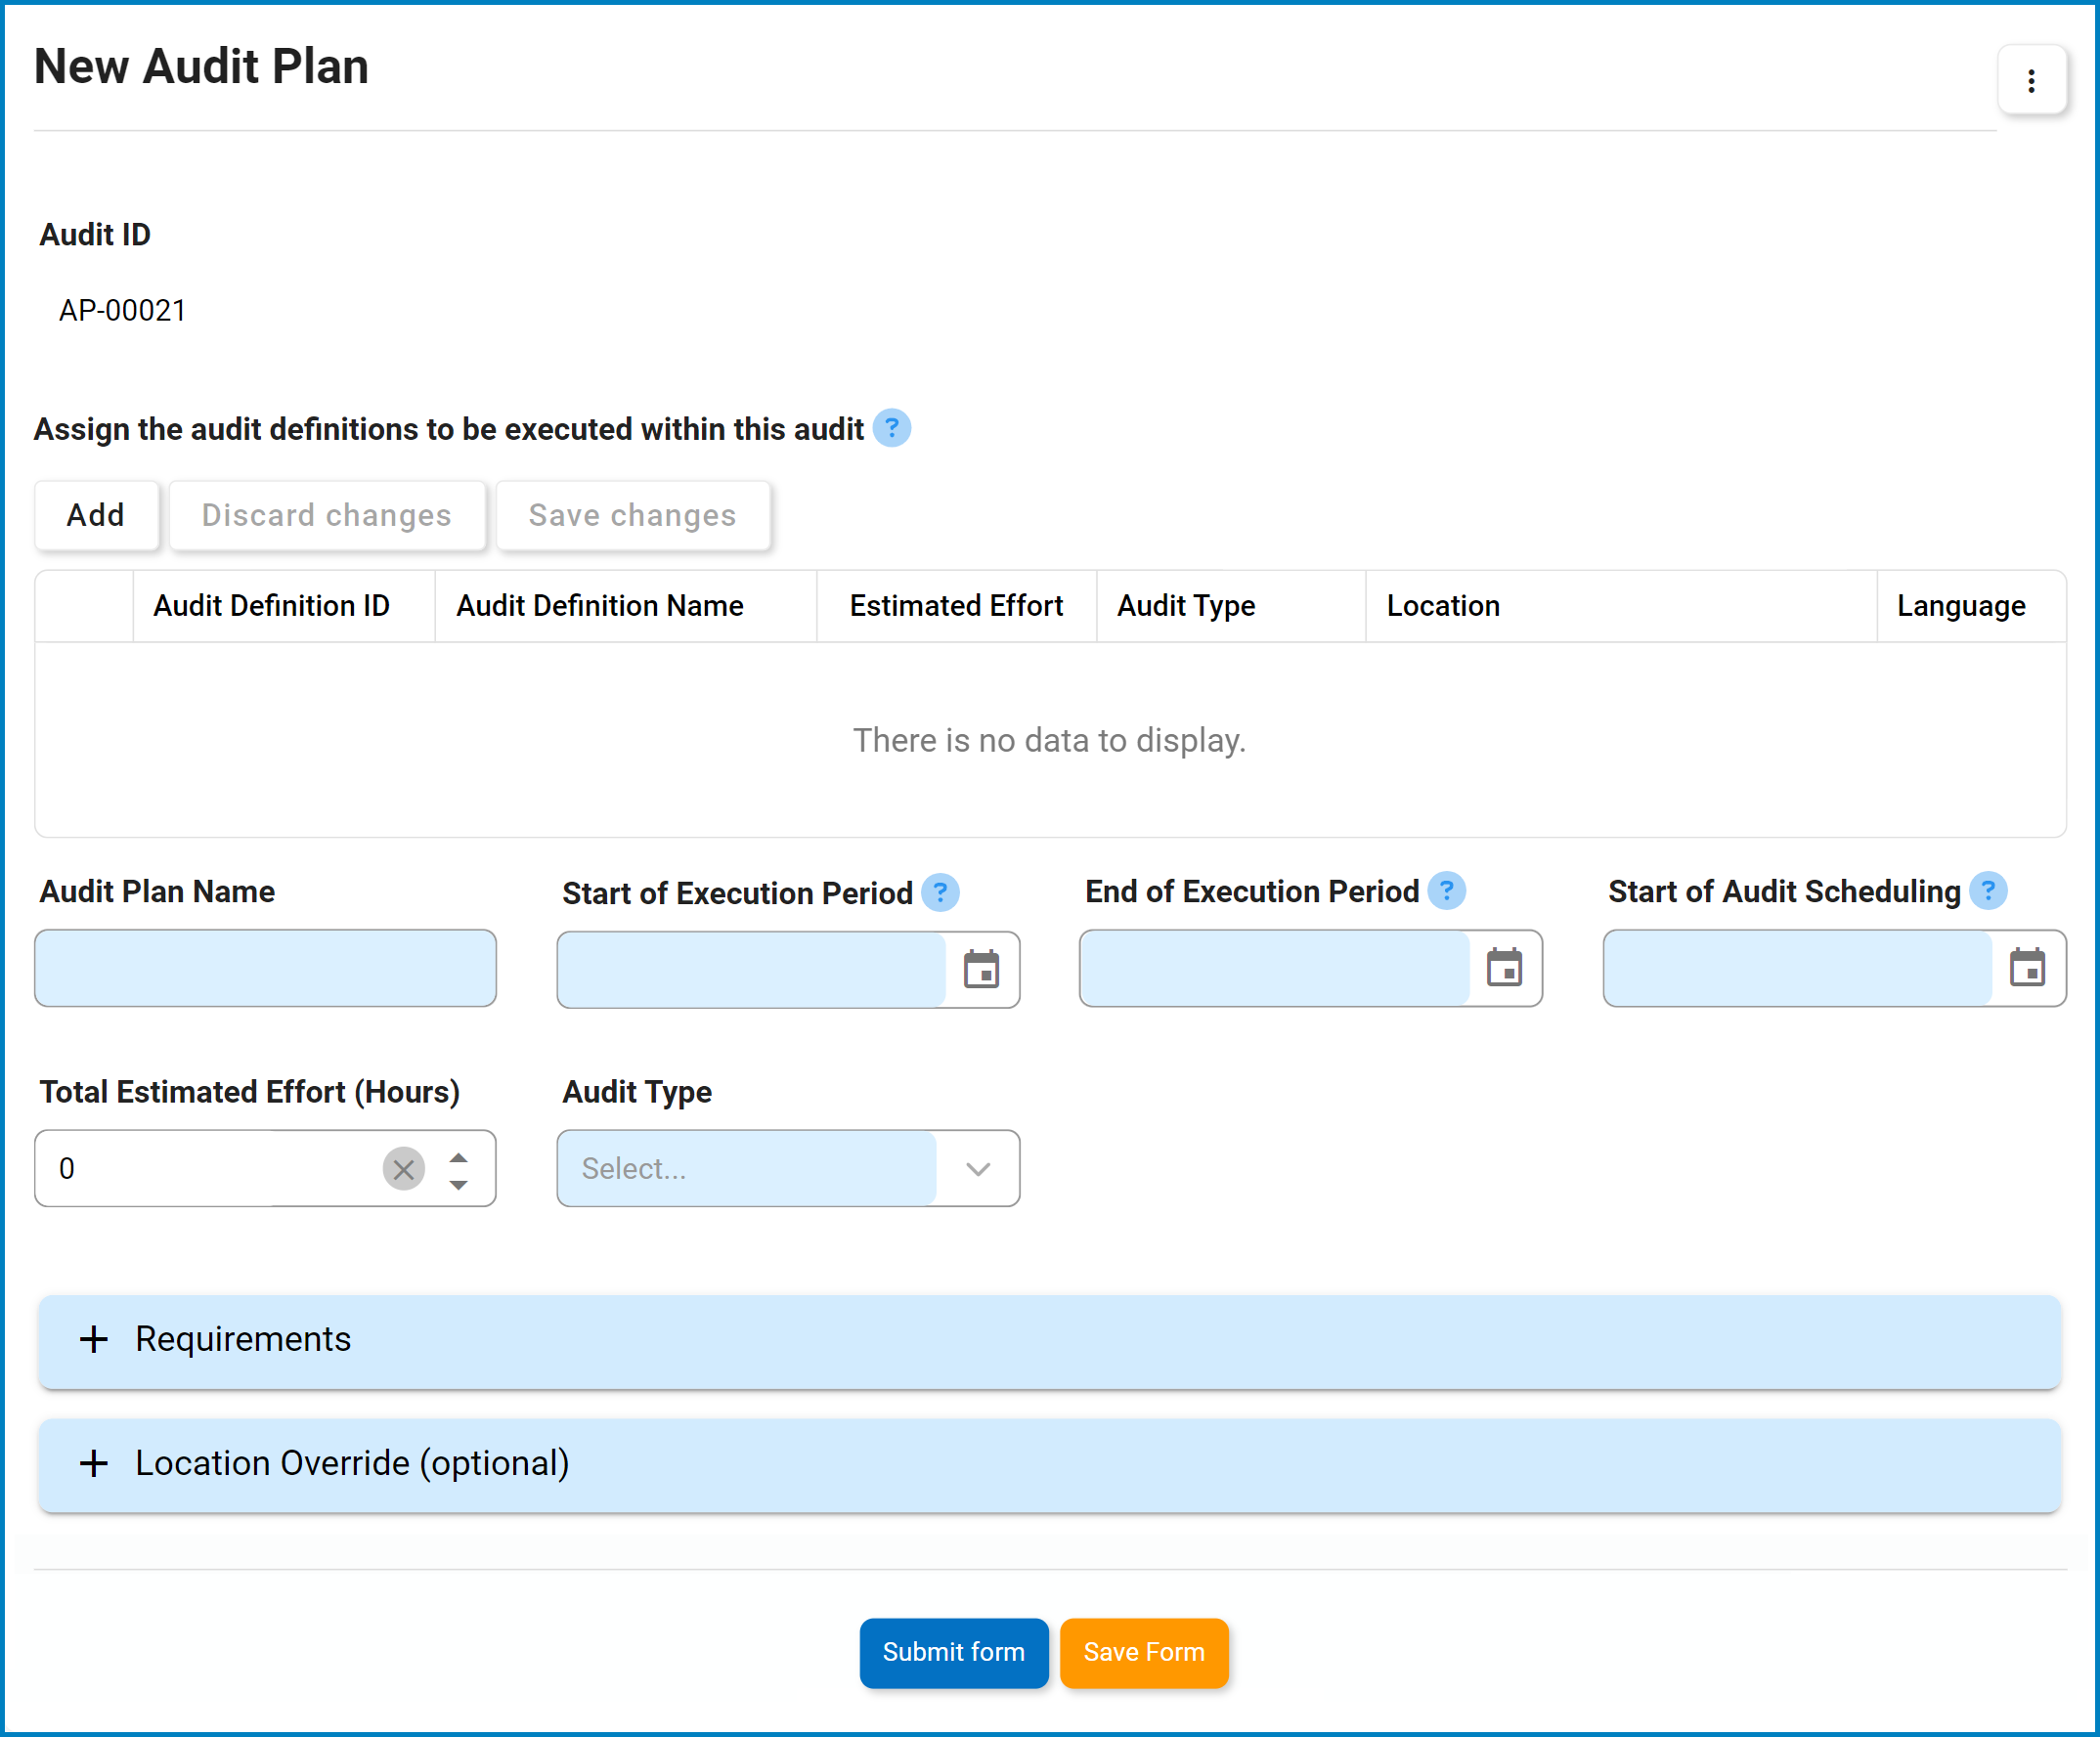
- Audit Plan ID: This field is automatically populated with a unique identifier when a new audit plan is created.
- Add: This button allows users to add an audit, thereby setting it up to be executed.
- If selected, it will open a pop-up window with the Add Audit Definition to Plan form.
**Once users have saved their selection and returned to the main form, they will find the selected audit populating the grid. Users can then choose to either add more audits to the plan or remove selected audits using the Delete (
![]() ) function.
) function.
- If selected, it will open a pop-up window with the Add Audit Definition to Plan form.
- Audit Plan Name: This is a text field that allows users to input the name of the audit plan. It is a mandatory field.
- Start of Execution Period: This is a date picker that allows users to input/select the date when the audit execution will begin.
- End of Execution Period: This is a date picker that allows users to input/select the date when the audit execution will conclude.
- Start of Audit Scheduling: This is a date picker that allows users to input/select the starting date for scheduling the audit, ensuring a timely and organized audit execution.
- Total Estimated Effort (Hours): Once an audit has been selected for execution, this field will automatically display the total number of hours estimated for its execution.
- If multiple audits are selected, this field will display the combined total of hours.
- If multiple audits are selected, this field will display the combined total of hours.
- Audit Type: This is a single-select dropdown field that retrieves the list of predefined audit types. It is a mandatory field.
- If a single audit definition is selected, this field becomes disabled, displaying only the audit type associated with the selected audit definition.
- If multiple audits are selected, this field reverts to being an active dropdown menu, enabling users to choose the relevant audit type applicable to all selected audits.
- Accordions: The form includes two collapsible sections, known as accordions, which each serve a specific purpose.
- Submit Form: This button allows users to submit the completed form.
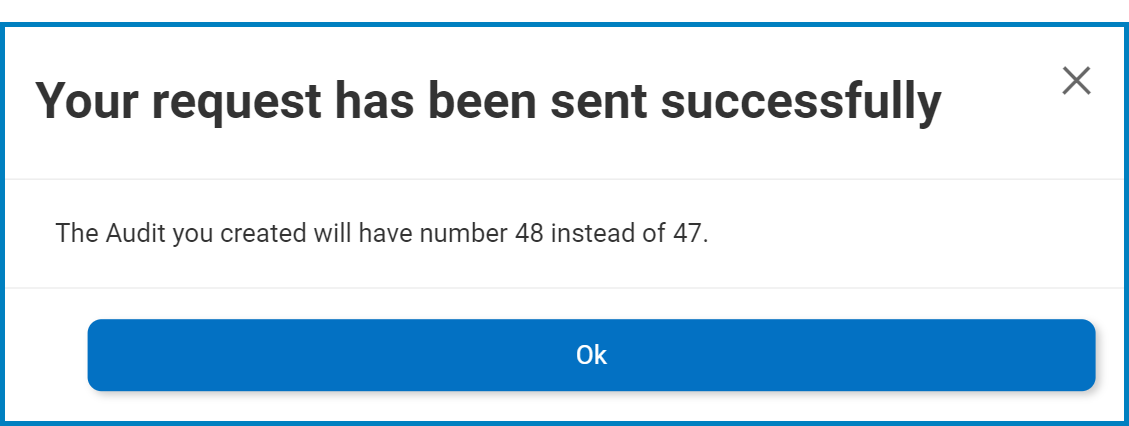
- To maintain the integrity of the Audit Plan ID system, we have implemented a validation mechanism. When users select this button and are ejected from the New Audit Plan module, a pop-up window may appear with the following message:
![]()
- After submission, the audit plan remains inactive until the specified Start of Audit Scheduling date is reached.
- Upon reaching this date, the system automatically triggers the Schedule Audit task, assigning it to the designated team leader.
- Upon reaching this date, the system automatically triggers the Schedule Audit task, assigning it to the designated team leader.
- To maintain the integrity of the Audit Plan ID system, we have implemented a validation mechanism. When users select this button and are ejected from the New Audit Plan module, a pop-up window may appear with the following message:
- Save Form: This button allows users to save the form.
- If saved, this form can be found in the Drafts folder (shown in the image below).
- A saved form can be found in the Drafts folder if it is the first step in a given workflow. If it is a task assigned in the middle of a workflow, the saved form will remain in the Pending Tasks folder.
- A saved form can be found in the Drafts folder if it is the first step in a given workflow. If it is a task assigned in the middle of a workflow, the saved form will remain in the Pending Tasks folder.
- If saved, this form can be found in the Drafts folder (shown in the image below).
*To access additional options or perform actions related to the form, please utilize the kebab menu ( ![]() ) located in the upper rightmost corner.
) located in the upper rightmost corner.
Post your comment on this topic.