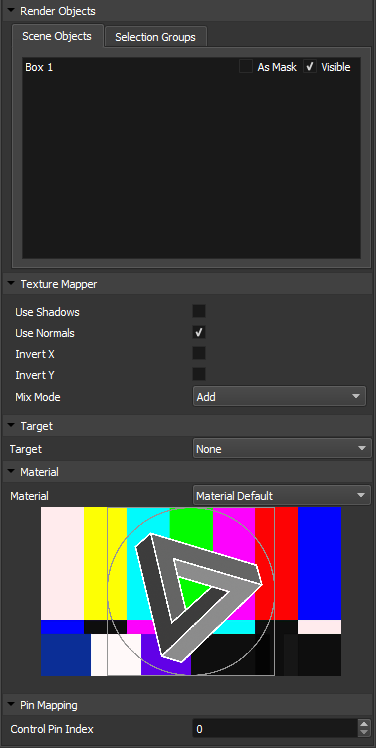
Texture Mapping is the process of applying textures to the surface of a 3d model. In SHAPE we can virtually project textures on a model with various different projection types: perspective, planar, cylindrical, spherical, radial, and UV. Texture mapping allows you to use models without UV Maps and project onto multiple objects.
Common Texture Mapper Settings
These settings are applicable to all texture mappers.
Render Objects
These options only work when shadowing is enabled.
- Scene Objects: Decide what objects you want the Texture mapper to render on or be used as a mask.
- Selection Group: Decide what selection group you want the texture mapper to render on or be used as a mask.
Texture Mapper
- Use Shadows: Toggle on / off shadows. With shadows off, content will pass through any object to objects behind it.
- Use Normals: Toggle on / off use of normals.
- Invert X: Inverts X axis of material applied from texture mapper
- Invert Y: Inverts Y axis of material applied from texture mapper
- Mix Mode: Choose the mixmode for that mapper: Add, Sprite, Alpha
Target
- Target: Choose an object for the texture mapper to always target.
| TIP: Null objects are a great to use as targets since they will not show on output |
Material
- Material: This is the material that the texture mapper will render.
Pin Mapping
- Control Pin Index: Sets the index for control from Hippotizer.


