
When projecting there are often situations when you need to stop the projection from hitting certain areas such as windows, this is known as masking. When using multiple projectors on a project, blending is needed to make it look like one smooth projected image. When working on complex models these overlapping areas are often also complex which is why we have blend Shapes.
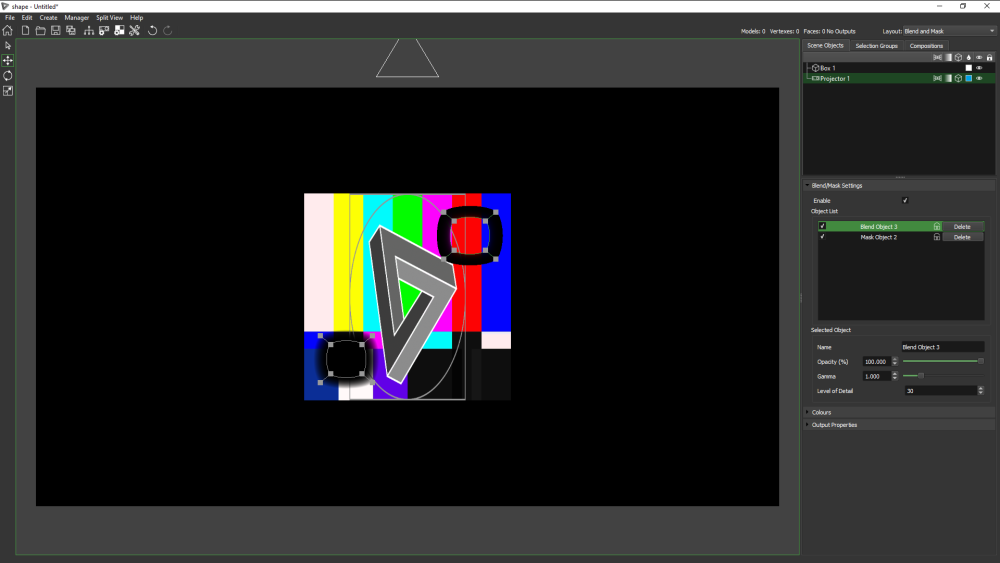
To enter Blend,
Right click on the projector, Blend
OR
Switch the Layout view to Blend and Mask, and select the projector you wish to work on.
To exit the Blend click,
 Home Or right click, Home
Navigating Blend
To zoom, pan and rotate the hardboard use navigation modes 1,2,3.
Spacebar – Full Screen hardboard
Spacebar + double click left mouse – Reset hardboard view
| NOTE: The white arrow indicates up. |
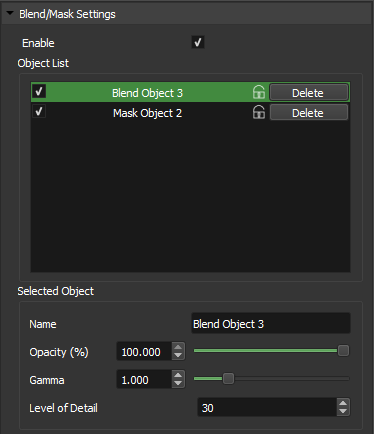
Mask Properties
- Enable: Toggle Masking on/off
- Object List: When you create new mask shapes they will appear in this list. You can toggle shapess on/off, lock them, or delete them.
- Name: Give your mask shape a unique names
- Opacity: Give each shape its own opacity.
- Gamma: Adjust the gamma of the feather/fall off.
- Level of Detail: Number of subdivisions between nodes. This can clearly be seen when using cubic shapes.
Adding Masks
To add masks or blends right click where you would like and select add mask or add blend, and choose from linear or cubic.
To edit a mask or blend object simply use E, R, or T
To edit the nodes in a mask or blend use the Point Selection tool (W)
Points can be added to a mask or blend by right clicking and selecting add linear/cubic point. A new point will be added to the object at the closest point to where you right clicked.
| TIP: To convert a soft edge to a hard edge in a mask, drag the feather handles inside the mask object. |
| TIP: Locking mask objects will help avoid unwanted changes when working with multiple mask/blend objects |