
This section of the release note explains how to set up existing e-billing functionality in evergreen proserv when also using evergreen proserv (project operations)
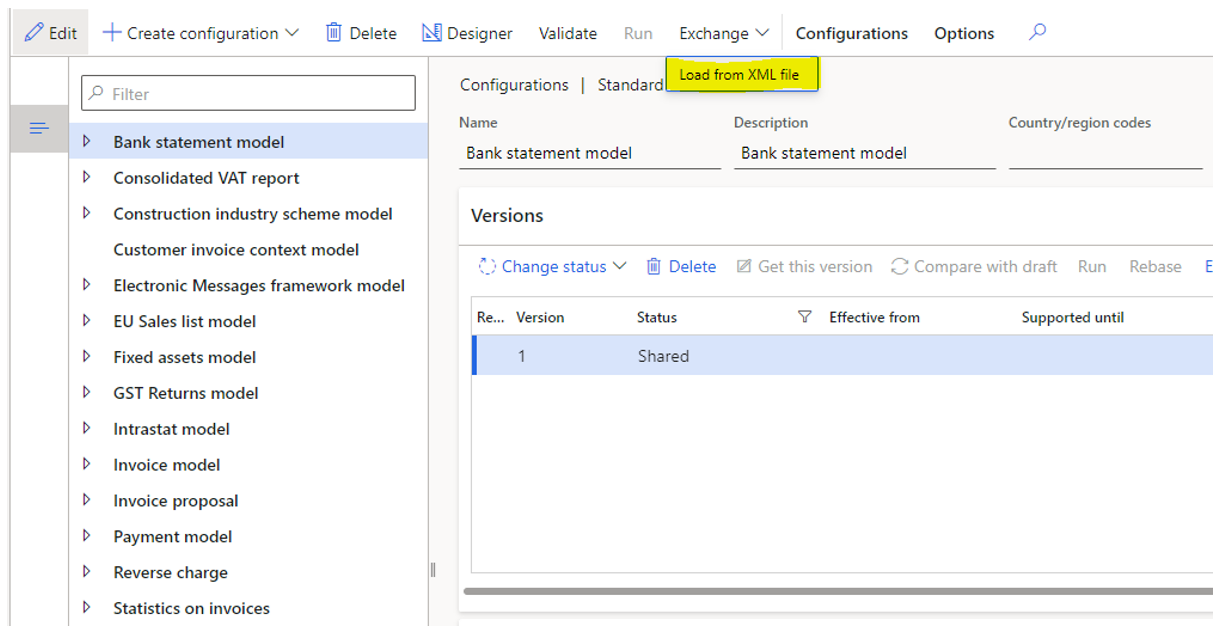
Set up formats on electronic reporting
- Go to Organization Administration > Workspaces > Electronic reporting > Reporting configurations > Exchange > Load from XML files.
 |
 |
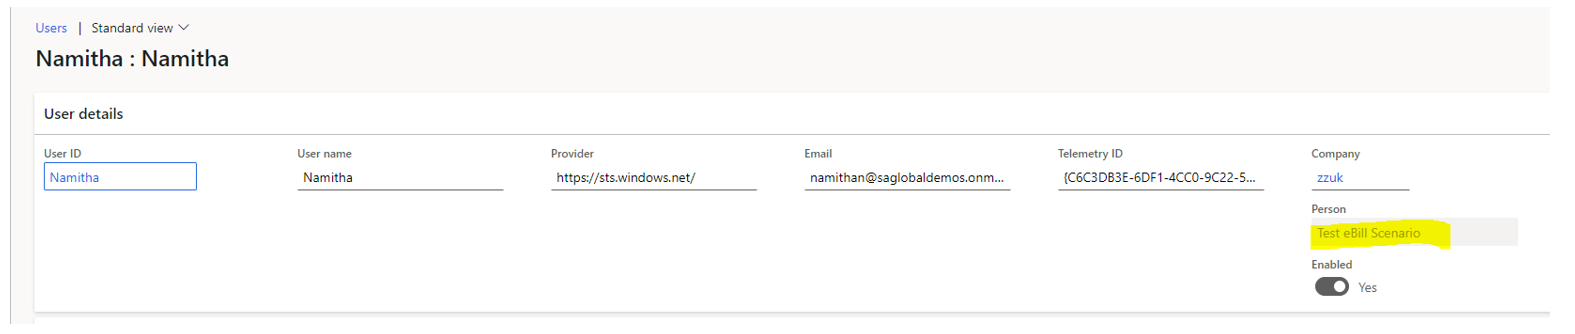
Set ‘Person’ on Users
- Go to Human resources > Workers > Employees
- Create an employee. Add First name, Last name, Address, Contact information (Phone & Email). Save.
- Go to System administration > Users > Select the user > Edit > Person (field) > Select the above created Employee. Save.
Setup Legal entity address, Contact information and Tax information
- Go to Organization administration > Organizations > Legal entities
- Add company address, contact information and Tax registration number.
- Save
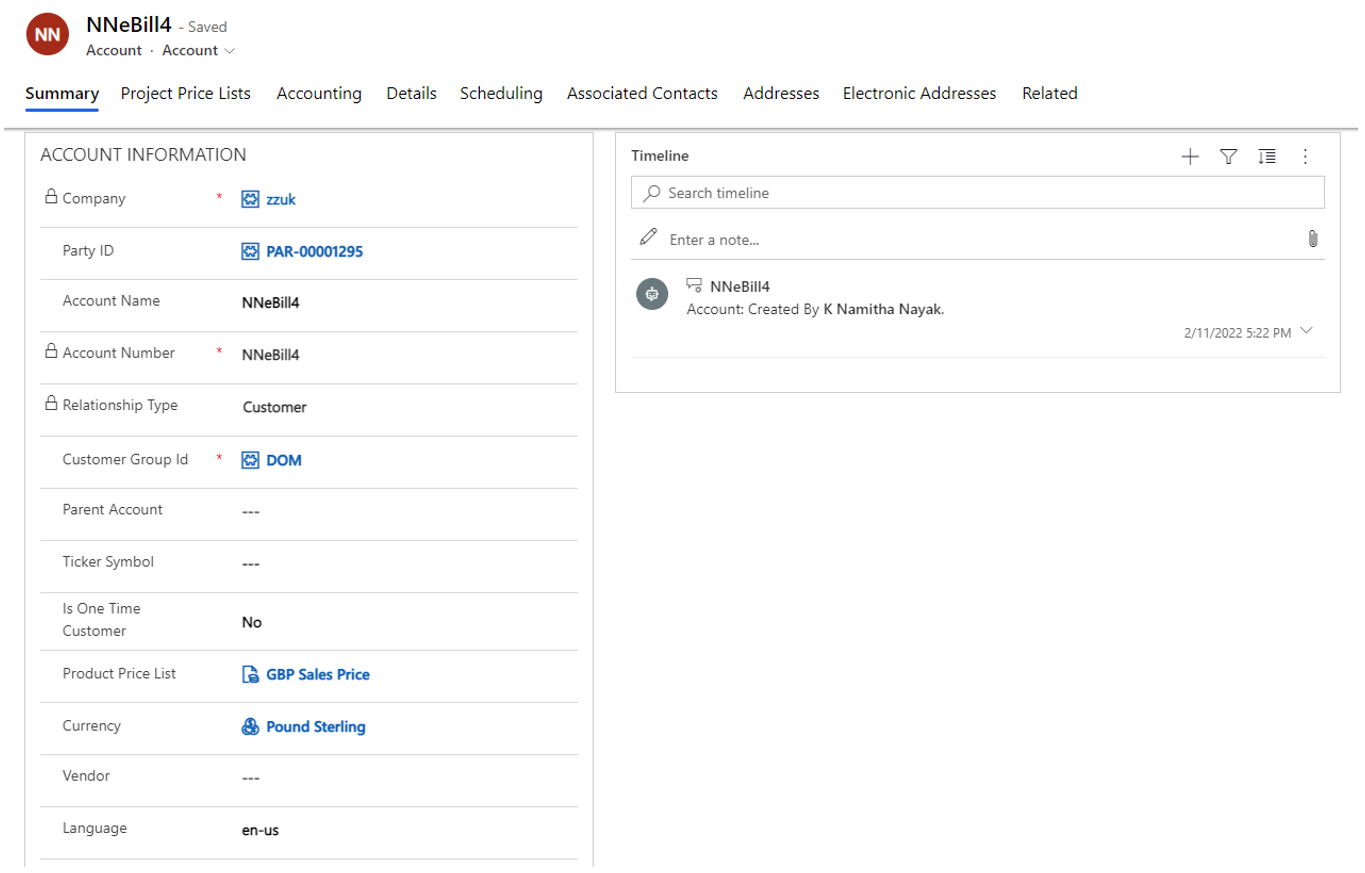
Create a customer account in evergreen proserv
- Go to Sales > Customers
- Create a customer account. Setup address, Sales tax group information. Save.

Set up customer address in Finance
In an evergreen:Finance environment:
- Go to PMA > Customers > All customers
- Set the status to Open.
- Ensure the address has Name or description

Create an invoice account in evergreen proserv
- Go to Sales > Customers
- Create an Invoice account. Setup address, Sales tax group information. Save.
In evergreen proserv environment,
- Go to PMA > Customers > All customers
- Set the status to Open.
- Setup Tax exempt number.
- Ensure the address has a name or description

- Go to PMA > Customers > All customers > NNebill3 (customer account) > Invoice and delivery
- Setup Invoice account. Select the invoice account created in the above step. Save.
Project contract
- Go to Sales > Project contracts.
- Create a new Project contract. Select the Customer account, Product price list. Save.
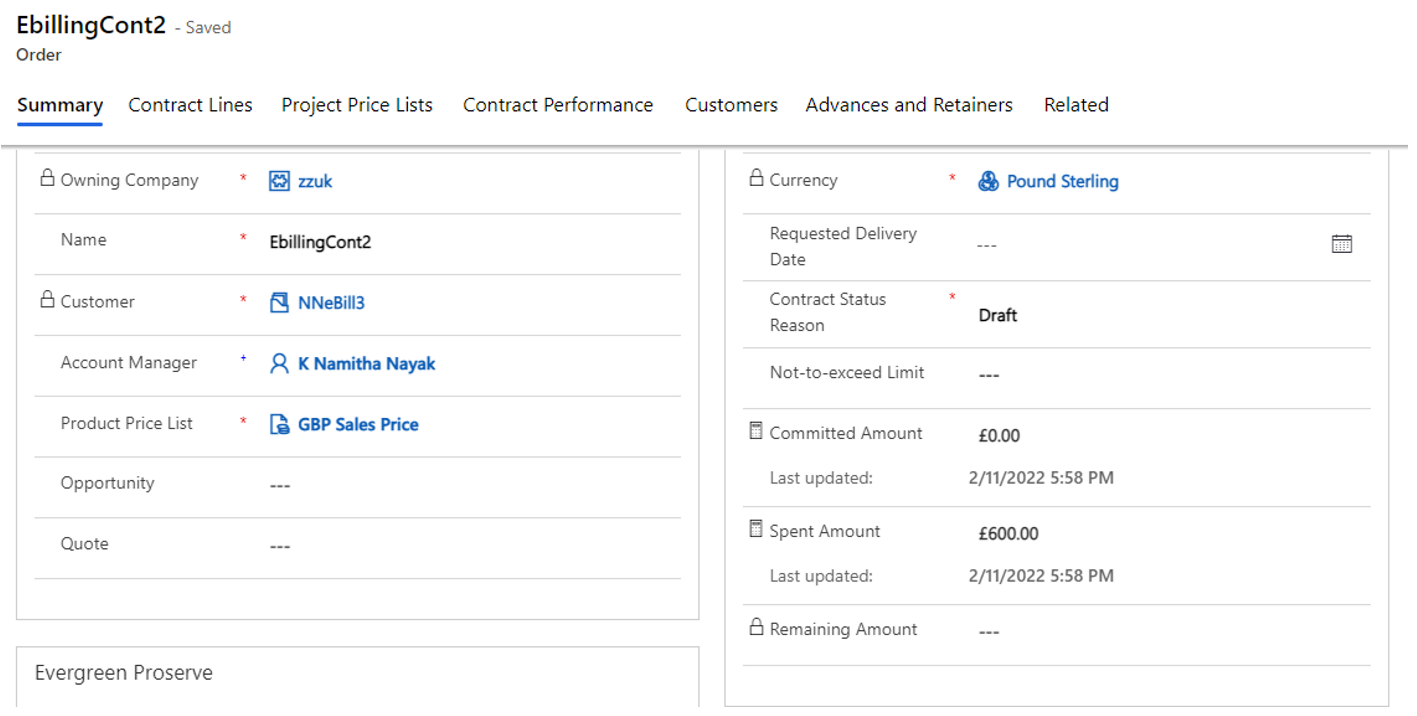
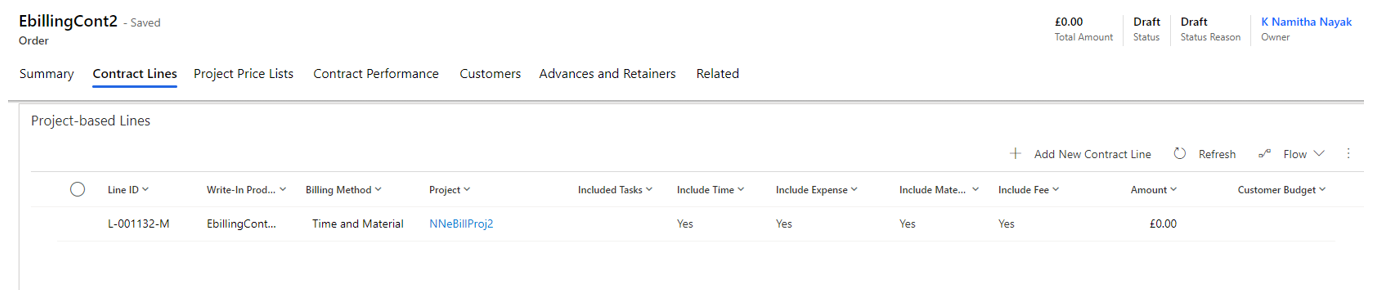
- Add contract lines
- Create a new project (As shown in next step) and setup on the contract line.
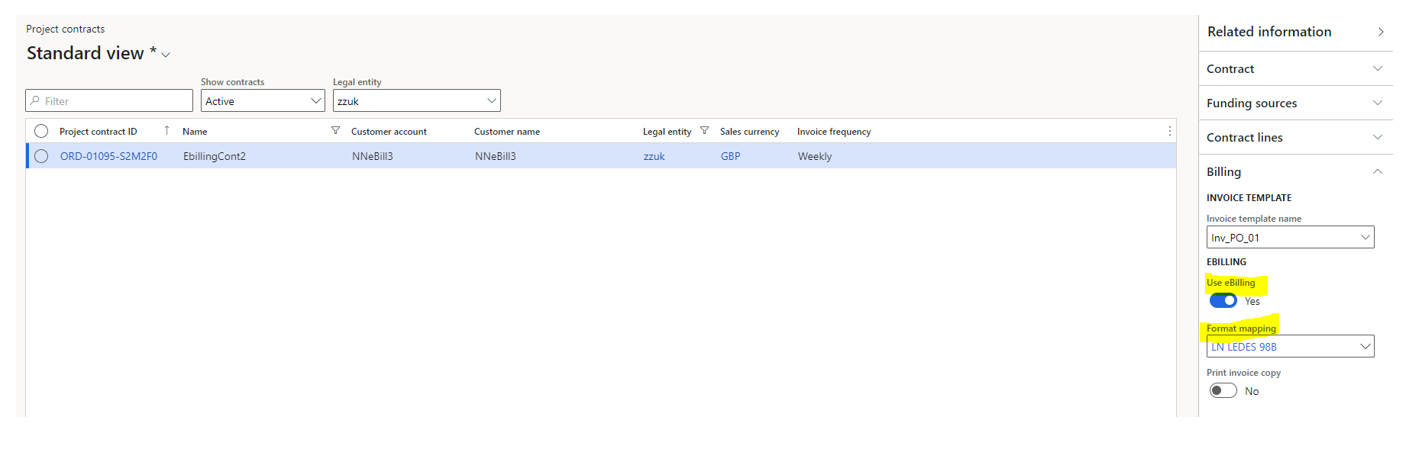
In evergreen proserv,
- Go to PMA > Projects > Project contracts > Select the above created contract > Click Show default accounting (Action pane) > Billing (Factbox)
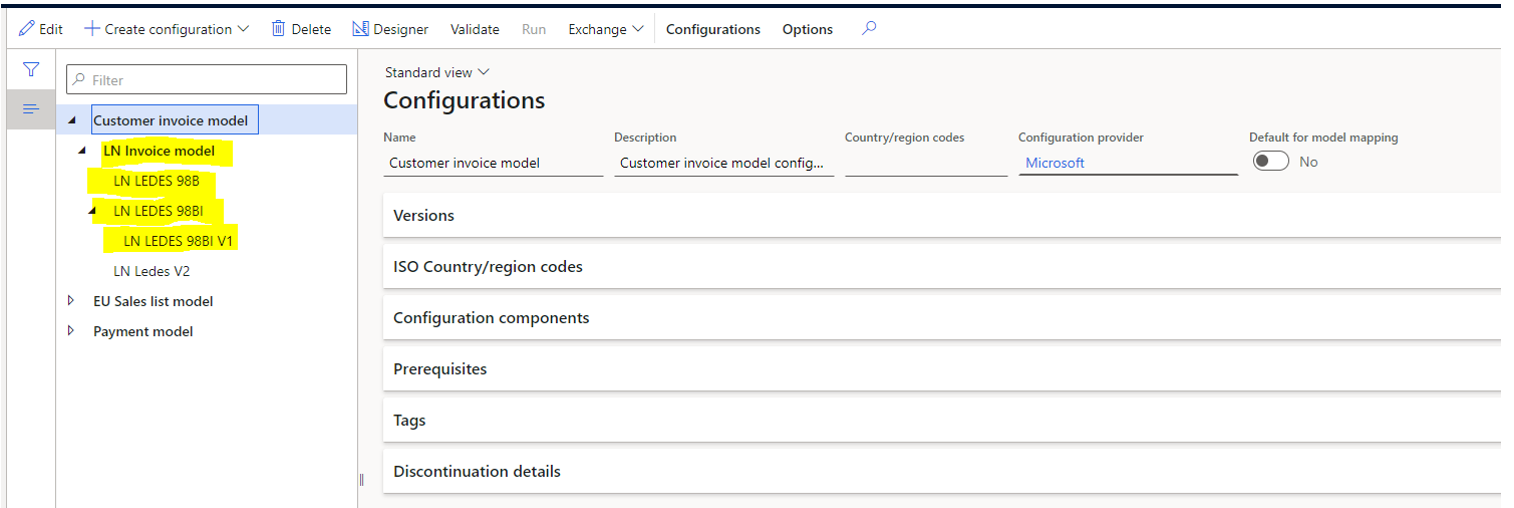
- Set fields ‘Use eBilling’ = Yes, ‘Format mapping’ = LN LEDES 98B. Save.
Create a project
- Go to Projects > Projects > Create a new project.
- Select Customer account. Save
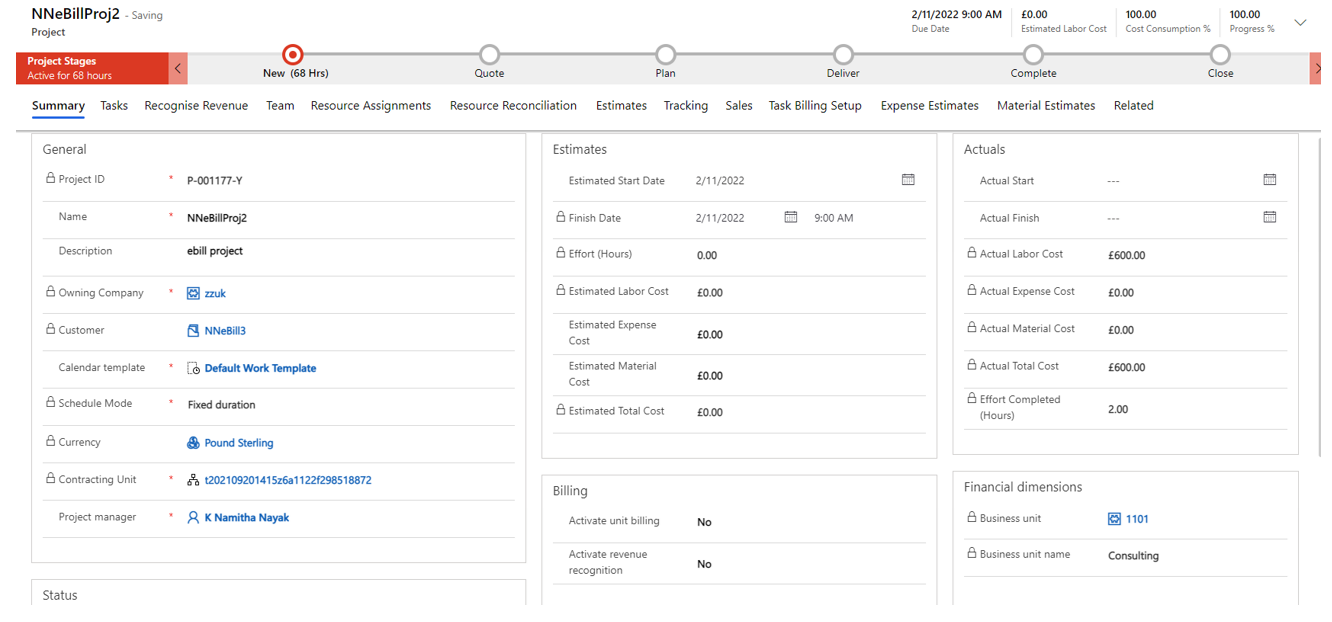
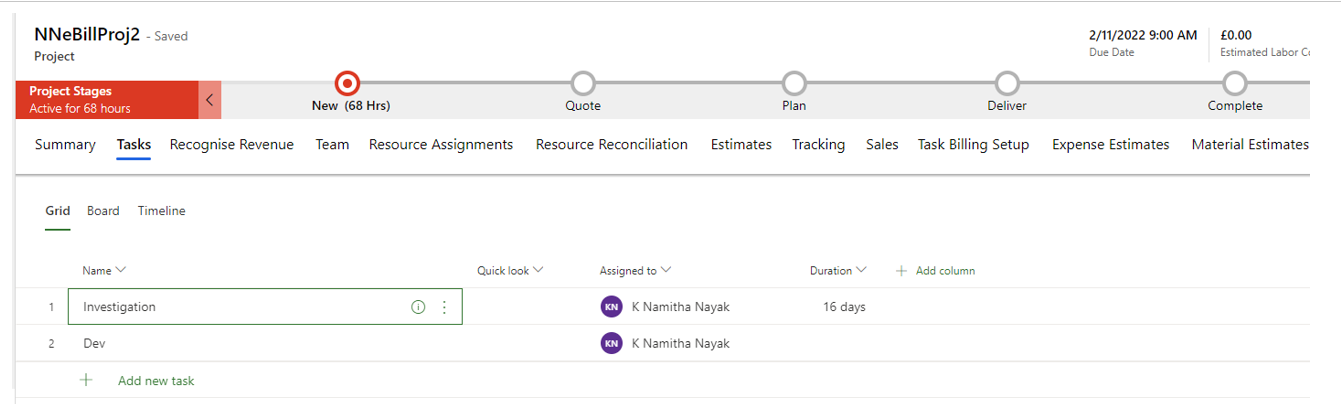
- Create tasks and assign resource
In evergreen proserv,
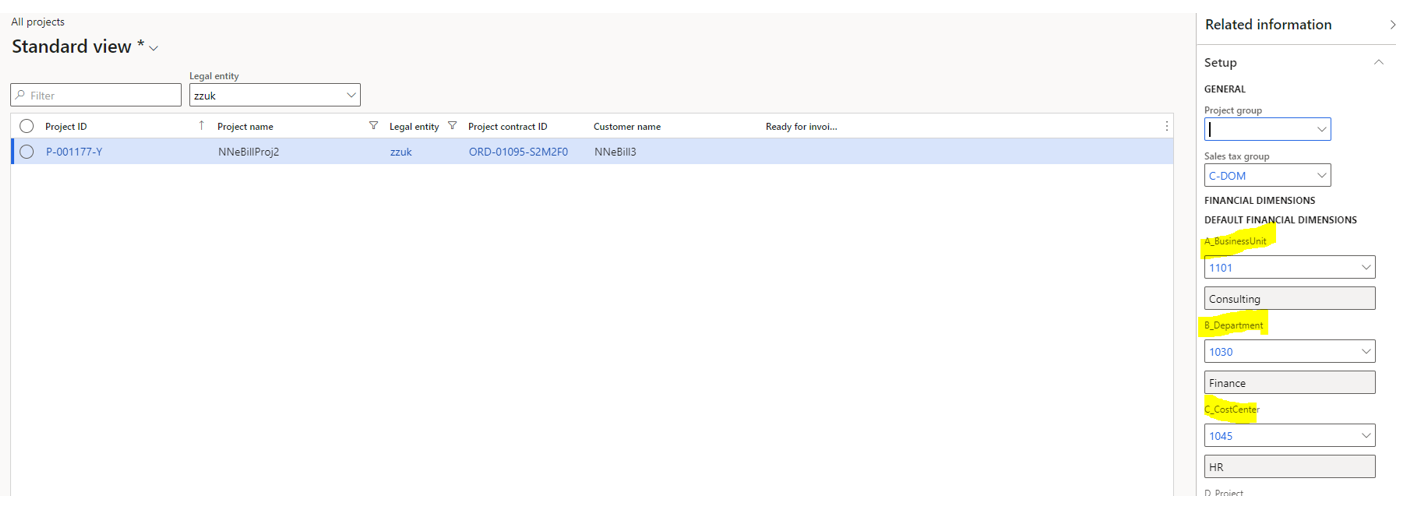
- Go to PMA > Projects > All Projects > select the above created project > Show default accounting > Setup (Fact box)
- Setup the financial dimensions – BusinessUnit, Department, CostCentre. Save.
Create and post transactions
- Post Time entries, Fee journals, Expense transactions for the above created project and task.
- Go to Sales > Time and Material Billing Backlog. Set the posted transactions as ‘Ready for invoicing’.
Generate and confirm Invoice
- Go to Sales > Project contracts > Select the Project contract.
- Click on ‘Create project invoices’.

- Go to Sales > Invoices > Select the created Invoice.
- Click Confirm.

Import data in evergreen proserv
- Go to PMA > Periodic > Project operations integration > Import from staging table.
- Go to PMA > Journals > Project operations integration journal > Select the created Integration journal.
- Click Post.
Post invoice proposal journal in evergreen proserv
- Go to PMA > Periodic > Project operations integration > Import from staging table.
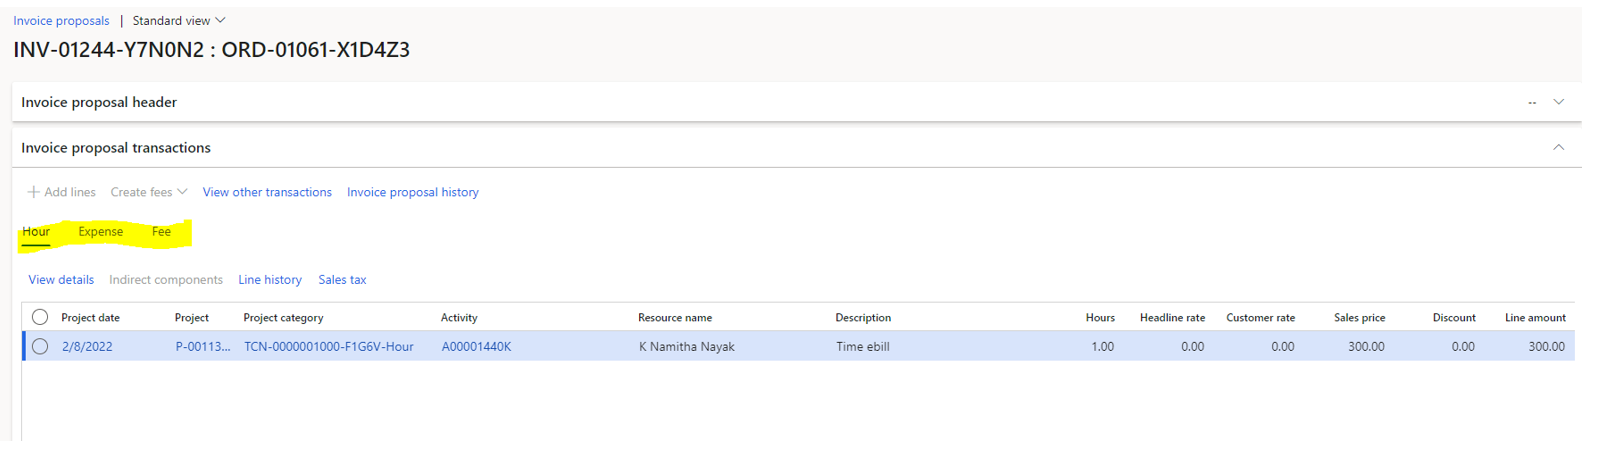
- PMA > Project invoices > Project invoice proposals > Select the created Invoice proposal.
- Ensure Hour, Fee, Expense journal lines are added to the Invoice proposal.
- Post the journal.
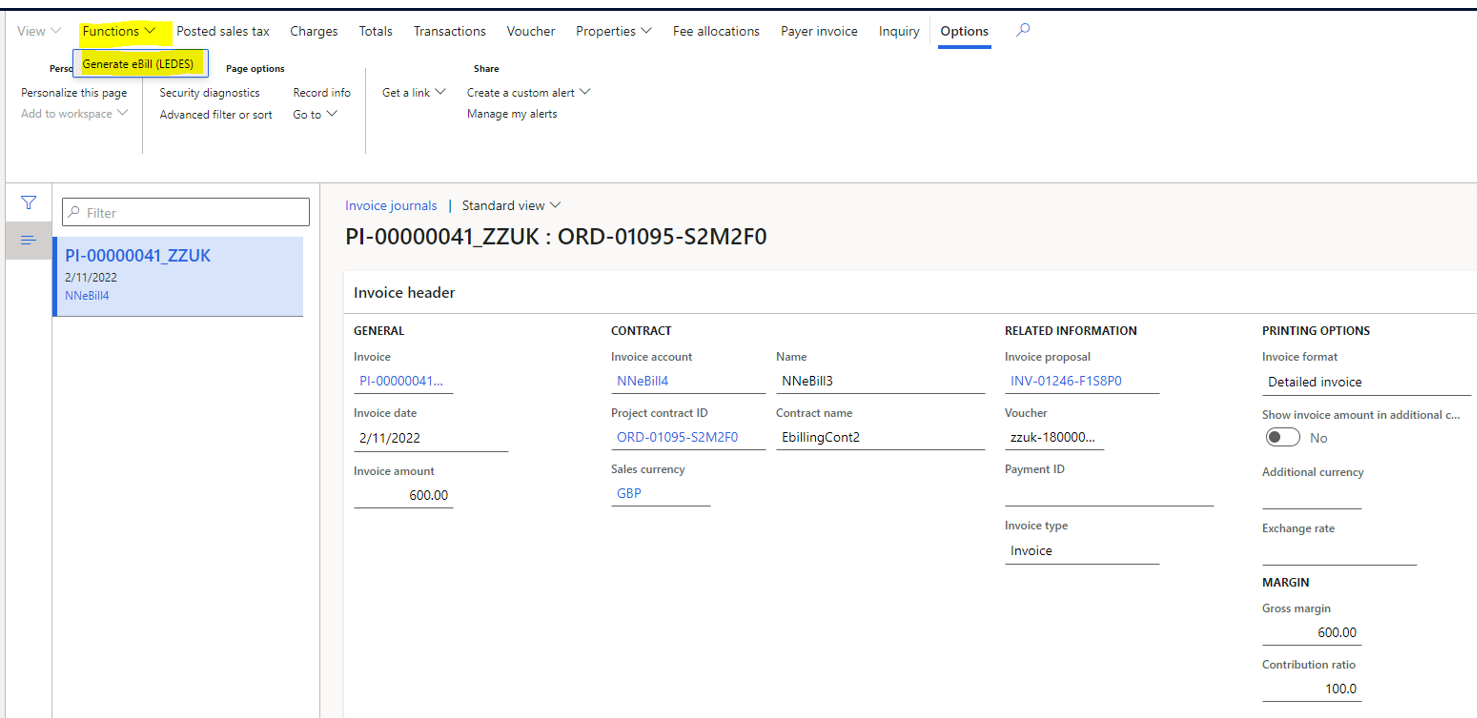
Generate eBill (LEDES) in evergreen proserv
- Project management and accounting > Projects > Project invoices > Project invoices > Select the Invoice journal posted above > Functions (button group) > Generate eBill (LEDES)
Check the status and view the files in evergreen:finance
- Go to Project management and accounting > Projects > Project invoices > eBilling
- Once the execution is completed, a record will be created with Status of the execution.
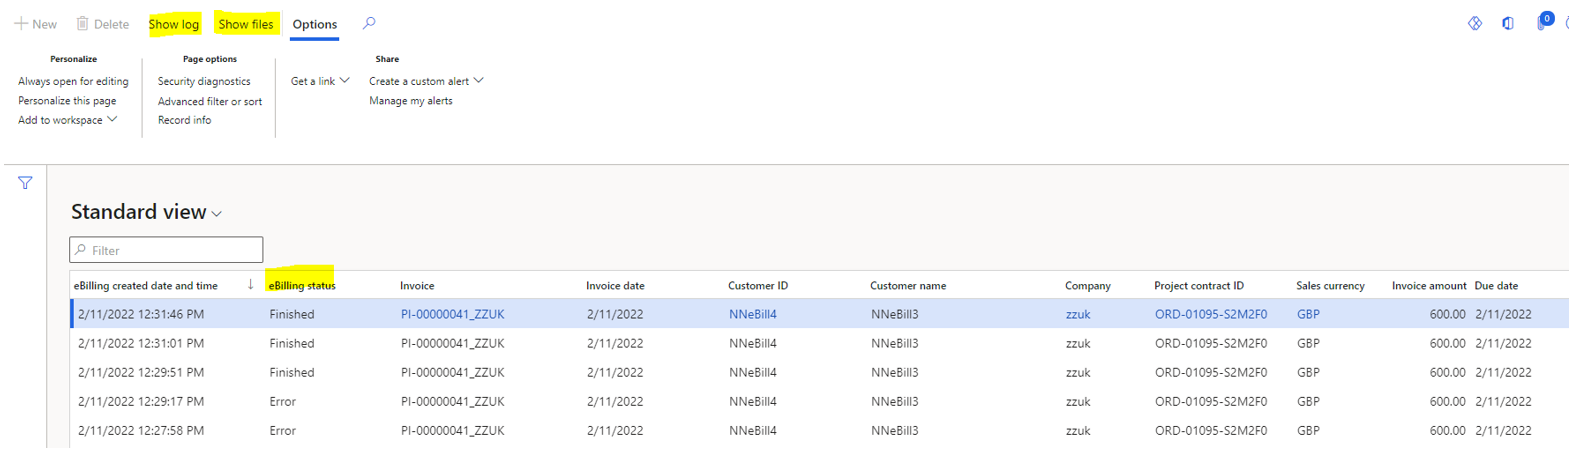
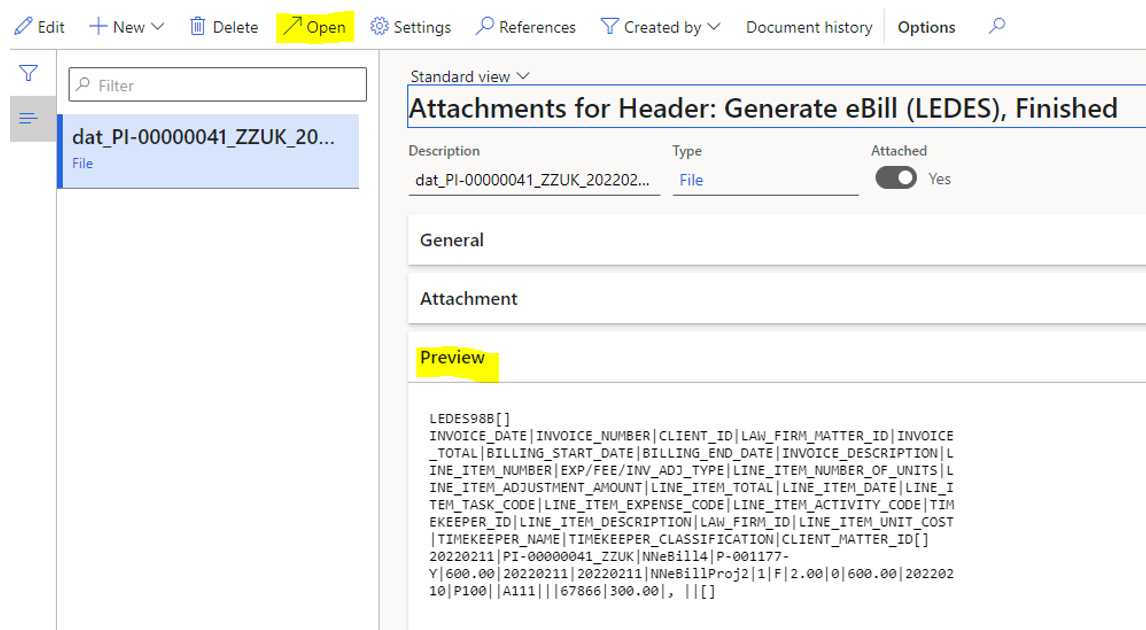
- Click ‘Show files’ to preview the file content. Click ‘Open’ to download the generated file in the format which is setup on the Project contract.
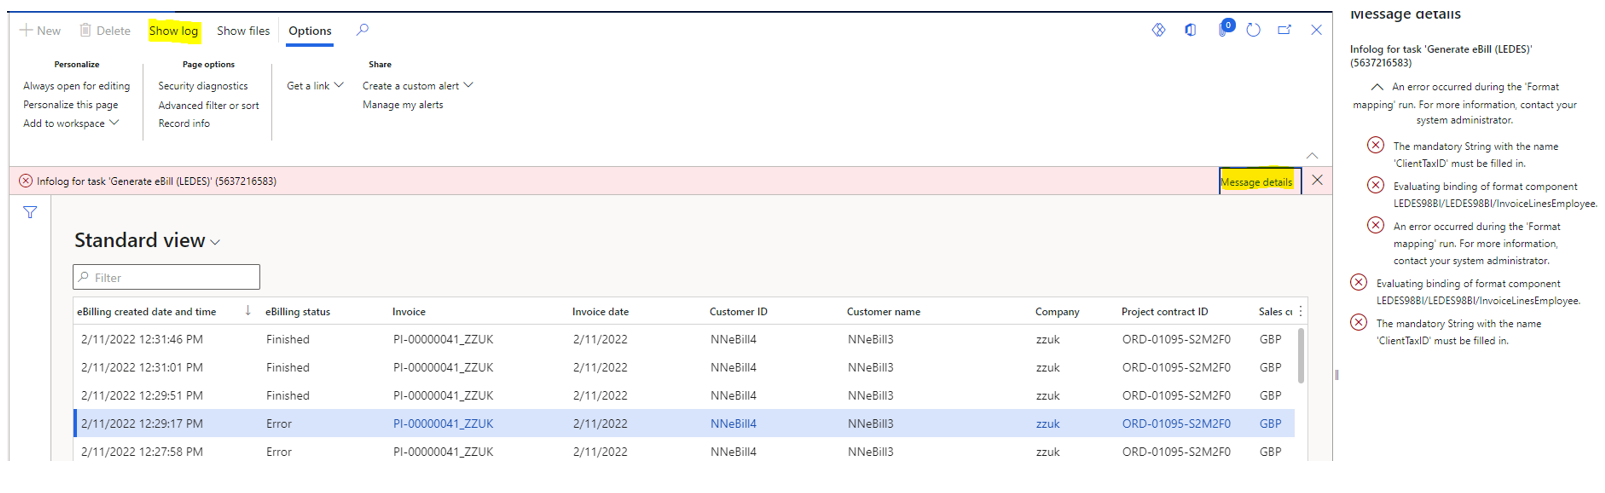
- If the execution results in error, the field ‘eBilling status’ will be set to ‘Error’.
- Click on ‘Show log’ to view the error message.
Change format on Project contract to generate file in different formats
- Go to PMA > Projects > Project contracts > Select the above created contract > Show default accounting (Action pane) > Billing
- Change the ‘Format mapping’ = LN LEDES 98BI. Save.
- Go to Invoice journal > Functions > Generate ebill (LEDES)
- Go to ebilling form. View the generated file in latest format setup on the Project contract.
Feedback
Copyright © 2025 sa.global
—
Powered by 
Post your comment on this topic.