
Daylite Sales Assistant allows the following to be done in Daylite:
- Have multiple live quotes on an opportunity
- Quote in any currency
- Quote for multiple locations
- Turn quotes into Orders and invoices
- Quote from people, companies and opportunities
- And much more…
Unlike accounting applications Daylite offers a more comprehensive way to manage or think about quotes. In Daylite they are more than a document that needs to be sent to a customer. Daylite is looking at the higher objective, winning the business. And sending a quote is only a small part of this process.
Long term Daylite users will understand the concept of an Objective… and how an opportunity and a project are related together as 2 sides of the objective coin. Form many businesses tis has been a difficult concept to adopt for within the business as Daylite lacked the features to be able to integrate the quoting and invoicing requirements. This results in businesses going to other applications to make quotes and then they start to track the quotes in the other systems and before you know it Daylite is not being used as it should be.
When using Daylite Sales Assistant to make quotes you are using Daylite concepts all the time. So every time you make a new quote for a customer you are making a new opportunity in Daylite. And when you make an order confirmation or invoice we automatically win the opportunity for you and open a new project – automatically. And this enables a pipeline to be opened automatically and then pipeline tasks to be sent out. Here is a screen breakdown of the Quote UI. There is also a video to watch showing how to use the quoting system.
Quoting from a Person or Company Object.
 Sales Assistant TAB on a company in Daylite
Working with Daylite Sales Assistant interface
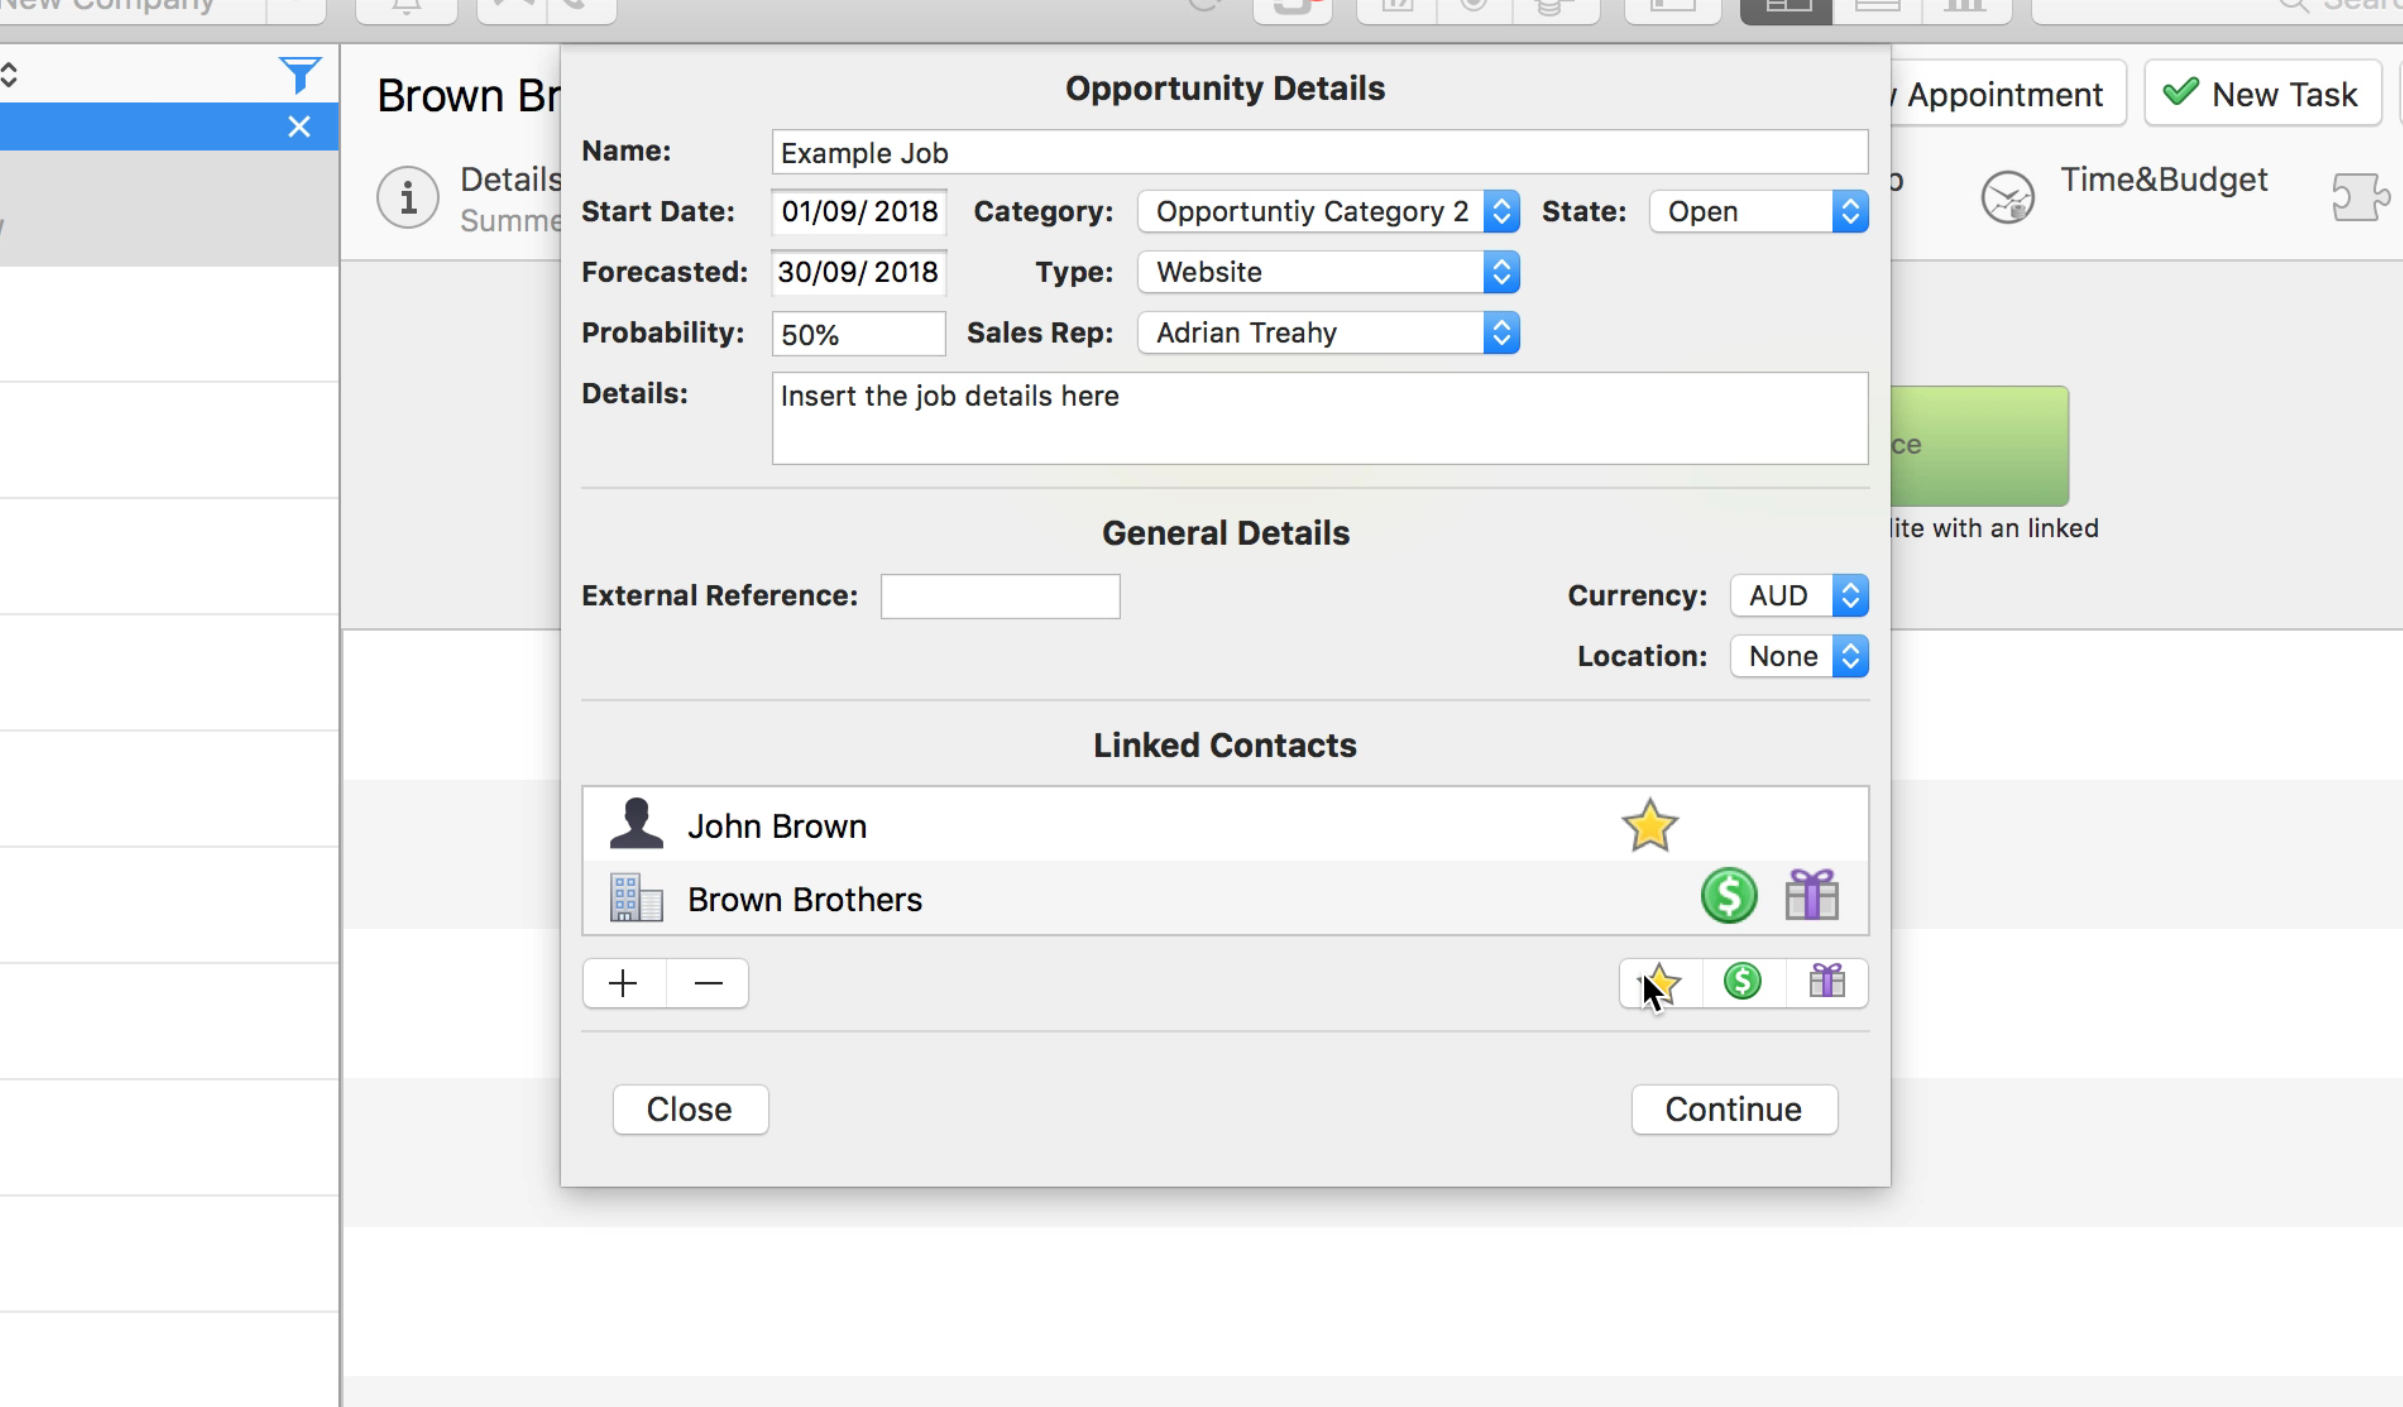
Most of the fields are normal Daylite opportunity fields used for Daylite opportunity tracking and sales based workflows. If your Daylite is already set up then these will display you current Daylite settings for:
- Forecast Close Date
- Category
- Type
- Probability
- Owner (Sales Rep)
If you are new to Daylite and these settings are not configured then please refer to the Daylite manual or training pages where there use is fully discussed with example.
Daylite Training
Once the details are completed press the continue button to add your first quote.

The first section will populate the 3 addresses from the previous screen based on the 3 icons.
Star = Primary Contact
Green Opportunity Icon = Billing Contact
Box = Shipping contact
![]()
Note there is also a search box to add other people or companies to the opportunity. Just like in Daylite there is no limit to the number of people and companies that can be added to an opportunity.
Adding Products & Services to a quote
Click on the Line Items to add your products
 The DSA Line Item view
We recommend that you add your products and services to Daylite Sales Assistant before your make quotes, although we have added the ability to add products and services on the fly to Daylite Sales Assistant. Avoid using custom products if you can as these dramatically reduce the effectiveness of Daylite Sales Assistant.
 Sales Assistant Advanced Product Picker
If a single product is picked the line item editor window will appear. If multiple items are selected then they go directly to the line item list and can be edited by double clicking on the line item.
The Line Item editor will show and the values entered for confirmed.
 Daylite Sales Assistant Line Item Editor
- Cost of goods in buy currency
- Markup
- Effective margin
- Sell price
- Additional costs
- Taxes
- Descriptions
- Notes.
Line item order can be set by dragging the line items to the order your want them to appear in on the PDF.
Line items can be bulk edited to set common values as required. Select all the line items to be edited and double click to open the line item bulk editor.
If these are always the same then adding multiple line items at the start is a good idea, as it saved the. If they are not then we recommend adding them singularly and checking the values.
Making a PDF and sending to the customer
The final step is to make a PDF and send to the customer.
 PDF Creation
From the PDF button you can preview the PDF in any quote template you have loaded, if you have multiple templates available. Press the create PDF button when ready to create the PDF. This will take the PDF from Draft mode to Active mode.
Once a PDF is made the base document is locked. This is to prevent changes to the document once a PDF is live. To make changes any exiting PDF must be cleared, the changes made and a new PDF generated.
The Document List
Once a document (quote, invoice, pro forma, order acknowledgement, Supplier Oder) has been made, whether in draft or active, they will appear in the document list for that Opportunity and Project in Daylite. The following screenshot shows the options that are available on a document.
 Document controls inside DSA
To email the PDF press the Email PDF button and it will load into Mac Mail with the Document name and the company’s or the person’s (recipient) email address. The DMA will allow the email to be linked into Daylite’s history. See Daylite manual and tutorials for instructions on linking with Daylite Mail Assistant.
Post your comment on this topic.