
The details of the “Definition of the Template” form are fully described in the image below.
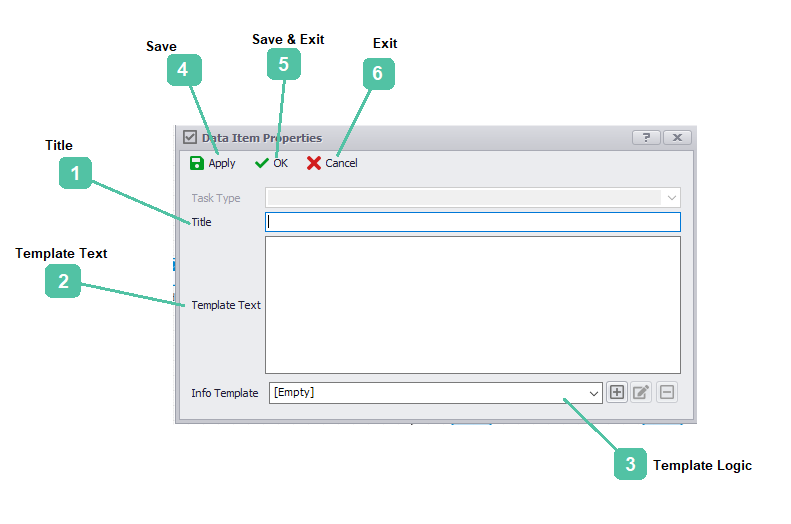
1. Title:
The title of the template is in this box.
2. Template Text:
The text typed in this box is the text that is supposed to be inserted instead of the text or the title of the selected activity.
Note: Insert a fixed text into the textbox of the template; to insert static text along with dynamic text, type the static text. To enter in dynamic text, begin with the $ sign followed by the name of the defined logic.
3. Template Logic:
Note: After defining template logic, it is necessary to display the dynamic text first, then enter the $ followed by the name of the defined logic in the text box of the template.
Button  : By selecting this button, you can save the new logic and attribute it to the selected activity.
Button ![]() : By selecting this button, the selected format logic is edited.
: By selecting this button, the selected format logic is edited.
Button ![]() : By selecting this button, the logic of the selected template is deleted.
: By selecting this button, the logic of the selected template is deleted.
4. Save:
By selecting this button, the template is saved and added to the list of templates.
5. Save and Exit:
By choosing this button, the template is first saved and added to the list of templates and then the form is closed.
6. Exit:
By choosing this button, you exit form.