
Break at a Point
![]()

The ‘Break at a Point’ function is used to break an object on a specific point.
- Select the ‘Break at a Point’ function from the ‘Change’ ribbon.
- Select the object you wish to break. (Note: confirmation by clicking ‘confirm’ or ‘enter’ not required).
- If you want to break between 2 tines. Click on the Snap Intersection option from the upper menu that appear.
- Click or tap to select the breakpoint. The object will be broken at the selected point.
- The function runs continuously, so now select a new element to be broken from step 2, or press ‘Confirm’ or ‘Cancel’ to end the function.
Break 2 points
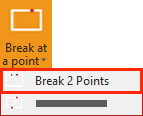
The ‘Break 2 points’ function is used to break an object between two points.
- Select the ‘Break 2 points’ button from the drop down underneath ‘Break at a Point’
- Select the object you wish to break. (Note: confirmation by clicking ‘confirm’ or ‘enter’ not required)
- Click or tap to select the first break point, then the 2nd break point. The element is broken between the 2 points, and the section between these points is removed.
- The function runs continuously, so now select a new element to be broken from step 2, or press ‘Confirm’ or ‘Cancel’ to end the function.
Break at a line
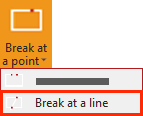
The ‘Break at a line’ function is used to break all objects that are transected by a line.
- Select the ‘Break at a line’ button
- Select the line at which all transecting objects should be broken_(Note: confirmation by clicking ‘confirm’ or ‘enter’ not required)_
- The command window will read out the results: ’2 Object(s) broken at 4 point(s)’.
- The function runs continuously, so you may now select a new line as in step 2, or press ‘Confirm’ or ‘Cancel’ to end the function.
Feedback
Copyright © 2025 Flexijet GmbH
—
Powered by 
Post your comment on this topic.