
This tab displays all the requirements defined in the system. Users will need to deselect any requirements that do not apply to the audit.
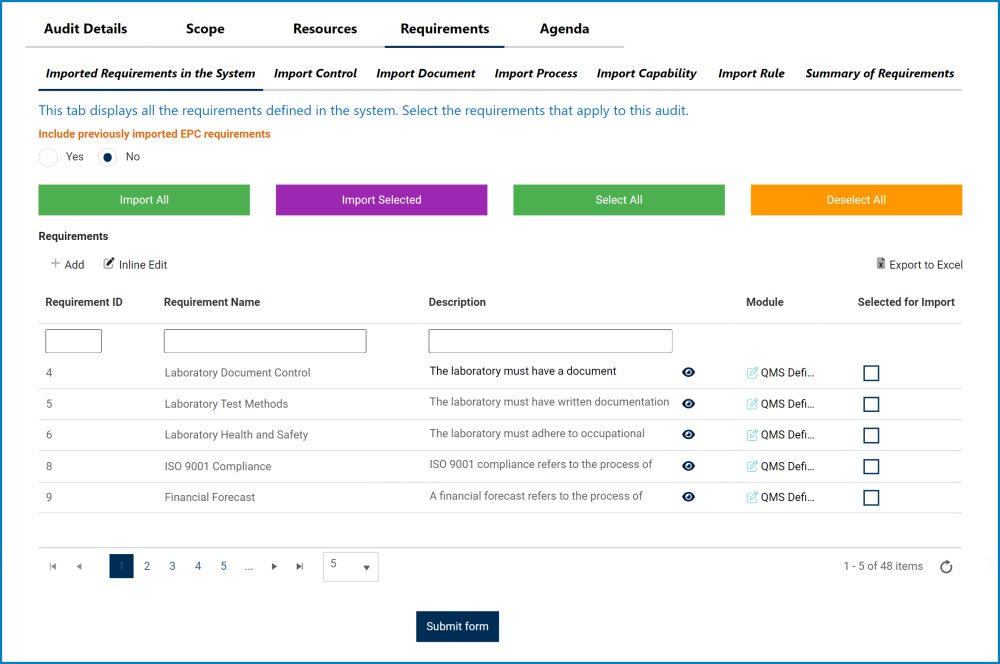
- Include Previously Imported EPC Requirements: This is a radio button that allows users to select only one option from a set of mutually exclusive options. Users can choose to include or not include previously imported EPC requirements.
- If Yes is selected, the previously imported EPC requirements will populate the Requirements grid.
- Import All: This button allows users to import all requirements to the Summary of Requirements tab.
- Import Selected: This button allows users to import selected requirements to the Summary of Requirements tab.
- Select All: This button allows users to select all requirements in the grid (for importing purposes).
- Deselect All: This button allows users to deselect all requirements in the grid (to cancel import).
- Add: This button allows users to add a new audit requirement.
- If selected, it will open a pop-up window with the Define a New Audit Requirement form. This form is largely a duplicate of the New Requirement form.
- Unlike the latter form, however, at the bottom of this form, users are given the following options:
![]()
- Save and Return: This button allows users to save the requirement and return to the New Audit Definition form.
- Save and New: This button allows users to save the requirement and open a new form to create another requirement.
- Unlike the latter form, however, at the bottom of this form, users are given the following options:
- If selected, it will open a pop-up window with the Define a New Audit Requirement form. This form is largely a duplicate of the New Requirement form.
- Inline Edit: This button allows users to edit inside the Requirements grid. Here, it specifically allows users to manually select/deselect the Selected for Import checkbox.
- To edit inline, select the requirement that you want to edit from the grid and click on the Inline Edit button.
- Click on either the Save button to save your changes or the Cancel button to cancel them.
- Export/Template/Import: These buttons allow users to perform Excel-related activities.
- For more details on these functions, click here.
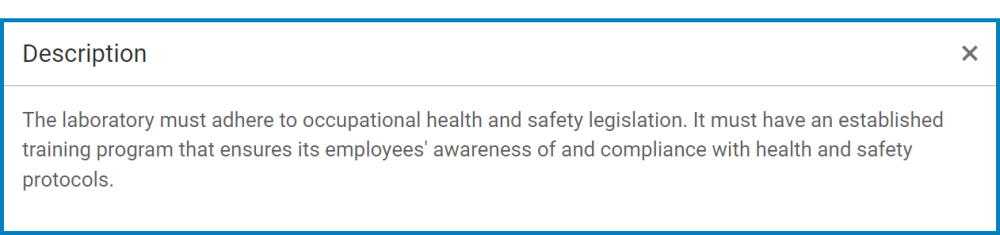
![]() : This button allows users to view the full contents of the requirement description.
: This button allows users to view the full contents of the requirement description.
- If selected, it will open a pop-up window with the information.
![]()
- If selected, it will open a pop-up window with the information.
- Submit Form: This button allows users to submit the form.
- For more details on this function, click here.

Post your comment on this topic.