
Once an audit has been selected for execution, this section of the New Audit Plan form will be populated with the list of requirements associated with the audit.
- If multiple audits have been selected, all of their associated requirements will be listed in the grid (barring any duplications).

- Enable Testing For All: This button allows users to enable testing for all requirements in the grid.
- Disable Testing For All: This button allows users to disable testing for all requirements in the grid.
- Inline Edit: This button allows users to edit inside the grid. Here, it specifically allows users to manually select/deselect the Requires Testing? checkbox for each requirement.
- Requires Testing?: This is a checkbox which, if enabled, allows users to establish that the requirement will need testing. Any tests that are assigned to the requirement will then be triggered during the audit execution.
- If this checkbox is not enabled/selected, the requirement will not undergo testing (even if a test has been previously assigned to it in either the Define a New Audit Requirement or New Requirement form).
- Requires Testing?: This is a checkbox which, if enabled, allows users to establish that the requirement will need testing. Any tests that are assigned to the requirement will then be triggered during the audit execution.
- Export to Excel: This button allows users to export the Requirements grid to Excel.
- Submit Form: This button allows users to submit the form.
- Once the audit plan has been submitted, it will be sent to the assigned team leader for scheduling.
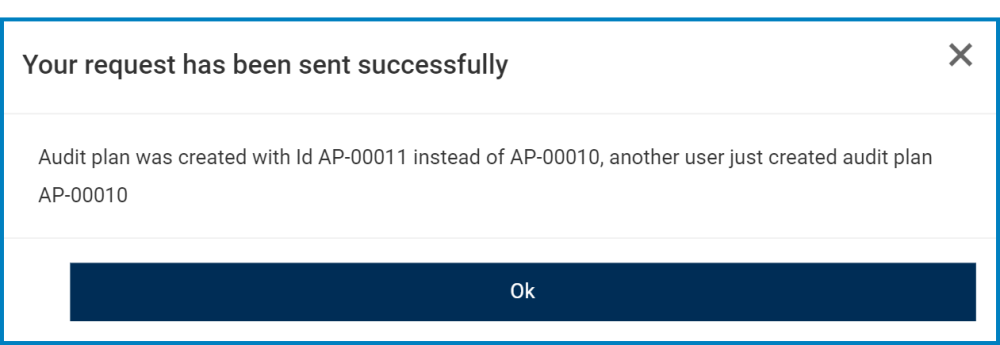
- In some cases, once the user has selected this button and been ejected from the New Audit Plan module, a pop-up window will appear with the following message:
![]()
- This message serves to prevent duplicate Audit Plan IDs, should multiple audit plans be created and submitted at the same time (or within seconds of one another).
- Save Form: This button allows users to save the form.
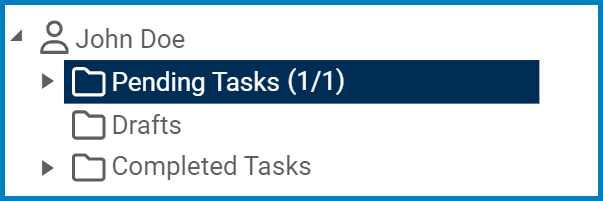
- If saved, this form can be found in the Drafts folder (shown in the image below).
- A saved form can be found in the Drafts folder if it is the first step in a given workflow. If it is a task assigned in the middle of a workflow, the saved form will remain in the Pending Tasks folder.
![]()
- A saved form can be found in the Drafts folder if it is the first step in a given workflow. If it is a task assigned in the middle of a workflow, the saved form will remain in the Pending Tasks folder.
- If saved, this form can be found in the Drafts folder (shown in the image below).
Post your comment on this topic.