
In this section, users can create new requirements.
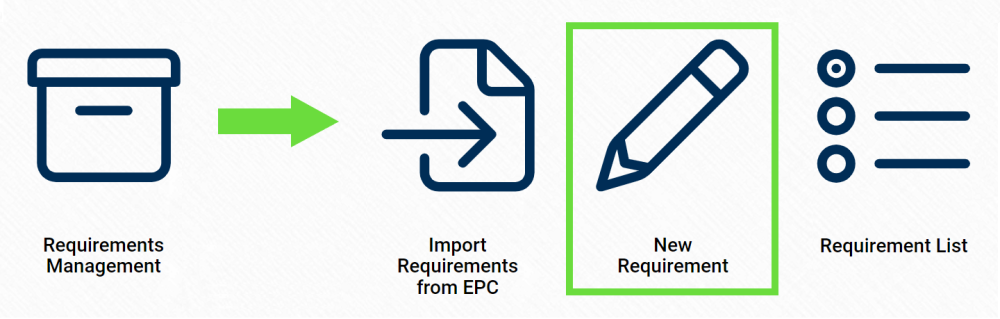
Defining Requirements
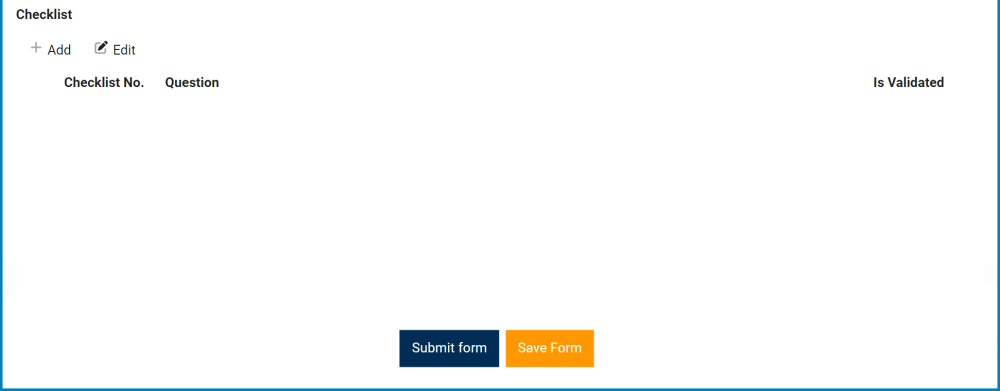
Although its specific features will be delved into below, the grid in the Check List section of this form essentially functions the same as any editable grid control—that is, one with Add/Edit functions. For more details on this type of grid and its features, click here.
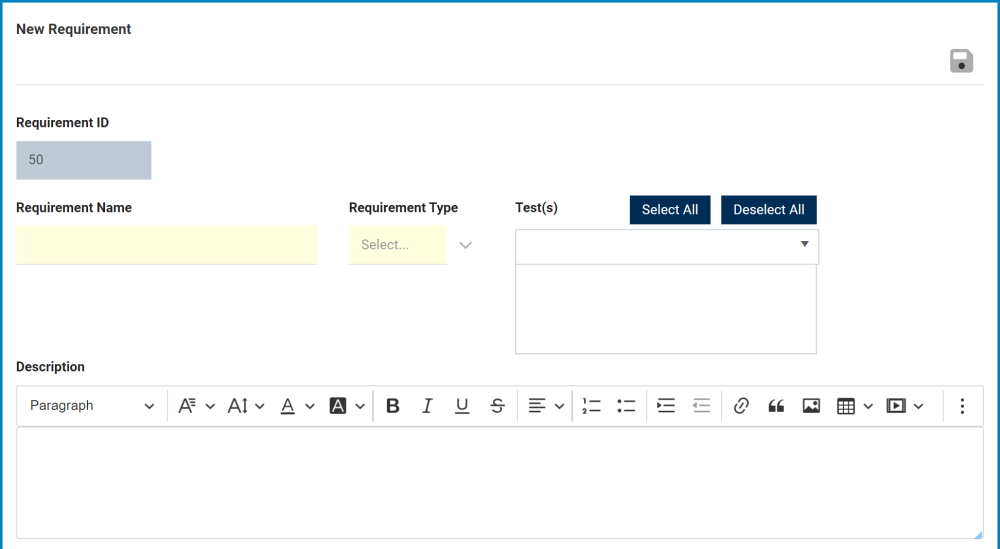
- Requirement ID: This field is automatically populated with the requirement number whenever a new requirement is defined. Users cannot modify the field.
- Requirement Name: This is a text field that allows users to input the name of the requirement. It is a mandatory field.
- Requirement Type: This is a single-select dropdown field that displays the list of requirement types. It is a mandatory field.
- Requirement Types: Audit, Inspection, or Both.
- Test(s): This is a multi-select dropdown field that retrieves the list of predefined tests (from the Test List). Any tests selected will be linked to the requirement.
- Tests are created in the New Test section of the Tests Management application.
- Description: This is a rich text field that allows users to input a description of the requirement.
- For more details on this field, click here.
- Add: This button allows users to add a requirement checklist item.
- If selected, it will open a pop-up window with the form Define Requirement Check Item.
- Edit: This button allows users to edit a requirement checklist item.
- To edit, select the desired item from the grid and click on the Edit button.
- To save your changes, click on the Apply button at the bottom of the form.
- To edit, select the desired item from the grid and click on the Edit button.
- Submit Form: This button allows users to submit the form.
- Save Form: This button allows users to save the form. It will remain in the Drafts folder.
Post your comment on this topic.