
In this section of the New Test form, users can assign evidence to the test.
Under the Evidence tab, there are two subtabs to consider: (1) Select Evidence and (2) Evidence Selected.
1. Select Evidence
In this tab, users can select the evidence that they would like to assign to the test.
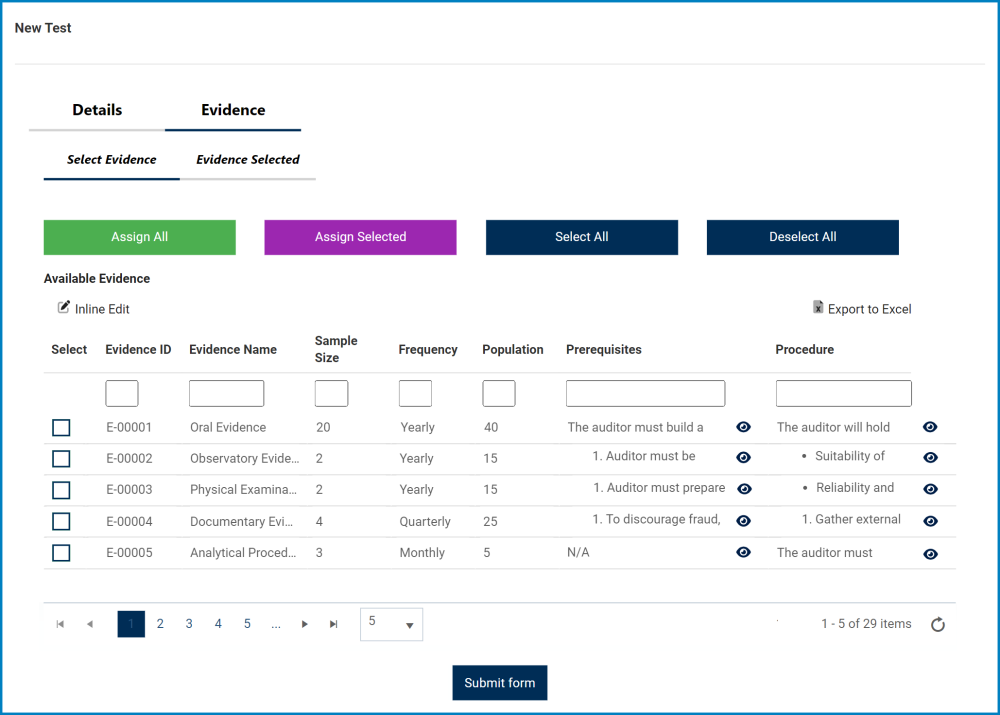
- Assign All: This button allows users to assign all evidence requests to the test.
- If this button is selected, all evidence requests will populate the grid inside the Selected Evidence tab.
- Assign Selected: This button allows users to assign selected evidence requests to the test.
- If this button is selected, only selected evidence requests will populate the grid inside the Selected Evidence tab.
- Select All: This button allows users to select all evidence requests in the Available Evidence grid.
- Deselect All: This button allows users to deselect all evidence requests in the Available Evidence grid.
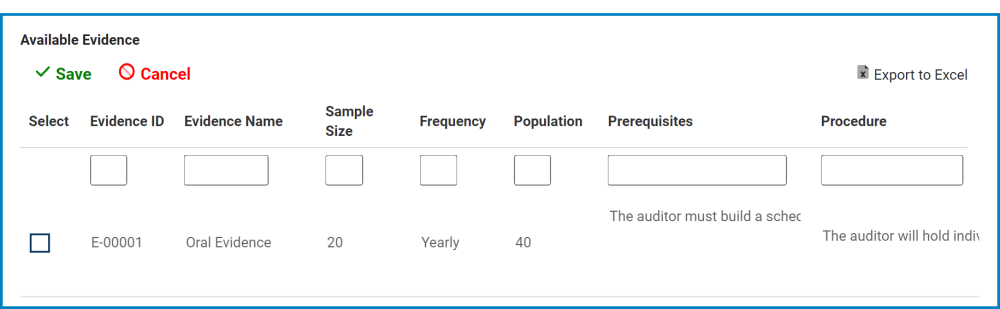
- Inline Edit: This button allows users to edit inside the Available Evidence grid. Here, it specifically allows users to manually select/deselect the Select checkbox.
- To edit inline, select the desired evidence request from the grid and click on the Inline Edit button. (Users can also just double-click on the evidence request).
![]()
- Click on either the Save button to save your changes or the Cancel button to cancel them.
- To edit inline, select the desired evidence request from the grid and click on the Inline Edit button. (Users can also just double-click on the evidence request).
- Export to Excel: This button allows users to export the Available Evidence grid to Excel.
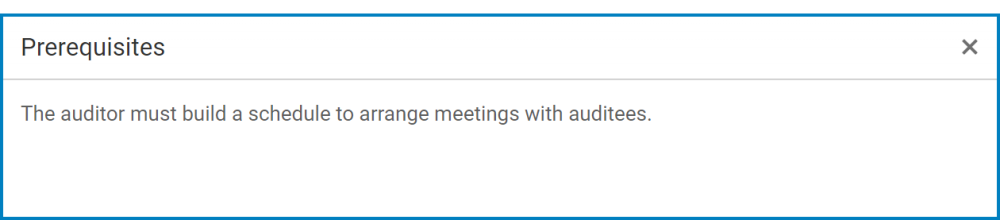
![]() : These buttons allow users to view the full contents of the evidence collection prerequisites and procedure.
: These buttons allow users to view the full contents of the evidence collection prerequisites and procedure.
- If selected, it will open a pop-up window with the information.
![]()
- If selected, it will open a pop-up window with the information.
- Submit: This button allows users to submit the form.
- Once submitted, the test will populate the Test List.
2. Selected Evidence
In this tab, users can access the list of selected evidence that has been assigned to the test.
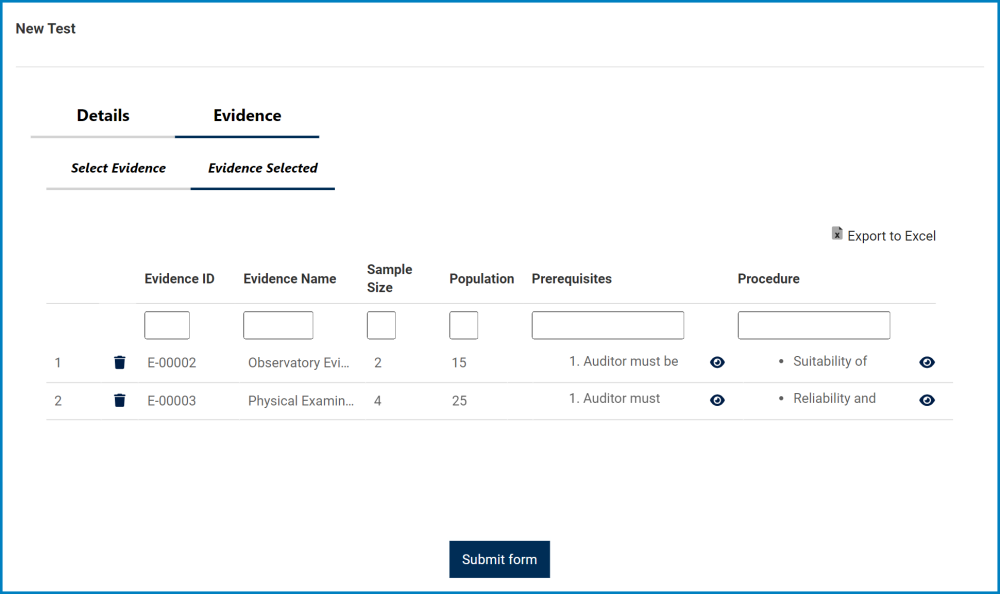
- Export to Excel: This button allows users to export the grid to Excel.
- Delete: This button allows users to delete an assigned evidence request.
- For more details on this function, click here.
![]() : These buttons allow users to view the full contents of the evidence collection prerequisites and procedure.
: These buttons allow users to view the full contents of the evidence collection prerequisites and procedure.
- If selected, it will open a pop-up window with the information.
- Submit: This button allows users to submit the form.
- Once submitted, the test will populate the Test List.
Post your comment on this topic.