
Once the collected evidence has been submitted, the lead evidence collector will receive a notification in their Pending Tasks informing them that they need to review the evidence.

They will also receive an email informing them of the assigned task.
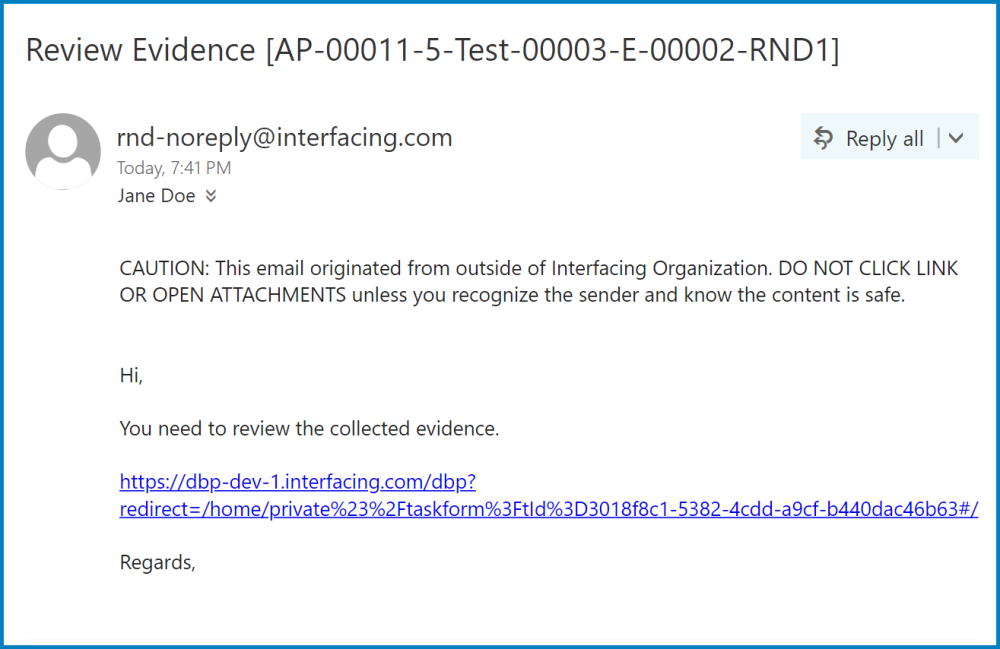
Clicking on either the subject in Pending Tasks or the link in the email will direct the lead evidence collector to the Review Evidences form.
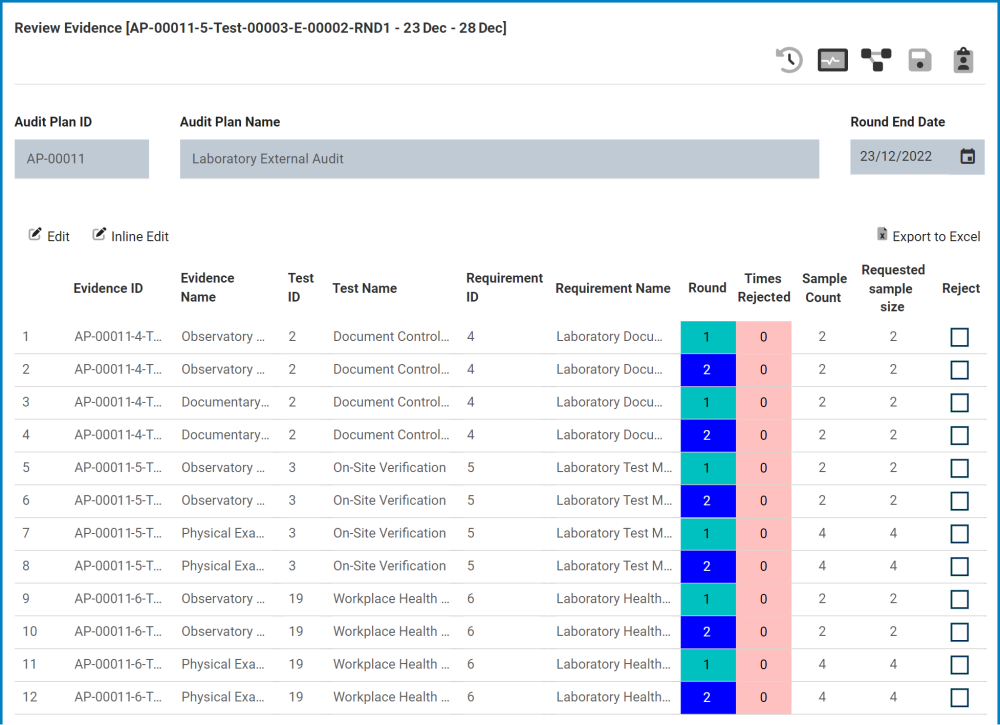
- Edit: This button allows users to individually review the collected evidence.
- To edit/review, select the desired evidence from the grid and click on the Edit button. It will open a pop-up window with the form Review Collected Evidence. Users cannot make any modifications in this form. They can, however, add, edit, and/or reply to comments.
![]()
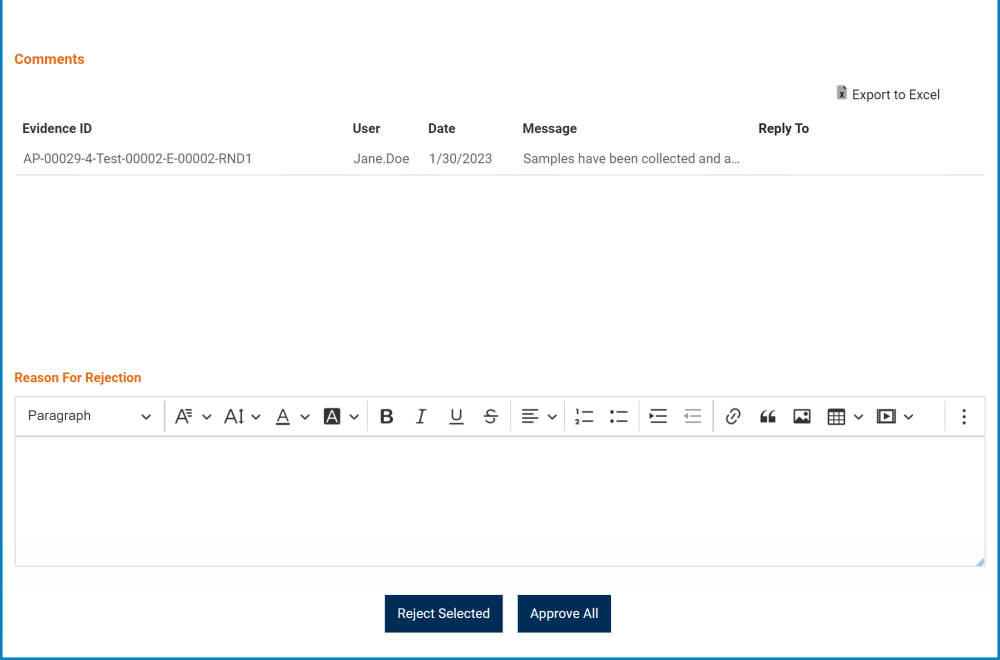
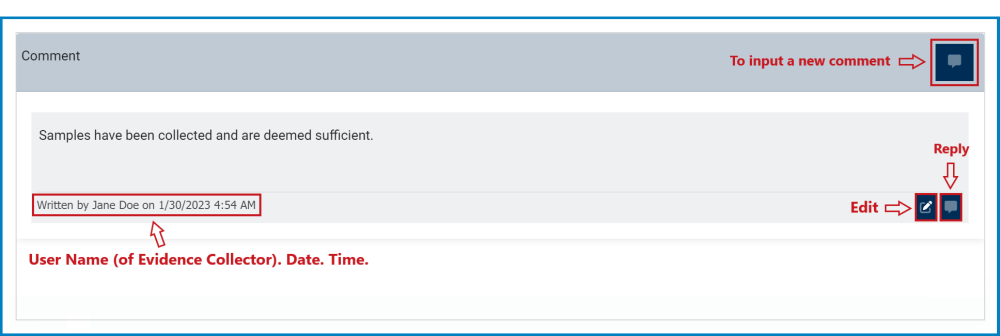
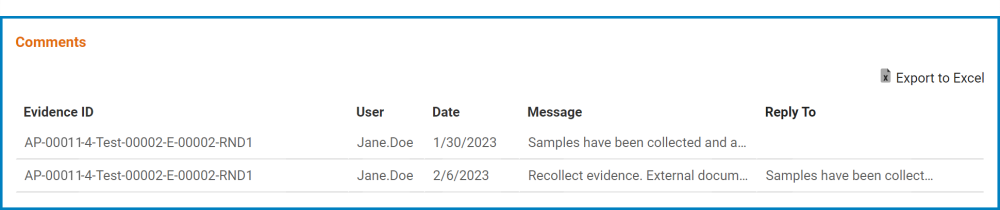
- Comment: This field will contain any comments previously inputted by the evidence collector in the Collect Evidence form. The reviewer can edit or reply to these comments. They can also add new comments.
- Any comments (or replies) inputted in this field will populate the Comments grid in the Review Evidences form.
![]()
- To edit/review, select the desired evidence from the grid and click on the Edit button. It will open a pop-up window with the form Review Collected Evidence. Users cannot make any modifications in this form. They can, however, add, edit, and/or reply to comments.
- Inline Edit: This button allows users to edit inside the Collected Evidence grid. Here, it specifically allows users to manually select/deselect the Reject checkbox.
- To edit inline, select the evidence that you want to edit from the grid and click on the Inline Edit button.
- Click on either the Save button to save your changes or the Cancel button to cancel them.
- Export to Excel: This button allows users to export the Comments grid to Excel.
- Reason for Rejection: This is a rich text field that allows users to input the reason for the rejection. It is a mandatory field.
- If evidence is rejected, this field will be displayed to the collector in the Collect Evidence form.
- Users cannot reject evidence without providing a reason in this field.
- For more details on this field, click here.
- If evidence is rejected, this field will be displayed to the collector in the Collect Evidence form.
- Reject Selected: This button allows users to reject the selected evidence.
- If clicked on, the evidence collector(s) assigned to the selected evidence will be tasked with re-collecting the evidence.
- They will again receive the Collect Evidence form, but this time the grid will only contain the rejected evidence. (The form will also contain the Reason for Rejection field, with the provided reason.) In the Collect Evidence form for the rejected evidence, the fields will all be populated with previously inputted information. Users can still make modifications where applicable.
- Once evidence has been re-collected, it will be sent back for review.
- If upon review, all evidence is approved, the Collect Evidence workflow will end.
- If upon review, evidence is rejected, this process will repeat.
- If clicked on, the evidence collector(s) assigned to the selected evidence will be tasked with re-collecting the evidence.
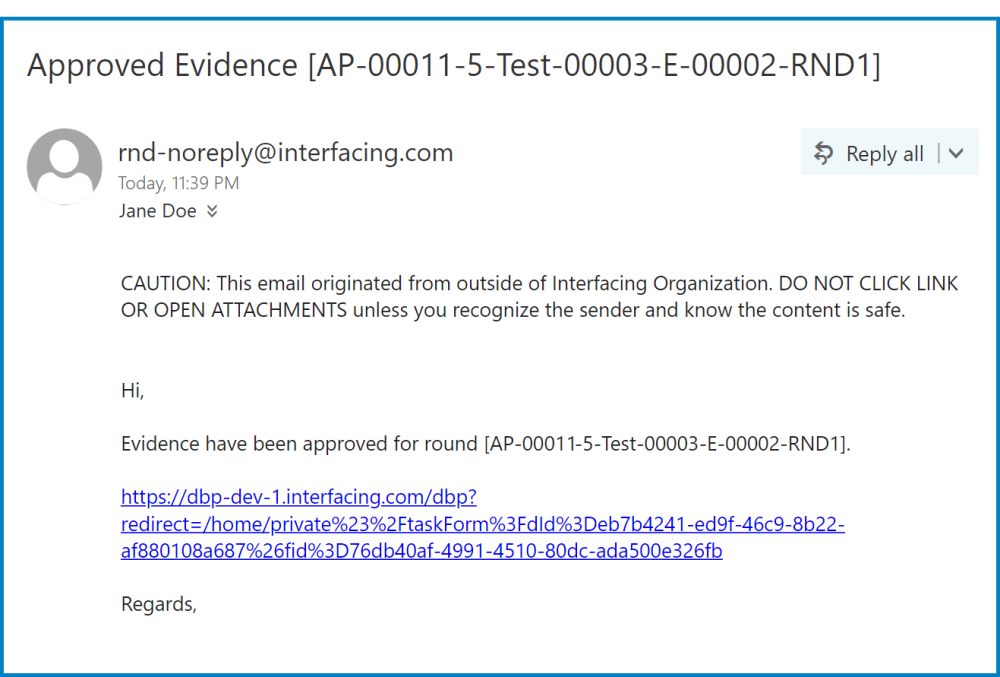
- Approve All: This button allows users to approve all collected evidence.
- If selected, the Collect Evidence workflow will end.
- The assigned evidence collector(s) will be notified of the approval via email.
![]()
- The assigned evidence collector(s) will be notified of the approval via email.
- Once all collected evidence has been reviewed and approved, it will populate the Collected Samples grid in the Test Results form.
- If selected, the Collect Evidence workflow will end.
Post your comment on this topic.