
If the Edit button is selected in the Execute Audit form, it will open a pop-up window with the Conduct Requirement Result form. This form can be divided into seven sections: (1) Requirement Details, (2) Results for This Requirement, (3) Document Requests, (4) Tests, (5) Observations/Audit Findings, (6) Checklist, and (7) Requirement is Completed.
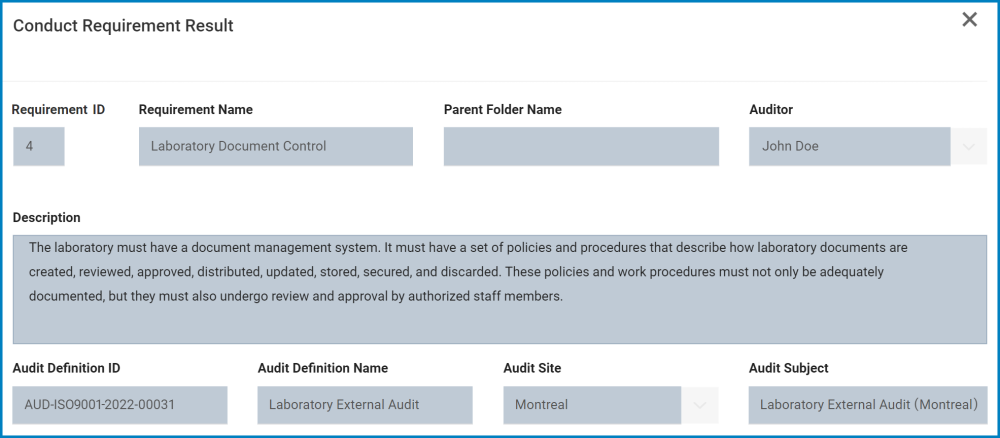
1. Requirement Details
Users cannot make any modifications in this section of the form. It displays details about the requirement and the associated audit definition.
2. Requirement Results

- Documents Round No.: These are attachment fields that allow users to attach documents for each round of evidence collection.
- For more details on these fields, click here.
- If a document is sent (following a document request), it will populate the Documents Round 1 field.
- Round No. Evidence: These fields are automatically populated with the relevant evidence (as provided in the Collect Evidence stage of the workflow).
- Once the evidence for a round has been completed and reviewed, it will populate the appropriate field.
- Evidence, in this context, refers to the content inputted inside the URL & Description field in the Collect Evidence form.
- Once the evidence for a round has been completed and reviewed, it will populate the appropriate field.
3. Document Request
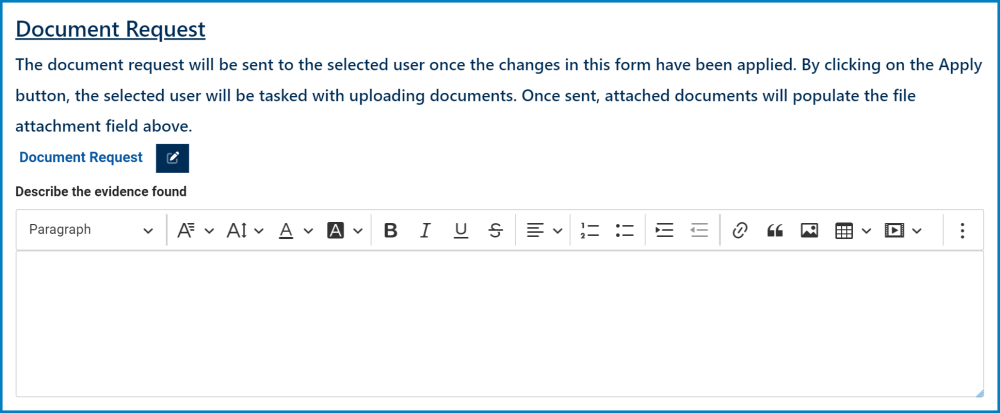
- Document Request: This field allows users to issue a document request.
- To issue a document request, select the
![]() icon. It will open a pop-up window with the form Issue Document Request.
icon. It will open a pop-up window with the form Issue Document Request.
- To issue a document request, select the
- Describe the Evidence Found: This is a rich text field that allows users to describe the evidence found.
- For more details on this field, click here.
4. Test*
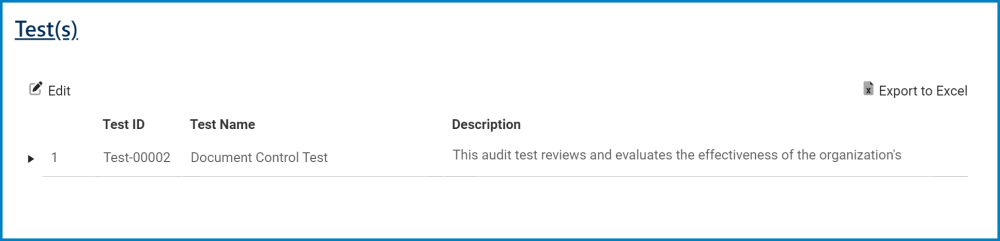
- Edit: This button allows users to access the test results and trigger a third round of evidence collection.
- To use this function, select the desired test from the grid and click on the Edit button. It will open a pop-up window with the form Test Results.
- Accordion Menus: These are menus which, when collapsed, provide users with details about the corresponding test. These details would have been inputted in the New Test form.
- Icon:
![]()
- If selected, it will display the full contents of the test description.
- Icon:
- Export to Excel: This button allows users to export the grid to Excel.
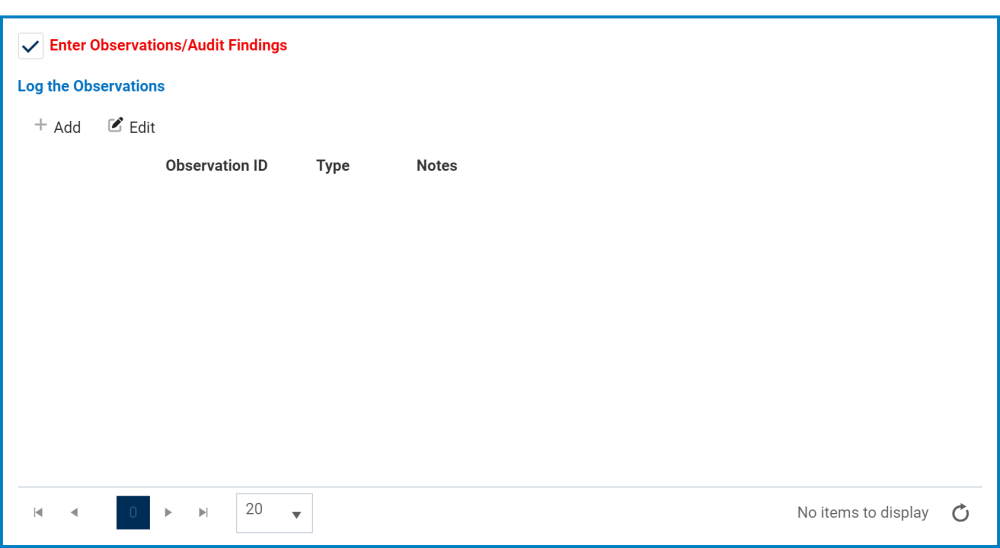
5. Observations/Audit Findings

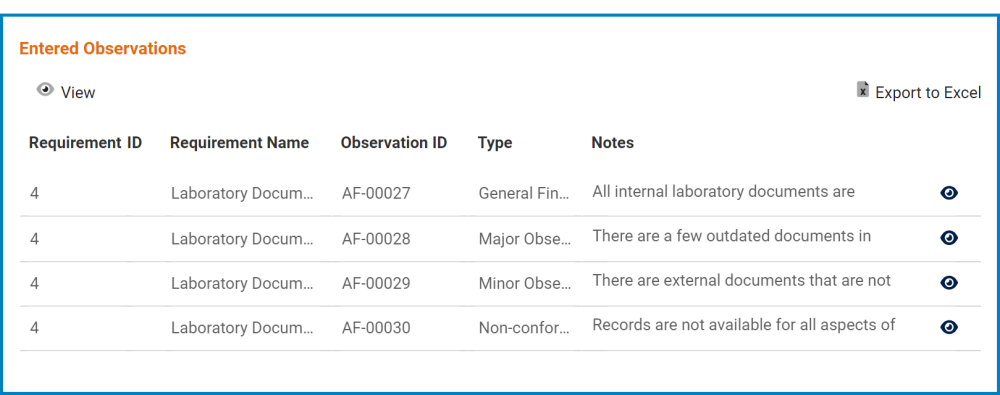
- Observations/Audit Findings: This is a checkbox which, if enabled, allows users to add observations/audit findings to their results.
- If selected, it will display the following grid:
![]()
- If selected, it will display the following grid:
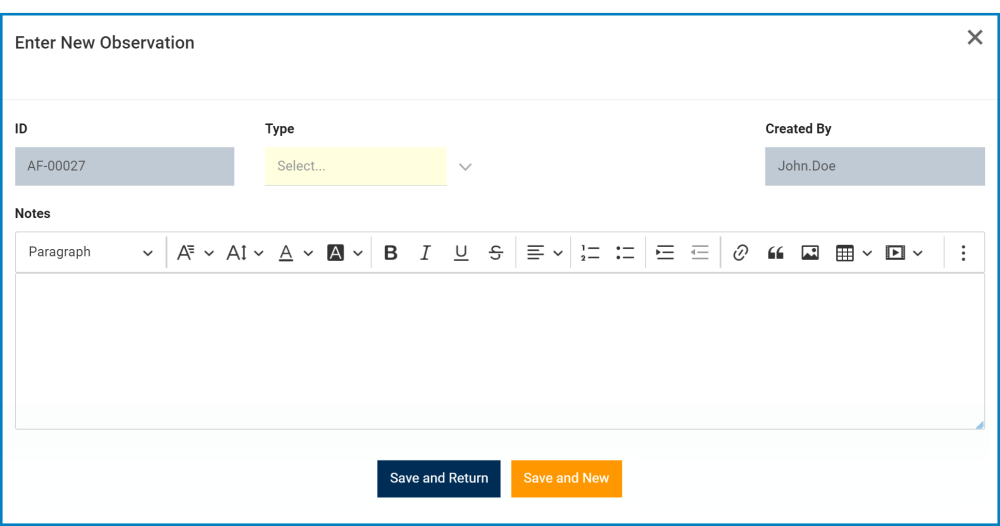
- Add: This button allows users to add a new result.
- If selected, it will open a pop-up window with the following form:
![]()
- ID: This field is automatically populated with the unique ID of the audit finding.
- Type: This is a single-select dropdown field that displays the list of result types. It allows users to select only one value at a time from the dropdown. It is a mandatory field.
- Description: This is a rich text field that allows users to input details about the result.
- For more details on this field, click here.
- Save and Return: This button allows users to save the result and return to the Requirement Conduct Result form.
- Save and New: This button allows users to save the result and open a new form to create another result
- Any results added in this section will populate the Entered Observations grid in the Execute Audit form.
![]()
- If selected, it will open a pop-up window with the following form:
- Edit: This button allows users to edit an existing result.
- To edit, select the result that you want to edit from the grid and click on the Edit button. It will open a pop-up window with the form Edit the Result.
- To save your changes, click on the Apply button at the bottom of the form.
- Delete: Once a result has been added and saved, this button allows users to delete it from the grid.
- For more details on this function, click here.
6. Requirement Checklist*
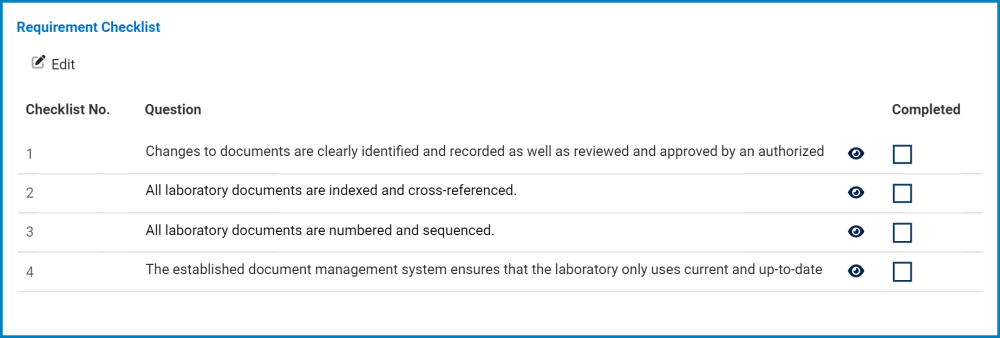
- Edit: This button allows users to input the conduct of the audit checklist item.
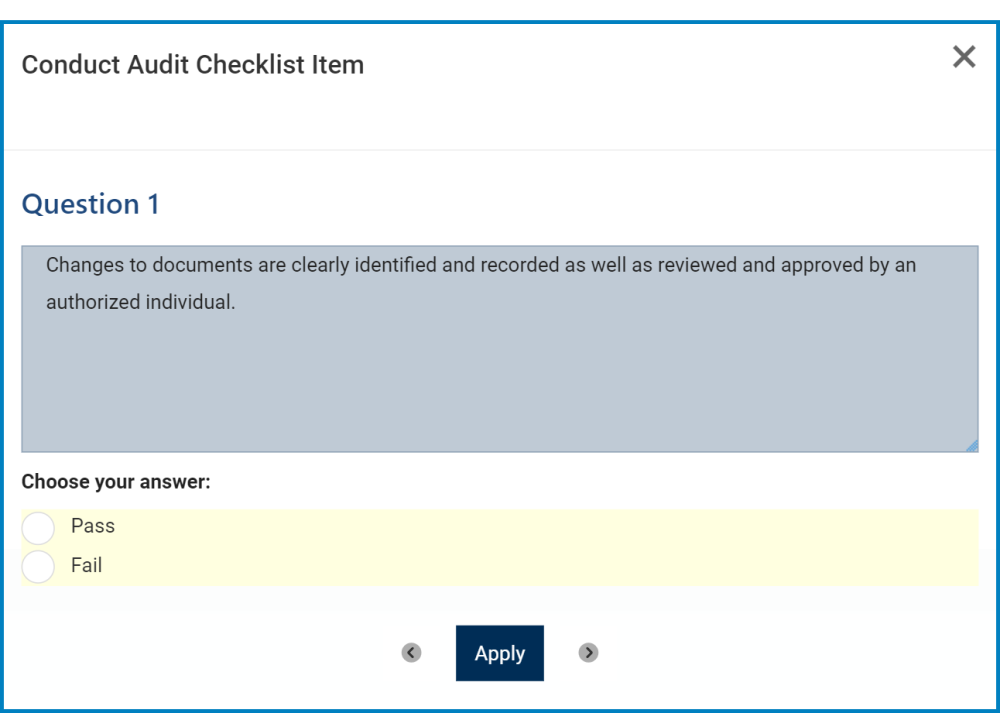
- To use this function, select the desired checklist item from the grid and click on the Edit button. It will open a pop-up window with the form Conduct Audit Checklist Item.
![]()
- Choose Your Answer: This is a radio button that allows users to select only one option from a set of mutually exclusive options.
- The answer options displayed in this form will depend on the answer type selected in the Define Requirement Check Item form.
- Choose Your Answer: This is a radio button that allows users to select only one option from a set of mutually exclusive options.
- Apply: This button allows users to save their answer and return to the checklist.
- Users can navigate between different checklist items by using the arrows on either side of the Apply button.
- To use this function, select the desired checklist item from the grid and click on the Edit button. It will open a pop-up window with the form Conduct Audit Checklist Item.
![]() : These buttons allow users to view the full contents of the checklist item.
: These buttons allow users to view the full contents of the checklist item.
- If selected, it will open a pop-up window with the information.
7. Requirement is Completed

- This Requirement is Completed: This is a checkbox which, if enabled, allows users to mark out the requirement as completed.
8. Apply
At the bottom of the Requirement Conduct Result form, there is the following button:

- Apply: This button allows users to save their work and return to the Execute Audit form.
Post your comment on this topic.