
Each user has their own code they work with that is regulated by internal Git repository, so if one user test does any type of modification to the code and doesn’t ‘push it’ then other users will not see his changes. This is done so when a user works on their code, they are not concerned that they will interfere with other users code and executions and only push when they feel confident to do so. User also has an option when to Pull the code from main branch that was pushed by other users. at statement in the log when this action code is used.
Pushing/Pulling code
- After user modifies the code they would need to Push it in order for other users to get it. After they click on Push button an option will appear where user can select the files they wish to push and provide commit notes to specify the changes they have made to trunk.
- If user wants to receive latest code changes from trunk they need to click on Pull button which will fetch all latest changes.
Version Control
By expanding lower portion of Scripts screen you’ll be able to select Version Control option and see all the previous commits that have been done to the currently opened file. Clicking on the icon on the last column to the right will open the comparison diff between your current file and the one for that version.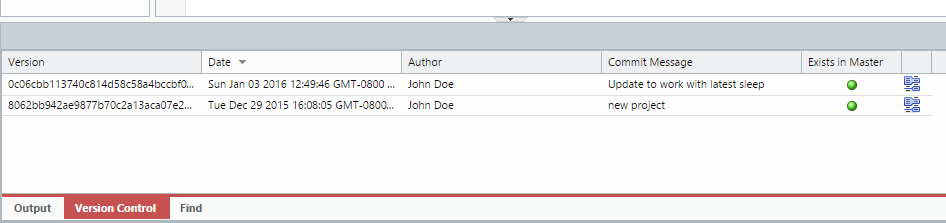
Accessing Git directly
You can access Git interface directly by going to: \vendor\Git and running bash git utility from there. Now you can access any projects and users git repository in RedwoodHQ and be able to run any additional commands or resolve any potential issues. Location example of admin user git repository in sample project: \public\automationscripts\Sample\admin
External Repository
You can setup the external repository (eg: Github) so that all the code will be committed there rather than RedwoodHQ internal one. Here is how to set it up:
- Make sure all code is checked in (pushed) and pulled by all users in RedwoodHQ
- Go to project settings, click on “Use External Repo” check box and type in full URL of the remote repo, click Submit
- Click on user name in right top corner and select “SSH Key” menu item
- Copy that SSH key and add it in your remote repo
- Click on “Enable Remote Repo” and wait while your code is being pushed to remote repo
- Your remote repo will now have a branch that corresponds to your user name. Use that branch to create master branch on remote repo (eg: Github).
- Now all of your users will need to go through process of adding their SSH keys to the remote repo.
- All code that is pushed will be pushed to your personal branch all code that is pulled will be pulled from master on remote repo, it is your responsibility to create
Post your comment on this topic.