
PriApps makes it very easy to add entries automatically, such as users and printers. However where entries need to be manually added, deleted or editing, the following guidelines apply throughout the PriApps Admin UI.

Add an Entry
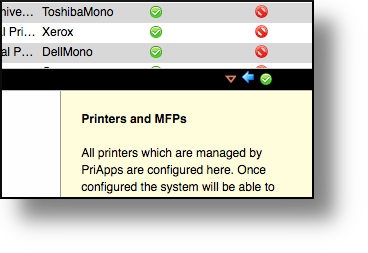
To add an entry, click on the ADD button ( ![]() ) on the right-hand side of the screen.
) on the right-hand side of the screen.
To cancel changes, select the Back button ( ![]() ) on the right-hand side of the screen
) on the right-hand side of the screen
Once completed, select the Save / Confirm button ( ![]() ) on the right-hand side of the screen to save all details.
) on the right-hand side of the screen to save all details.
Delete an Entry
To delete an entry, click on the Delete button ( ![]() ) on the right-hand side of the screen.
) on the right-hand side of the screen.
Edit an Entry
To edit an entry, click on the Edit button ( ![]() ) on the right-hand side of the screen.
) on the right-hand side of the screen.
To cancel changes, select the Back button ( ![]() ) on the right-hand side of the screen
) on the right-hand side of the screen
Once completed, select the Save / Confirm button ( ![]() ) on the right-hand side of the screen to save all changes.
) on the right-hand side of the screen to save all changes.
Need more help with this?
Contact PriApps Support