
Once action items have been selected and triggered in the Execute Independent Action Item form, the owners of each triggered action will receive a notification in their Pending Tasks informing them that they need to execute the independent action item.
- Owner = the user assigned as owner in the Define an Action Item form.
- If the same user has been assigned as owner for multiple action items, they will receive separate notifications for each action.

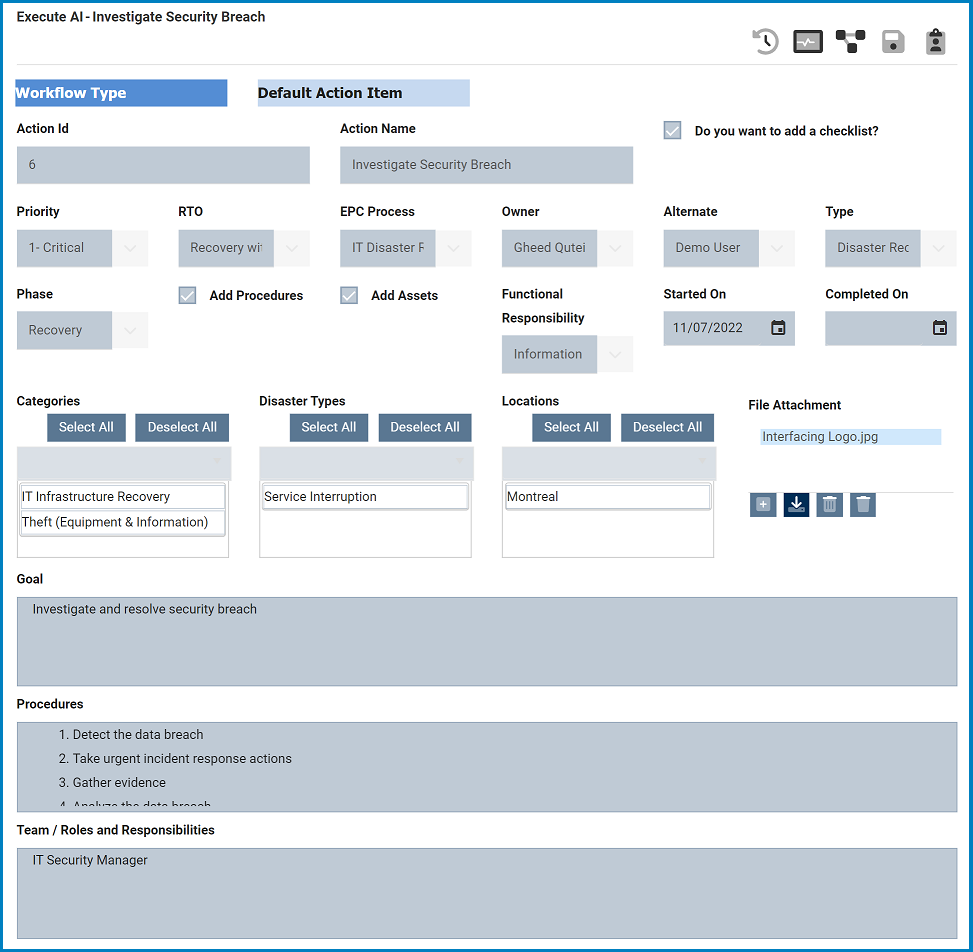
Clicking on the subject in Pending Tasks should direct the user to the Execute AI form. This form can be divided into 4 main sections: (1) Action Item Details, (2) Action Item Result, (3) Assets, and (4) Check List Result.
- Action Item Details
Users cannot make any direct modification in this section of the form. They can, however, download any attached files.
- Action Item Result
In this section, users can input the results of the action item.
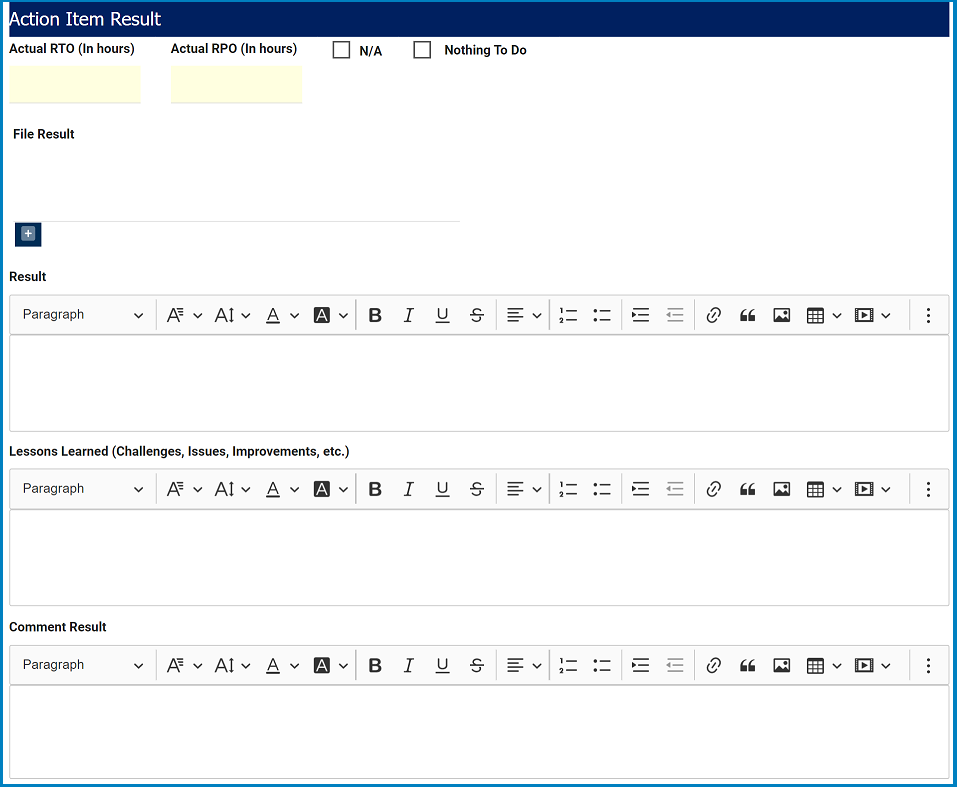
- Actual RTO (in hours): This is a numeric field that allows users to input the actual recovery time objective (RTO)—as opposed to the RTO estimated prior to the execution. It is a mandatory field
- Actual RPO (in hours): This is a numeric field that allows users to input the actual recovery point objective (RPO)—as opposed to the RPO estimated prior to the execution. It is a mandatory field.
- N/A: This is a checkbox which, if enabled, allows users to mark out that the RTO and RPO do not apply to the results obtained.
- Nothing To Do: This is a checkbox which, if enabled, allows users to mark out that there was nothing to do for this action item.
- File Result: This is an attachment field that allows users to attach files relevant to action item results. Users can attach up to 2 GB worth of data.
- To attach a file, click on the Add button [+]. A pop-up window will appear with the following buttons:
![]()
- Using these buttons, users can add files, upload them either individually or all at once, or cancel the upload.
- Once the files have been uploaded, users can download them, deleted selected ones, or delete them all.
![]()
- To attach a file, click on the Add button [+]. A pop-up window will appear with the following buttons:
- Result: This is a description box that allows users to input the result of the action item. In this field users can insert headings, bullets, images, tables, links, and media files (as well as change font colors, font sizes, background colors and more). It is a mandatory field.
- Lessons Learned: This is a description box that allows users to input the lessons learned during the execution process—that is, any challenges/issues faced, any improvements that could be implemented in the future, etc. In this field users can insert headings, bullets, images, tables, links, and media files (as well as change font colors, font sizes, background colors and more). It is a mandatory field.
- Comment Result: This is a description box that allows users to input any comments relating to the results. In this field users can insert headings, bullets, images, tables, links, and media files (as well as change font colors, font sizes, background colors and more).


- Assets
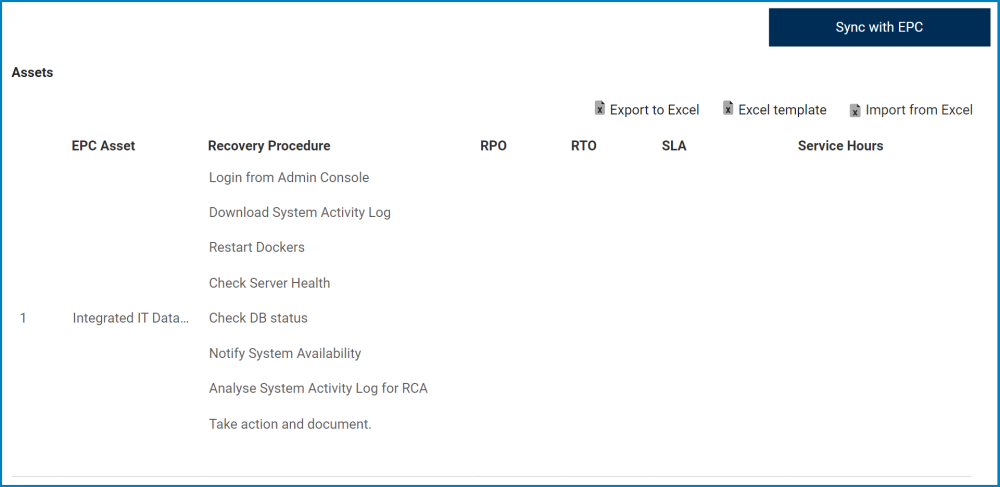
- Sync with EPC: This button allows users to synchronize with EPC. Once selected, the data stored in EPC will be synced with the data that is retrieved and displayed on this page.
- Export to Excel: This button allows users to export selected columns from the grid to Excel.
- Excel Template: This button allows users to generate an Excel template of the grid.
- Import from Excel: This button allows users to import data (inside columns) from an Excel sheet into the grid.
- Check List Result
In this section, users can the final status for each checklist item.
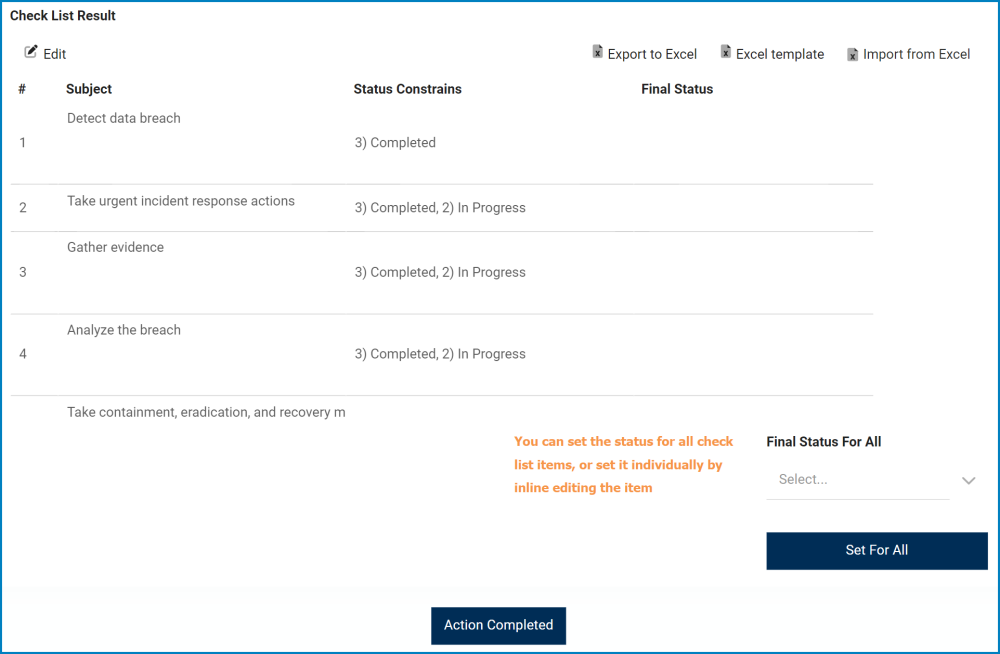
- Edit: This button allows users to edit the final status for a checklist item.
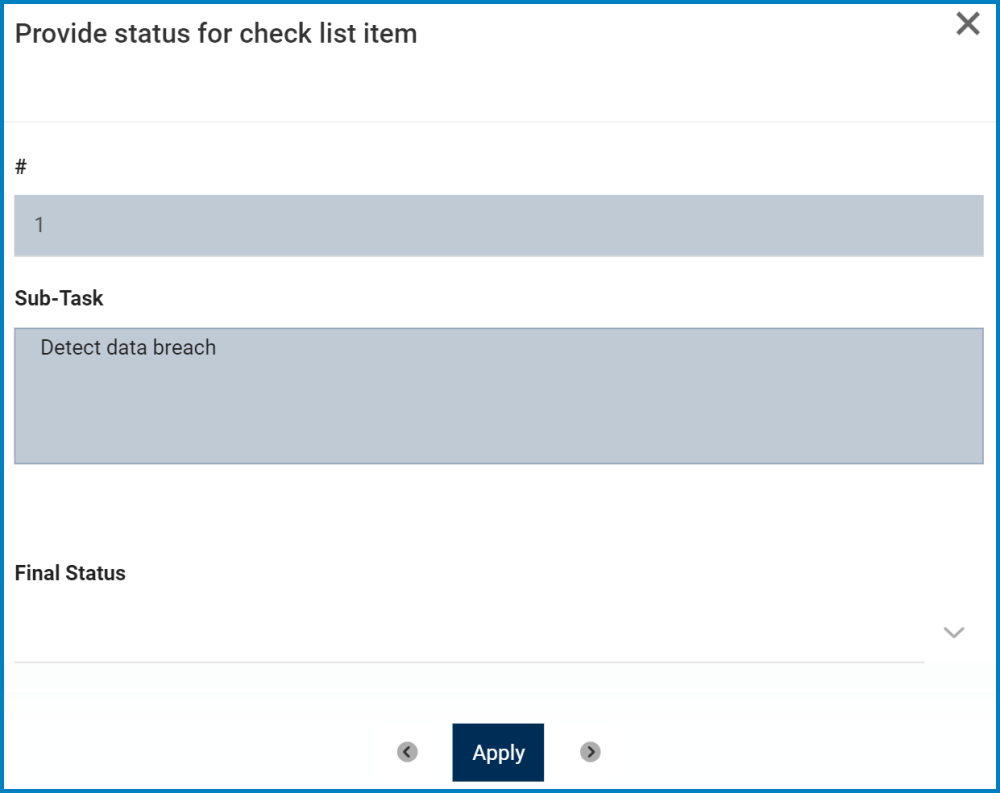
- To edit, select the final status that you want to edit from the grid and click on the Edit button. It will open in a pop-up window the form Provide Status for Check List Item.
![]()
- Final Status: This is a single-select dropdown field that displays the list of final statuses. It allows users to select only one value from the dropdown.
- Apply: This button allows users to save the status.
- Users can navigate between different checklist items by using the arrows on either side of the Apply button.
- To edit, select the final status that you want to edit from the grid and click on the Edit button. It will open in a pop-up window the form Provide Status for Check List Item.
- Export to Excel: This button allows users to export selected columns from the grid to Excel.
- Excel Template: This button allows users to generate an Excel template of the grid.
- Import from Excel: This button allows users to import data (inside columns) from an Excel sheet into the grid.
- Final Status For All: This is a single-select dropdown field that displays the list of final statuses. It allows users to select only one value from the dropdown.
- Set for All: This button allows users to set the same final status for all checklist items.
- If selected, the final statuses displayed in the grid will all automatically update to the status selected.
- Action Completed: This button allows users to complete the action.
- If a checklist was added to the action item, users will not be able to complete the action until their final statuses meet the status constraint requirements.
- For example, if the status constraints for a checklist item are “In Progress” or “Completed,” the user will not be able to complete the action until their final status for the item is either “In Progress” or “Completed.”
- If a checklist was added to the action item, users will not be able to complete the action until their final statuses meet the status constraint requirements.
Post your comment on this topic.