
The BC & DR Actions tab contains a grid that organizes action items by their level of priority, ID, name, category, EPC process, owner, and alternate. It is based on the criteria used when defining an action item in the Action Items Management section.
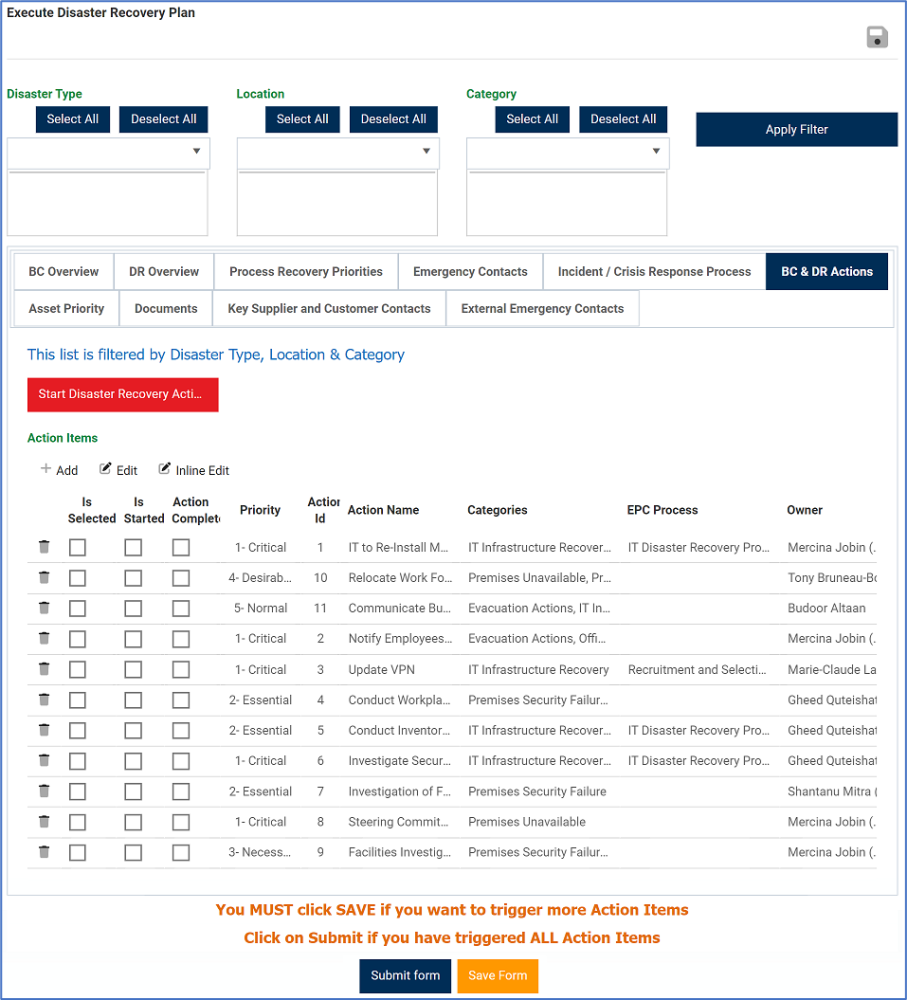
- Start Disaster Recovery Action Items: This button allows users to trigger the execution of the selected action items.
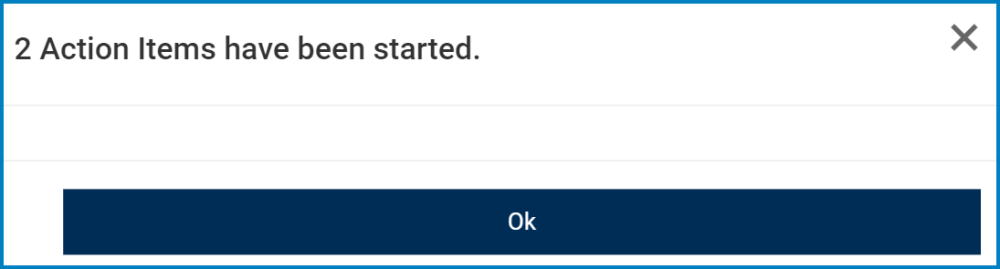
- If selected, it will open a pop-up window containing a message of the following nature (depending on the number of action items selected):
![]()
- Once the OK button has been selected, the Is Started checkbox for those action items will be enabled in the grid.
![]()
- Once the OK button has been selected, the Is Started checkbox for those action items will be enabled in the grid.
- If users have selected all the action items that need to be executed, they should click on the OK button and then submit the form.
- If users have more action items that they will later want to trigger for execution, they should click on the OK button and then save the form.
- If selected, it will open a pop-up window containing a message of the following nature (depending on the number of action items selected):
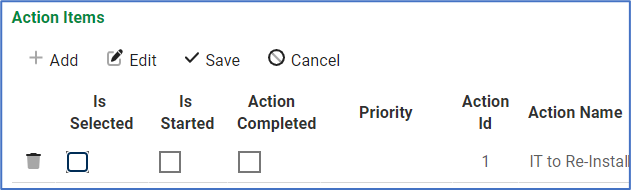
- Add: This button allows users to add a new action item.
- If selected, it will open a pop-up window with the form DR Execute – New Action Item.
- Apart from the Simulation label at the top and the Action ID being a text field, this form is a duplicate of the Define an Action Item form.
- The Action ID is an auto-generated field in the Define an Action Item form.
- Edit: This button allows users to edit an existing action item.
- To edit, select the action item that you want to edit from the grid and click on the Edit button. To save your changes, click on the Apply button at the bottom of the form.
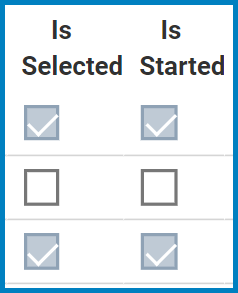
- Inline Edit: This button allows users to edit inside the action items grid. Here, it specifically allows users to manually select/deselect the Is Selected checkbox.
![]()
- Is Selected: This is a checkbox which, if enabled, allows users to select the action item for execution—meaning that the action item will be triggered once the Start Disaster Recovery Action Items button is clicked on.
- Save: This button allows users to save their selection.
- Cancel: This button allows users to cancel their selection.
- Submit Form: This button allows users to submit the form.
- Users should only submit the form if they have selected and triggered all of the action items that need to be executed.
- For details on the next steps of the workflow, click here.
- Users should only submit the form if they have selected and triggered all of the action items that need to be executed.
- Save Form: This button allows users to save the form.
- Users should only save the form if they have more action items that will later need to be triggered for execution.
- For details on the next steps of the workflow, click here.
- If saved, this form can be found in the Drafts tab (under Pending Tasks).
- Users should only save the form if they have more action items that will later need to be triggered for execution.
Post your comment on this topic.