
 TV Damage is available in the VFX: Damage Pack.
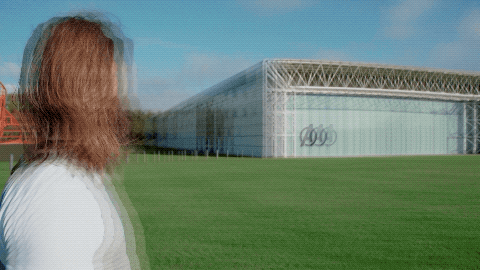
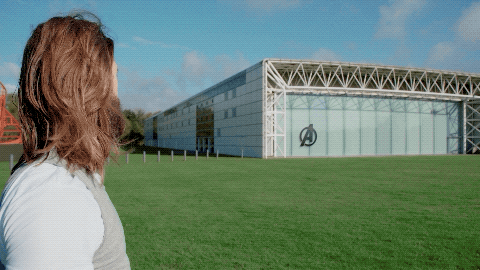
TV Damage simulates the appearance of a badly tuned television signal. It combines multiple elements to create the final effect, and each element can be customized individually to create the exact look you want.
- Seed: Randomizes the specific frames which are affected by the various elements of the TV Damage effect.
Ghosting
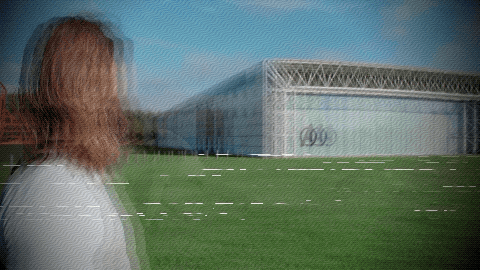
Ghosting is a duplication of the image, with the duplicate(s) being offset from the original. The most common cause is a television signal reaching the antenna from several different paths, with slightly different timing, so multiple frames are displayed simultaneously. Here is the sample footage with only the ghosting component applied.
- Enabled: Toggles the ghosting component on or off.
- Number of Ghosts: Defines the number of duplicate images which will be generated.
- Separation: Sets the distance, in pixels, between each ghost, or duplicate.
- Falloff: Increasing the falloff moves the ghosts back to the correct position. At 0.00, the ghosts will be separated by the Separation value defined above. At 1.00, they will be perfectly aligned with the original. Keyframing this value allows you to naturally animate the appearance or disappearance of the ghosting component.
Co-Channel Interference
Co-Channel interference, also known as crosstalk, occurs when two channels are being received at the same time. It blends a second image onto your primary image. Here is the co-channel interference from the sample footage, isolated from the main footage:
- Enabled: Toggles the co-channel interference component on or off.
- Source: Choose another timeline layer to be the source of the interference.
- Intensity: Adjusts the balance between the primary image, and the interference image. 0.00 shows only the original image, and 1.00 shown only the interference image.
Offset
Use these controls to change the positioning of the interference image.
- Position: Sets the location for the center of the interference image, using X (horizontal) and Y (vertical) values.
- Use Layer: Select another layer from the timeline using, to use the selected layer’s position to control the position of the interference image. When a layer is selected, the Position property above functions as an offset from the parent layer’s position.
Movement
The movement controls apply automated animation to the position of the interference image.
- X: Set the distance, in pixels, which the interference image will move horizontally per second.
- Y: Set the distance, in pixels, which the interference image will move vertically per second.
Gap
controls the size of the gap between duplicates of the interference image, when the Offset or Movement properties are set to values which reveal the edges of the image.
- X: Set the width, in pixels, of the gap between each horizontal copy of the interference image.
- Y: Set the height, in pixels, of the gap between each vertical copy of the interference image.
Radio Interference
This component simulates the negative impact on your image quality of a radio signal which is overlapping the frequency of the television signal. Generally the affect presents as squiggly lines which break up the image. Here is the radio interference component from our sample footage:

- Enabled: Toggles the radio interference component on or off.
- Intensity: Controls how visible the interference lines are.
- Angle: The angle selected here will be perpendicular to the squiggly lines.
- Scale: Adjust the overall size of the lines which make up the interference.
- Frequency: Sets the width of each wave, or squiggle. Higher values increase the number of squiggles in each line.
- Amplitude: Sets the height of each squiggle. Lower values result in relatively straight lines, while higher values increase the distortion of the lines.
- Sharpness: Adjusts how crisp the edges of each line are.
Motion
- Angle: Select the direction in which the radio interference lines will move.
- Speed: Set the speed, in pixels per second, at which the radio interference lines will move.
Vertical Hold
Analog television signals sometimes needed to be manually adjusted for accurate alignment. When vertical hold lost synchronization, the image would consistently or intermittently scroll upwards or downwards. Here is the sample footage with only the vertical hold component applied:

- Enabled: Toggles the vertical hold component on or off.
- Frequency: Adjusts how often the vertical hold is lost, causing the image to shift vertically.
- Regularity: Controls how consistently the vertical position of the image is shifted. Lower values give more random results.
- Gap: Determines the size of the gap between each copy of the image.
- Blur: Applies motion blur to the image, based on how quickly it is moving on each frame.
Horizontal Hold
When horizontal hold lost synchronization on an analog television signal, each line of resolution could become shifted sideways, causing vertical edges within the image to become ragged. Here is the sample footage with only the horizontal hold component applied:
- Enabled: Toggles the horizontal hold component on or off.
- Frequency: Adjusts how often the horizontal hold is lost.
- Amplitude: Controls how far the lines may be shifted sideways.
- Regularity: Controls how consistently the horizontal position of the image is shifted. Lower values give more random results.
Electrical Interference
Electrical interference can be caused by any electromagnetic source near the television receiver. It presents as horizontal lines of noise over the image. Here is the electrical interference component from our sample footage, isolated over a black background:

- Enabled: Toggles the electrical interference component on or off.
- Quantity: Determines the number of lines which are present.
- Width: Controls the thickness of the individual lines.
- Color: Choose a color for the lines. White is the default, and most common. You can use the eyedropper to choose a color from the layer, or click the swatch to open a color picker and choose any color you prefer. You can also manually enter the color values for the red, green, and blue channels.
Placement
Use these controls to alter the positioning of the electrical interference lines.
- Center: Sets the location for the center of the electrical interference, using X (horizontal) and Y (vertical) values.
- Use Layer: Select another layer from the timeline using, to use the selected layer’s position to control the position of the electrical interference. When a layer is selected, the Position property above functions as an offset from the parent layer’s position.
- Area Width: Defines the percentage of the frame height which will be filled by the electrical interference.
Gaps
The horizontal lines will be broken up by gaps. Use these controls to define how the gaps will appear.
- Amount: Adjusts the ratio of lines to gaps. Higher values increase the amount of gaps.
- Frequency: Changes the overall number of lines and gaps within the frame width.
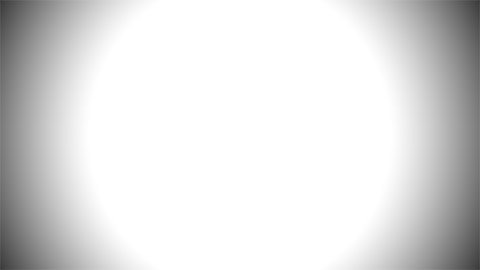
Vignette
Darkens the corners and edges of the frame. Here is the vignette from our sample footage, on its own:
- Enabled: Toggles the vignette component on or off.
- Horizontal Stretch: Adjusts the width of the vignette, relative to the width of the frame.
- Vertical Stretch: Adjusts the height of the vignette, relative to the height of the frame.
- Softness: Adjusts the transition from full brightness to darkened vignette, around the vignette’s edges.
- Curvature: Shifts the weighting of the transition, between the center of frame and the edge of the vignette.
- Opacity: Adjusts the opacity of the layer to which the vignette is applied, for some reason.
Background
These controls adjust the appearance of the vignette itself.
- Opacity: Defines how visible the vignette is. Higher values make the vignette more opaque, lower values make it more transparent.
- Color: Choose a color for the vignette. You can use the eyedropper to choose a color from the layer, or click the swatch to open a color picker and choose any color you prefer. You can also manually enter the color values for the red, green, and blue channels.
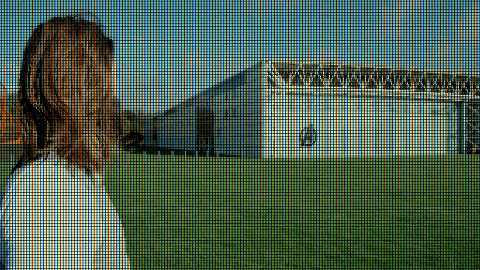
Monitor
The monitor component divides the image into a grid of squares, pixelating the image based on a resolution of your choice. This component was not used in our sample footage, but here is an example applied to the same source:
- Enabled: Toggles the Monitor component on or off.
- Resolution: Controls the number of vertical pixels used to represent the frame. the number of horizontal pixels will be calculated based on the aspect ratio of the frame.
Pixel Component
- Width: Sets the width of each pixel, as a percentage of its available width. At 1.00, each pixel will touch the pixels bordering it on the left and right. At lower values, a gap will be created between the pixels.
- Height: Sets the height of each pixel, as a percentage of its available height. At 1.00, each pixel will touch the pixels bordering it on the top and bottom. At lower values, a gap will be created between the pixels.
- Shift: Each pixel contains red, green, and blue values (RGB) You can offset the color values using these controls.
- Red: Shifts the red value of the pixel. Negative values shift it right, and positive values shift it left.
- Green: Shifts the green value of the pixel. Negative values shift it right, and positive values shift it left.
- Blue: Shifts the blue value of the pixel. Negative values shift it right, and positive values shift it left.