
The Controls panel displays every property and setting for your currently selected layer or clip. The contents of the Controls panel updates for your currently selected timeline item. Some items have more available controls than others. As you add masks and effects to layers the Controls panel will expand and update to show the new information.
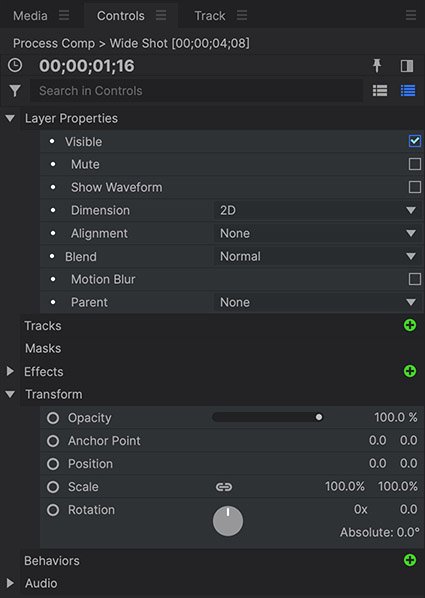
Each customizable entry in the Controls panel is called a property. These are organized into property groups so that you can easily find what you need. For example, the Transform property group is where you’ll find the Position, Scale and Rotation properties.
When you’re working on composite shots, most properties in the Controls panel are also mirrored on the timeline, making it easy to add keyframe animation for properties. However, some effects such as Color Correction Wheels display richer controls in the Controls panel than on the timeline.
The Controls Panel Timeline ![]()

You can also view a timeline within the Controls panel. This is especially useful for viewing keyframes for clips on the Editor timeline. See the Controls Timeline page for full details.
The Controls Panel Selection Lock ![]()

By default the Controls displayed in the controls panel are for the selected clip on the currently displayed timeline. However, the Lock Selection icon allows you to pin the controls for a specific item, so they remain visible in the Controls panel, even when a different clip is selected on the timeline, or a different timeline is displayed in the timeline panel.
To Pin an clip’s controls:
- On the timeline, select the clip whose controls you wish to pin.
- In the Controls Panel, click the Pin at the top right to Lock the Selection.
- The controls for the selected clip will now remain in the Controls panel until the Lock Selection Pin is toggled off. You can select a different clip on the timeline, or switch timeline tabs, to view the controls for other clips on the timeline.
Search Box ![]()

Some layers can contain large numbers of properties, particularly when the layer has many effects applied to it. The Search In Controls box at the top of the Control panel can make it easier to find specific properties for the layer or its effects.
Adjusting Property Values
There are several methods used to adjust values for various properties in HitFilm. You will frequently use direct values, sliders, rotation wheels, check boxes, and combo boxes.
- Direct Values: Most properties will display a numeric value which can be changed directly. Some properties offer only a direct value, while others include interface tools that can be used to change the value, which are discussed further down this page. Values can be changed directly on any property, whether there are interface controls or not, in the following ways.
![]()
- Typing Values: Click the value, and type in a new value. Pressing Enter will confirm your entry and apply the value to that property. Pressing Tab will confirm the value and auto-select the value of the next property in the controls.
- Dragging: Click and hold on the value, and drag to the left or right while keeping the mouse button depressed.
- Inverting: On some properties, holding Ctrl (or Cmd on Mac) and clicking on a positive Transform value will switch it to a negative value and vice versa (eg, -500 will become 500).
- 2D ad 3D: Some properties will function in 2D, and have two values, such as the Position shown above. The first value controls the X axis of the property, which runs from left to right. The second value controls the Y axis, which runs from bottom to top.
![]()
![]()
Other properties, such as the Orientation shown above, will function in 3D, and have three values. In this case, the first two values are the same as the values in the 2D version. The third value controls the Z axis, which runs forward and back, controlling the distance from the audience. Many properties can operate in either 2D or 3D, depending on the Dimension settings of the layer. Converting a 2D layer to 3D will add a third value to some properties. - Sliders: Sliders allow you to change a value by dragging to the left or right.
![]()
Some properties will allow only positive values, while other properties allow positive or negative values. - Rotation Wheels: Some properties are better served by a wheel than a slider. Primarily, this applies to rotational properties, where a wheel gives a more intuitive depiction of the selected angle.
![]()
Click on the wheel and drag around its perimeter to rotate it and change the value. The white handle on the wheel indicates the current angle.- *Rotation Value:*Rotating more than a complete turn is allowed, and the 0x indicator on the value represents the total number of complete rotations. The 0.0 portion indicates the angle in degrees beyond the last complete rotation, and resets to 0 after 360 degrees.
- Absolute Value: The Absolute value shows the total number of degrees represented by the number of rotations and the angle.
- Checkboxes: Check boxes toggle a property on or off.
![]()
They may be on or off by default, depending on the property. A checkmark in the box indicates the property is enabled, or on. - Combo Boxes: For properties that offer a specific list of options, rather than a numeric value, a combo box is used to select the option you need.
![]()
Clicking the triangle on the right side of the property opens the menu.
![]()
After opening the box, click any item in the list of available options to make your selection. - Unique Controls: Certain effects such as Color Correction Wheels or Scopes include unique controls, which are explained further in the Visual Effects pages that apply to those specific effects.


For more information: