
Display
The Display options control how your project is displayed within the HitFilm interface.The options here are defaults which will be used when creating new projects. All settings can be changed at any time within any project, as your workflow requires.
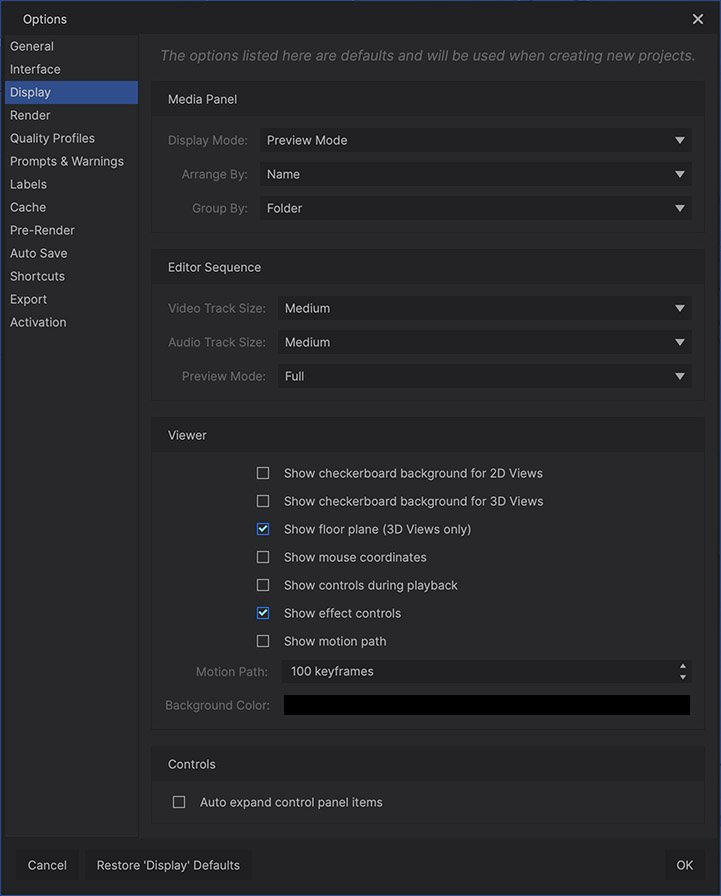
Media Panel
- Display Mode: When media is imported into your project, you can control how it is displayed in the Media panel.
- Preview Mode shows a thumbnail of each item, with the details printed beside it.
- List Mode lists them by name, without a preview image, so you can fit more items into the available space.
- Arrange By: Media can be arranged alphabetically by Name, or grouped together by Type.
- Group By: Your imported assets can grouped by Media, or by Folder.
Editor Sequence
- Video Track Size: Larger track sizes allow for larger thumbnails, so you can more easily see the contents of clips on the timeline. Smaller track sizes allow more tracks to be visible on the timeline at once.
- Audio Track Size: Larger track sizes allow for larger thumbnails, so you can more easily see the contents of clips on the timeline. Smaller track sizes allow more tracks to be visible on the timeline at once.
- Preview Mode: Controls how the contents of video clips are displayed on the timeline.
- None: displays no thumbnail images, and offers the fastest performance.
- Start/End: shows thumbnails only at the first frame and last frame of the clip. This gives you some visual reference of the contents of the clip, with minimal processing to keep performance optimal.
- Full: displays thumbnails throughout the runtime of the video clip. This is the easiest option for clearly seeing what clips you are working on, but can negatively impact performance on some slower systems.
Viewer
- Show Checkerboard Background for 2D Views: By default, a checkerboard pattern is displayed to indicate areas of transparency within the Viewer in 2D composites. You can disable it here if you prefer.
- Show Checkerboard Background for 3D Views: By default, 3D timelines use a black background to indicate areas of transparency within the Viewer. You can enable the checkerboard view here, if you prefer.
- Show Floor Plane (3D Views Only): The floor plane can be useful for visualizing the spacial relationships between objects in 3D space. but if you prefer to disable it, to more clearly see your clips in the viewer, you can disable the floor plane here.
- Show Mouse Coordinates: When enabled, the exact X and Y coordinates of the cursor position within the viewer will be displayed in the bottom right corner of the Viewer.
- Show Controls During Playback: Normally, the controls on the viewer are hidden during playback, so the contents of your project can be viewed without distraction. Enable this option if you want the controls to remain visible.
- Show Effect Controls: Many effects in HitFilm feature controls on the viewer that allow you to visually adjust the effect settings. if you find them distracting, or want to hide them for any other reason, you can do so here.
- Show Motion Path: The motion path provides a visual representation of the movement of a layer across multiple keyframes.
- Motion Path: You can set the number of keyframes which are displayed in the motion path here. More keyframes gives you a wider view of how the layer is moving, but may impact performance.
Controls
- Auto expand control panel items: Enable this option to have the primary control categories opened automatically when a new layer is created, so the individual properties are readily available. Disable it to keep the controls tree closed until you choose to open specific categories of controls.