 The Custom Light Flares effect is a HitFilm Pro exclusive.
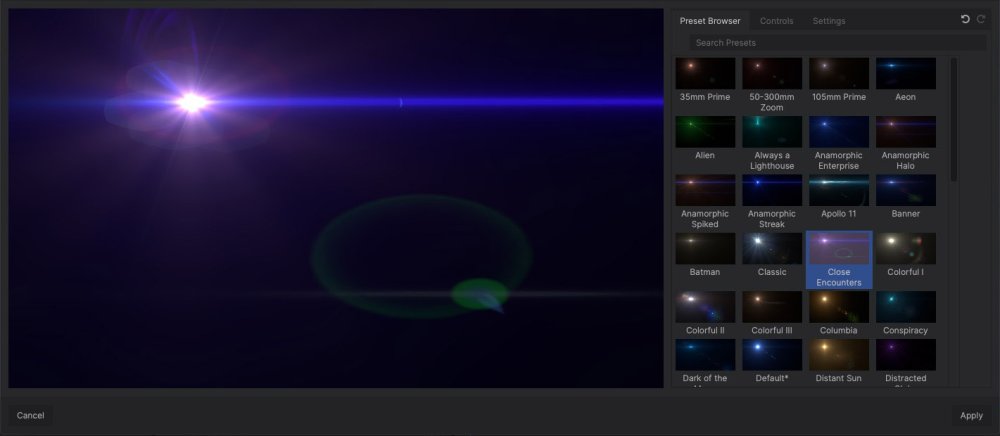
The Custom Light Flares effect is built on a powerful preset system which combines simplicity of use with complete control over every aspect of the effects. Any of the more than 60 presets can be used on any timeline as-is, but you also have the option of digging all the way down into the individual components of any preset, to completely customize its look and behavior.

Effects Controls
The controls for using the Custom Light Flares are accessed through the Controls panel, like any other effect. The deeper controls for the effect are accessed through the Options button, and are discussed fully on the Light Flares Browser page of this manual.
- Options: The Options button opens the Light Flares Preset Browser, where you can choose your desired preset or customize the individual components of the flare. See the Light Flares Browser page for full details.
- Hotspot Position: The controls in this section alter the position of the primary hot spot of the flare effect. You can move the hotspot either by editing the numeric values here, or by dragging the hotspot on the Viewer.
- Center: These two values define the X (horizontal) and Y (vertical) position of the hot spot on the canvas.
- Pivot Position: This control alters the position of the pivot point around which the elements of the flare will rotate when the hot spot is moved.
- Center: These two values define the X (horizontal) and Y (vertical) position of the pivot position on the canvas.
- Intensity: Adjusts the intensity (perceived as brightness) of the effect as a whole.
- Scale: Uniformly changes the size of all components of the flare.
- Blend: Select the blend mode used to composite the flares onto the layer.
- Global: The controls in this section alter the effect globally.
- Color: Tints the effect toward the selected color. This does not directly replace the colors of individual elements, but tints all existing colors toward your chosen hue.
- Saturation: Alters the overall saturation of the flare.
- Hue Shift: Rotates the existing colors in the effect around the color wheel, by the number of degrees specified.
- Hotspot: These controls alter the hotspot of the effect specifically.
- Brightness: Adjusts the brightness of the hot spot.
- Color: Tints the hot spot toward the selected color. This does not directly replace the original color of the hot spot, but tints its existing color toward your chosen hue.
- Scale: Adjusts the size of the hot spot, without affecting the other elements.
- Other Elements: These controls edit the secondary components of the flare.
- Brightness: Adjusts the brightness of the secondary elements, independent of the hot spot.
- Color: Tints the secondary elements of the flare toward the selected color. This does not directly replace the original colors of the secondary elements, but tints their existing colors toward your chosen hue.
- Scale: Adjusts the size of the secondary elements without altering the hot spot.
Creating Custom Light Flares
You can create your own light flares by either editing one of the existing Light Flare presets, or building your own flare from scratch. Click the Options button in the Custom Light Flares controls to open the Light Flares Browser. In the Preset Browser tab, you can click any preset to select it for immediate use, or to use it as a starting point to build your own custom flare. The Controls tab of the browser gives you access to additional controls for customizing the effect.
To create a new flare preset:
- In the controls panel for the Custom Light Flares, click the Options button to open the Light Flares browser.
- Click the thumbnail for the browser you want to use as a starting point.
- Click the Controls tab to access the controls for the flare elements.
- Edit the elements to create your new flare.
- Use the New Element button to add any additional elements you require.
- Right-click any existing element to Duplicate, Remove, or Rename it.
- If you wish to save any single customized element for future use, right-click the element and select Save As Element Preset…
- Once you are completed editing your preset, click the Preset Browser tab to return to the list of presets.
- Your edited preset will show an asterisk after its name, indicating it has been modified. Right-click that preset and select Save As… to name your new preset and save it to the preset browser.
