
Shortcuts
Many tools and functions in HitFilm can be selected or accessed using keyboard shortcuts. Getting familiar with the keyboard shortcuts can greatly speed up your workflow. If you prefer to use your own shortcut settings, rather than the defaults, any shortcut can be edited to suit your preferences.
To change an assigned shortcut key, click in the shortcut column for the command and then press the desired key combination.
You can use the search box at the top of the window to quickly find a specific shortcut.
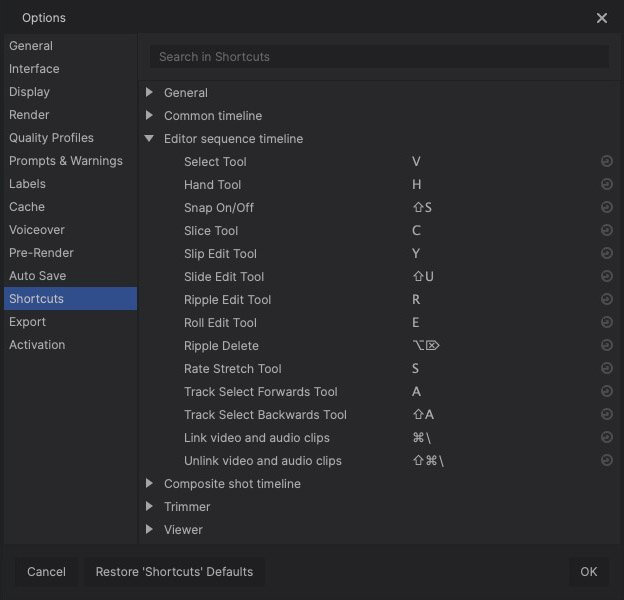
To the right of each shortcut is a Reset button, which can be used to reset that shortcut to its default setting. At the bottom of the Shortcuts tab is a Reset All Shortcuts button, which will reset all shortcuts to the defaults listed below.
General
- Undo – Ctrl+Z
- Redo – Ctrl*+*Y
- New Project – Ctrl+N
- Open Project – Ctrl+O
- Save Project – Ctrl+S
- Save As – Ctrl+Alt+S
- Exit – Alt+F4
- Delete – Del
- Rename – F2
- Cut – Ctrl+X
- Copy – Ctrl+C
- Paste – Ctrl+V
- Duplicate – Ctrl+D
- Select All – Ctrl+A
- Reset – Ctrl+R
- Set In Point – I
- Set Out Point – O
- Previous Frame – ,
- Next Frame – .
- Jump Back by 10 Frames – Shift+,
- Jump Forward by 10 Frames – Shift+.
- Move Playhead to Start of Timeline – Home
- Move Playhead to End of Timeline – End
- Move Playhead to In Point – Shift+I
- Move Playhead to Out Point – Shift+O
- Play/Pause – Space
- Toggle Loop Playback – Ctrl+L
- Shuttle Left – J
- Shuttle Right – L
- Shuttle Stop – K
- Create New Composite Shot – Ctrl+Shift+N
- Create New Plane – Ctrl+Shift+A
- Import Media – Ctrl+O
- Convert to Composite Shot – Ctrl+M
- Close Active Panel – Ctrl+W
- Close All Open Composite Shot Panels – Ctrl+Shift+W
- Create New Voiceover Recording Ctrl+Shift+R
- Switch to Home Screen – Ctrl+1
- Switch to Edit Screen – Ctrl+3
Common Timeline
- Jump to Time – Ctrl+J (highlights current time indicator)
- Previous Edit Point – Page up
- Next Edit Point – Page down
- Set In and Out Points to Content – P
- Set In and Out Points to View – (no default)
- Increase Timeline Scale – Ctrl++
- Decrease Timeline Scale – Ctrl+-
- Scroll to Playhead – Ctrl+Home
- Previous Keyframe – Alt+,
- Next Keyframe – Alt+.
- Add/Remove Keyframe – Alt+T
- Slice Selected clips/Layers – Ctrl+Shift+D
- Remove Attributes – Shift+CTRL+X
- Paste Attributes – Shift+CTRL+V
- Remove Effects – Option+CTRL+V
- Fit to Frame – (no default)
- Fit to Frame Width – (no default)
- Fit to Frame Height – (no default)
- Center in Frame – (no default)
- Cycle Properties Filter – U
- Export to File – (no default)
- Export In-to-Out Area – (no default)
- Export Contents Area – (no default)
- Add In-to-Out Area to Export Queue – (no default)
- Add Contents Area to Export Queue -(no default)
- Export Frame – (no default)
- Remove All Color Labels From the Selection – 0
- Apply Color Label 1 to the Selection – 1
- Apply Color Label 2 to the Selection – 2
- Apply Color Label 3 to the Selection – 3
- Apply Color Label 4 to the Selection – 4
- Apply Color Label 5 to the Selection – 5
- Apply Color Label 6 to the Selection – 6
- Apply Color Label 7 to the Selection – 7
- Apply Color Label 8 to the Selection – 8
- Apply Color Label 9 to the Selection – 9
Editor Sequence Timeline
- Select Tool – V
- Hand Tool – H
- Snap On/Off – Shift+S
- Slice Tool – C
- Slip Edit Tool – Y
- Slide Edit Tool – U
- Ripple Edit Tool – R
- Roll Edit Tool – E
- Ripple Delete – Alt+Delete
- Rate Stretch Tool – S
- Track Select Forwards Tool – A
- Track Select Backwards Tool – Shift+A
- Link Video and Audio Clips – CTRL+\
- Unlink Video and Audio Clips – Shift+CTRL+\
Composite Shot Timeline
- Select Tool – V
- Hand Tool – H
- Slice Tool – C
- Snap On/Off – Shift+S
- Open New Layer Menu – Ctrl+Alt+N
- New Plane Layer – Ctrl+Alt+A
- New Camera Layer – Ctrl+Alt+C
- New Light Layer – Ctrl+Alt+L
- New Grade Layer – Ctrl+Alt+G
- New Text Layer – Ctrl+Alt+T
- New Point Layer – Ctrl+Alt+P
- Move Layer(s) to Playhead – (No Default)
- Rate Stretch Tool – S
- Publish – (no default)
- Unpublish – (no default)
- Lock – (no default)
- Lock All – (no default)
- Unlock All – (no default)
Trimmer
- Insert Media on the Current Timeline – B
- Overlay Media on the Current Timeline – N
Viewer Panel
- Select Tool – V
- Hand Tool – H
- Text Tool – T
- Rectangle Mask Tool – R
- Rounded Rectangle Mask Tool – (no default)
- Ellipse Mask Tool – E
- Polygon Mask Tool – (no default)
- Star Mask Tool – (no default)
- Freehand Mask Tool – F
- Orbit tool – B
- Set Mask Point(s) to Linear – Ctrl+Alt+Shift+L
- Set Mask Point(s) to Curved – Ctrl+Alt+Shift+C
- Toggle Full Screen Preview – Alt+CTRL+F
- Move Position Left by 1 Pixel – Left Arrow
- Move Position Right by 1 Pixel – Right Arrow
- Move Position Up by 1 Pixel – Up Arrow
- Move Position Down by 1 Pixel – Down Arrow
- Move Position Left by 10 Pixels – Shift+Left Arrow
- Move Position Right by 10 Pixels – Shift+Right Arrow
- Move Position Up by 10 Pixels – Shift+Up Arrow
- Move Position Down by 10 Pixels – Shift+Down Arrow