
There are two different types of timeline: the Editor Timeline, where you perform 2D track-based video editing, and Composite Shots, where you create layered visual effects and motion graphics in either a 2D or a 3D environment. HitFilm has one editor timeline per project. In contrast, you can have as many composite shot timelines as you want, and new composite shots can be created at any time.
Switching between timelines is as easy as changing tabs in your web browser, making for a fast, efficient workflow.
There are many similarities between the timelines. Many tools are available in both, and the playhead works the same in both cases. It’s also important to understand the key differences.
The Editor Timeline
The editor timeline is track-based. Each track can contain multiple clips in sequence, one after another. This makes it very easy to edit your videos. Here’s what it looks like:
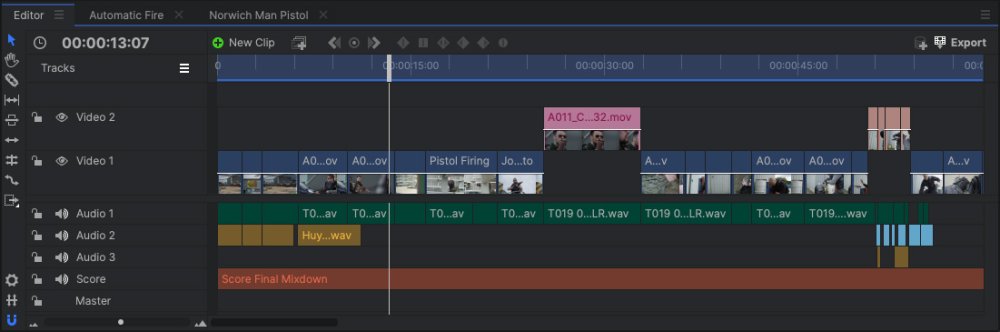
In the above example you can see there are several video and audio tracks. You can have an unlimited number of tracks in the editor. This can be used for simple animation and compositing (picture in picture during a vlog or presentation), adding titles and logos, or for actual editing, as you can see in the example above. The Editor timeline is always 2D and allows for basic animation. For more complex animations or for working in 3D, you will want to use a Composite Shot timeline, explained below.
See Editing for full information about using the editor timeline.
Composite Shot Timelines
Composite shot timelines are layer-based. Each layer contains a single asset which can be highly customized, enabling you to carry out sophisticated compositing tasks. Composite shots offer more comprehensive animation tools than the Editor timeline, and provide access to HitFilm’s native 3D compositing environment.
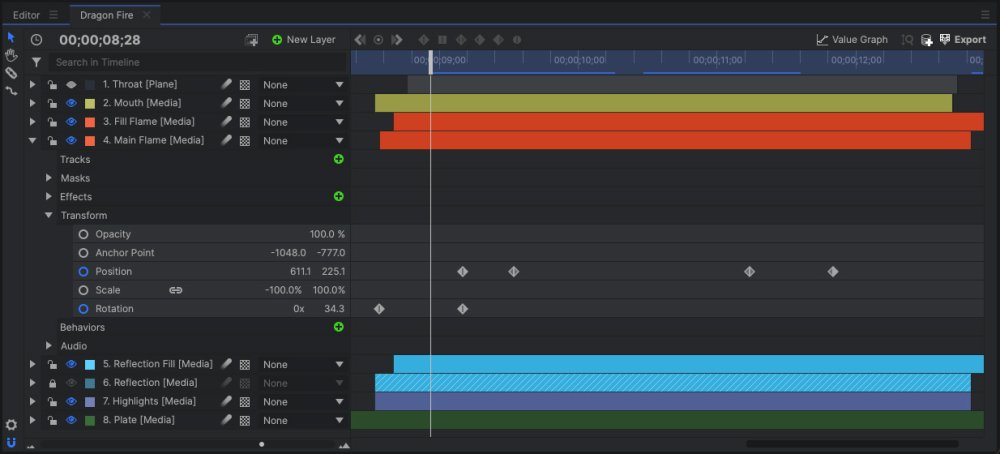
Layers can be expanded to display more information. In the above example the Main Flame media layer has been expanded to show the Transform controls for the layer. The left side of the timeline shows the names of the layers and properties, while the right side shows the position of layers in time. You can also see a number of diamond shaped icons on the Position and Rotation properties, which indicate keyframes. Keyframes are used to change the value of properties over time.
Composite shots can contain large numbers of layers, each of which contains many properties. You can use the Search box at the top of the timeline to find specific layers or properties within complex timelines.
See Compositing for full information about using composite shot timelines.
Switching Timelines
Looking at the top of the images above, you can see the each timeline is shown as a tab. Switching between the timelines is as simple as clicking on the relevant tab. You can do this at any time. It’s just like switching tabs in your web browser.

As you create more composite shots you will see more tabs along the top of the timeline. Composite shots are also listed in the Media panel, making it easier to manage larger projects when you might not want all your timelines open simultaneously. Clicking the X icon on any tab will close that tab. Any composite shot can be re-opened by double-clicking it in the media panel.