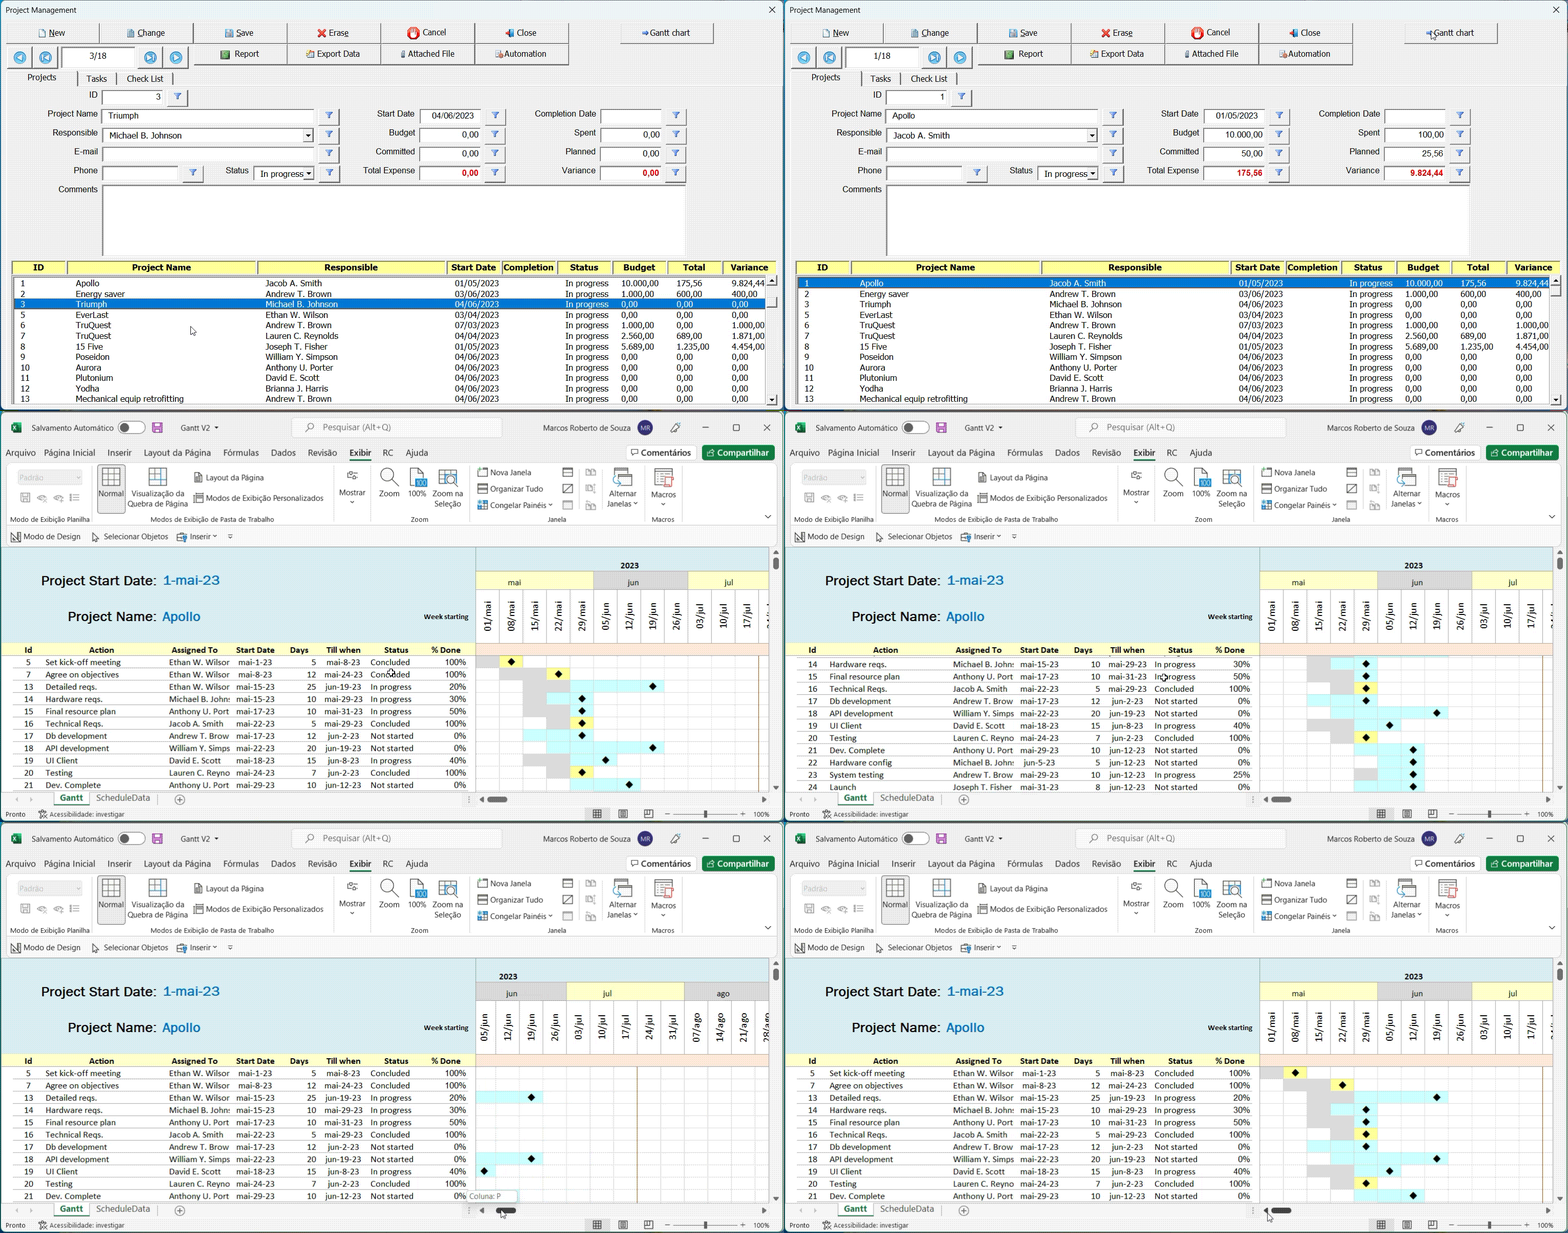
In order to clarify the purpose of the automation module and how to use it, let’s implement an example of its application.
In this example, we are going to add a Gantt chart through automation in an interface called (Project Management), which in this example is used for project management.

In the first tab of this interface called (Projects) are where the projects are added and the information related to them is filled.
The second tab called (Tasks) is where the tasks of each project are filled in, such as Action, Assigned to, Start Date, Till when, Status, among other information.

The purpose of automation in this case is to export the tasks of the selected project to another Excel spreadsheet that implements a Gantt chart, thus allowing a more comprehensive view of the progress of the project, as can be seen in the figure below.

The steps for creating this automation will be described below.
- Go to the wizard (Automation) located in the tab (Design Tools)
- Add a new record by clicking on (New) and fill in the fields as shown in the example below
- Click on (Save) to save the data
- The next step is to select the data to be exported. Click on the tab (Data Source) and then on the button (New)
- Fill in the field (Note) and then click on the button with the figure of a magic wand
- Move to the list called (Selected Fields) the fields that will be exported
- Sort the data according to the key field of the table (Tasks), in this case the field (ID). This will cause the data to be sorted according to the order in which it was added by users
- Filter only selected project data
- Click on the filter button to open the wizard screen
- Click the (Decision) button
In field (A) select the primary key of the table (Projects), in this case the field called (ID).
Under (Operators) click (=)
In field (B) select the function CurrentFieldValue(Table;Field)
This function will fetch the value of the field selected in (A), in this case the field (ID) when executing the query. See the example below.
- Route the objects and then click the button (Save)
When returning to the previous screen, click on the button (Apply and Close). Returning to the automation screen, click on the button (Save).
- Go to the interface in which the automation is associated, in this case the called interface (Project Manager) and execute the automation.
- Configure the new worksheet according to your goals
In our example, we will implement a Gantt chart on tab 1.
- Open the VBA editor and add the necessary code to copy the data from worksheet 1 to worksheet 2
- Save the spreadsheet using the option MACRO-ENABLED WORKBOOK (.XLSM)
- Return to the Smart Builder Tool system, go to the automation screen and click on (Edit)
- In the field (File Name) click on the open file button and select the formatted worksheet
- In the field (Run Macro On Worksheet) paste the name of the function that must be executed after exporting the data
- Save and that’s it! Automation is configured.


Post your comment on this topic.