Add buttons on main screen tabs
The purpose of the buttons is to load the interfaces created in the application. Once the user clicks on the button, the interface associated with the button will be loaded.
To add a button, follow these steps:
- Access the tab (Design Tools);
- Click on (Screen Design) and select the tab (Page Config);
- Select the tab (Screen Creation);
This tab has two fields as described below:
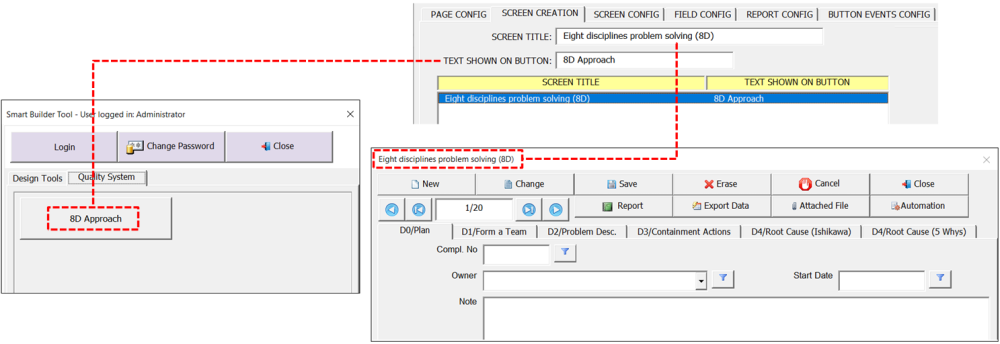
Screen Title field: The name of the interface must be filled in in this field. The name of the interface will be displayed in the title bar of the interface.
Text Shown on Button field: In this field, the name that will appear on the button must be filled in. The name should tell the user the interface it will load.
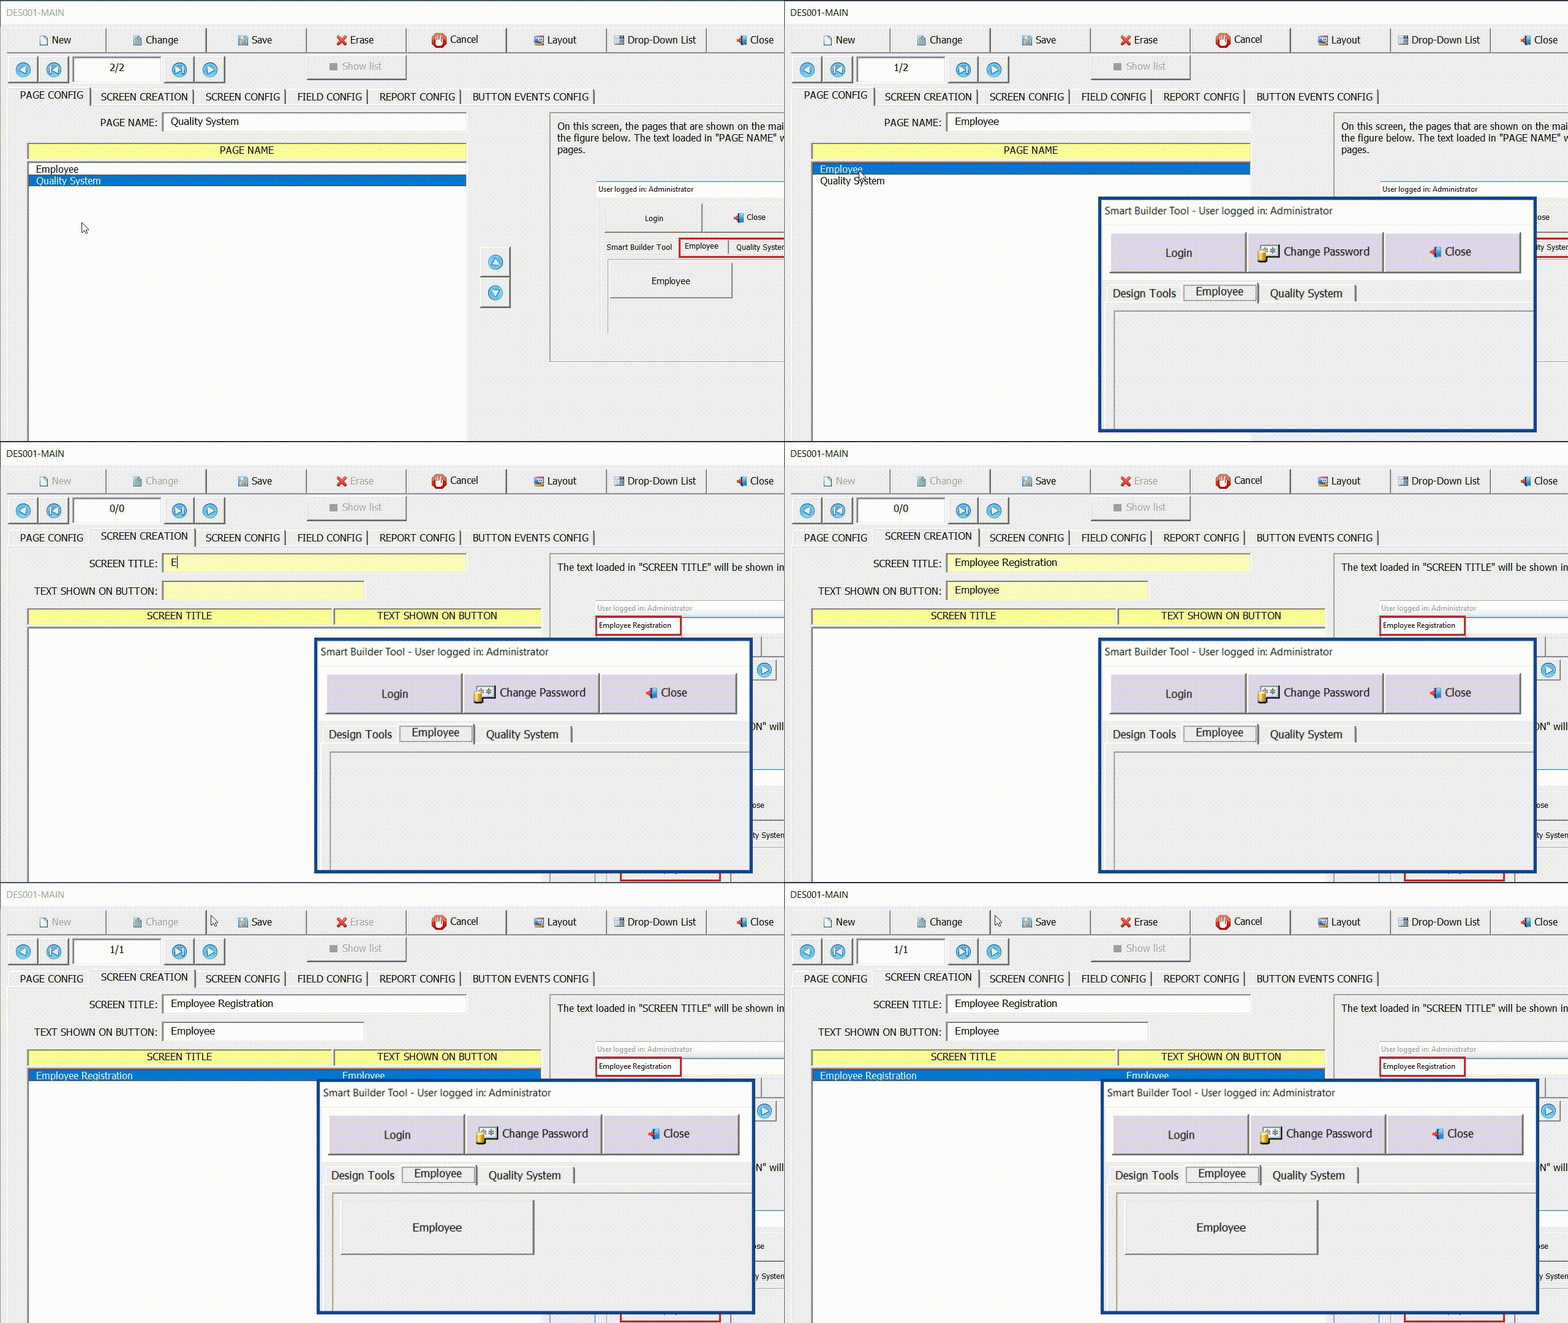
Click the (New) button, fill in the fields and then click (Save). To change the text of an already saved record, use the (Change) button.
Example:
Adjusting the buttons layout
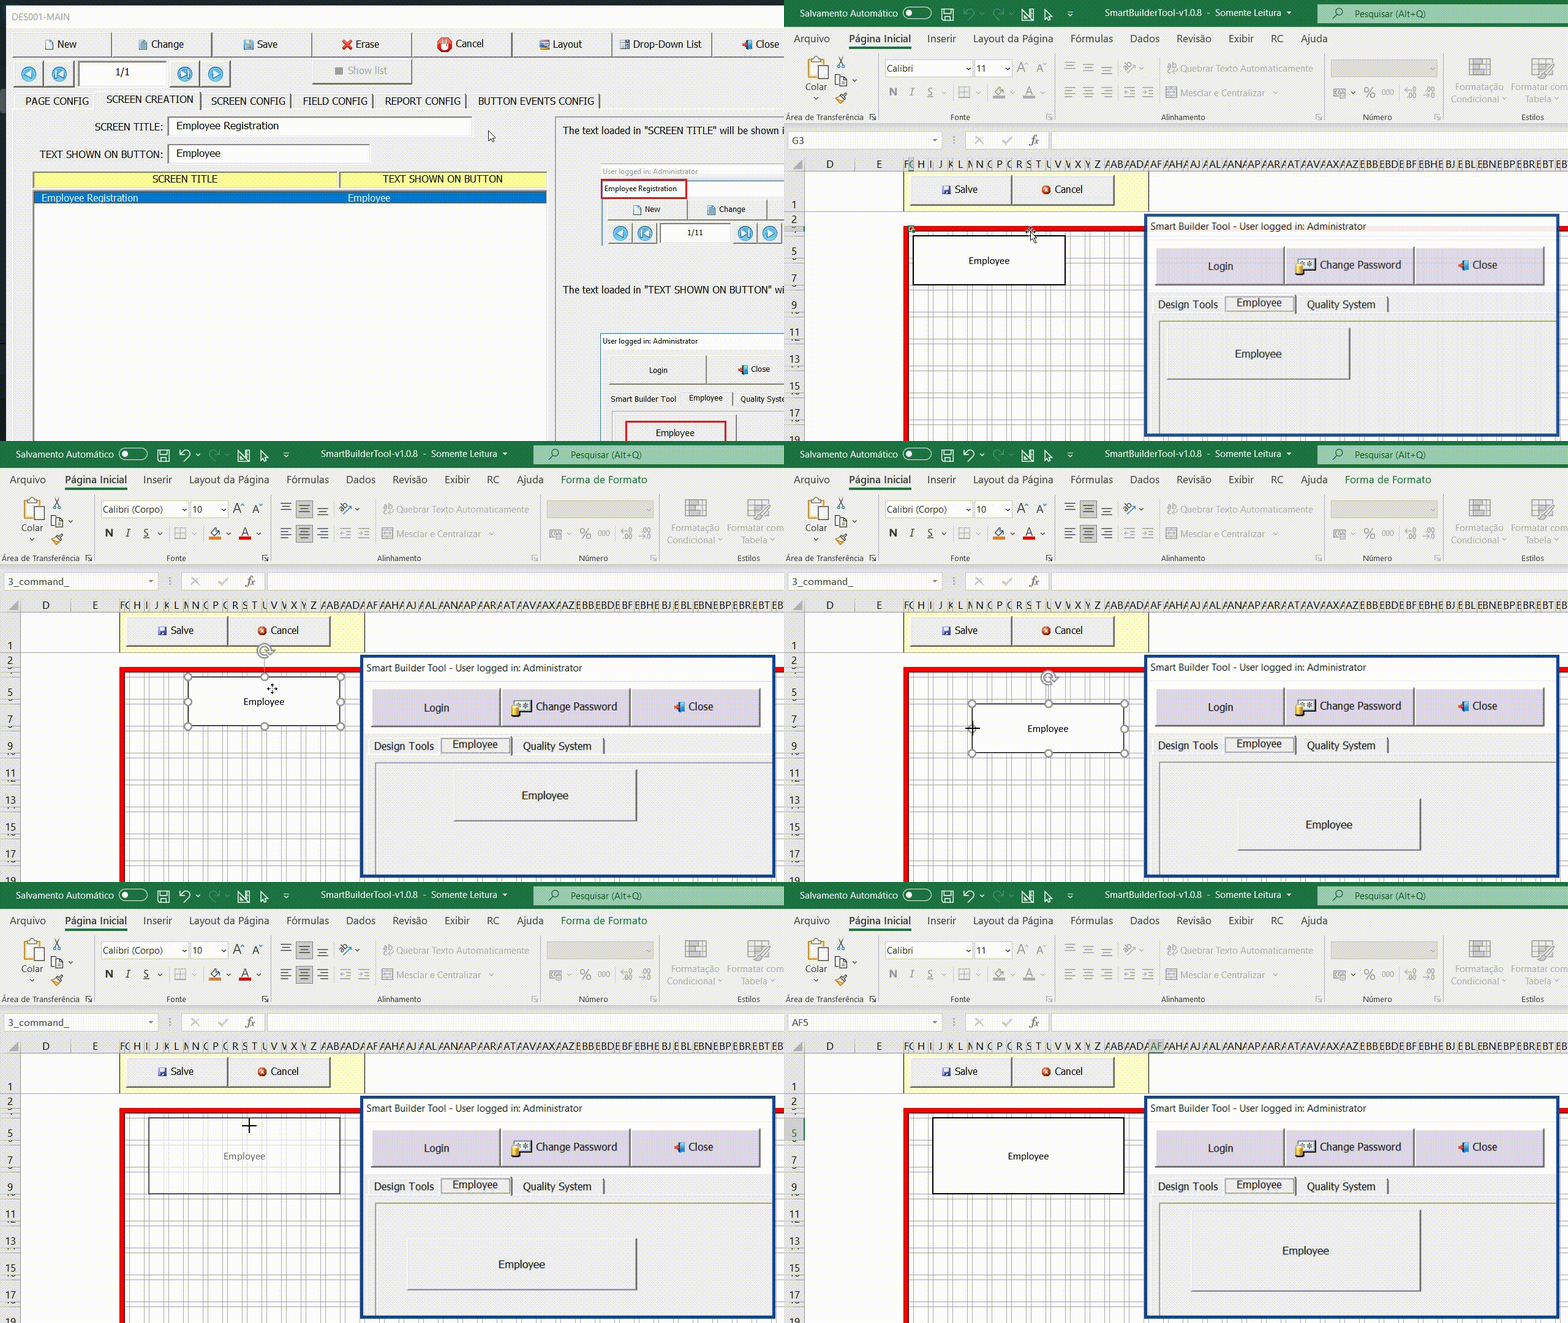
After creating the buttons, use the layout tool to adjust the size and position of the buttons on the main screen.
Adjusting the size and position of the button
When a button is created, its size and position are automatically set to a default value. However, it is possible to readjust the position and size of the buttons on the screen for better viewing as shown in the following figure.
Save or discard changes
Once the desired changes have been made, click the (Save) button to save the changes. If you want to discard the changes, click on the (Cancel) button.

Hide fields
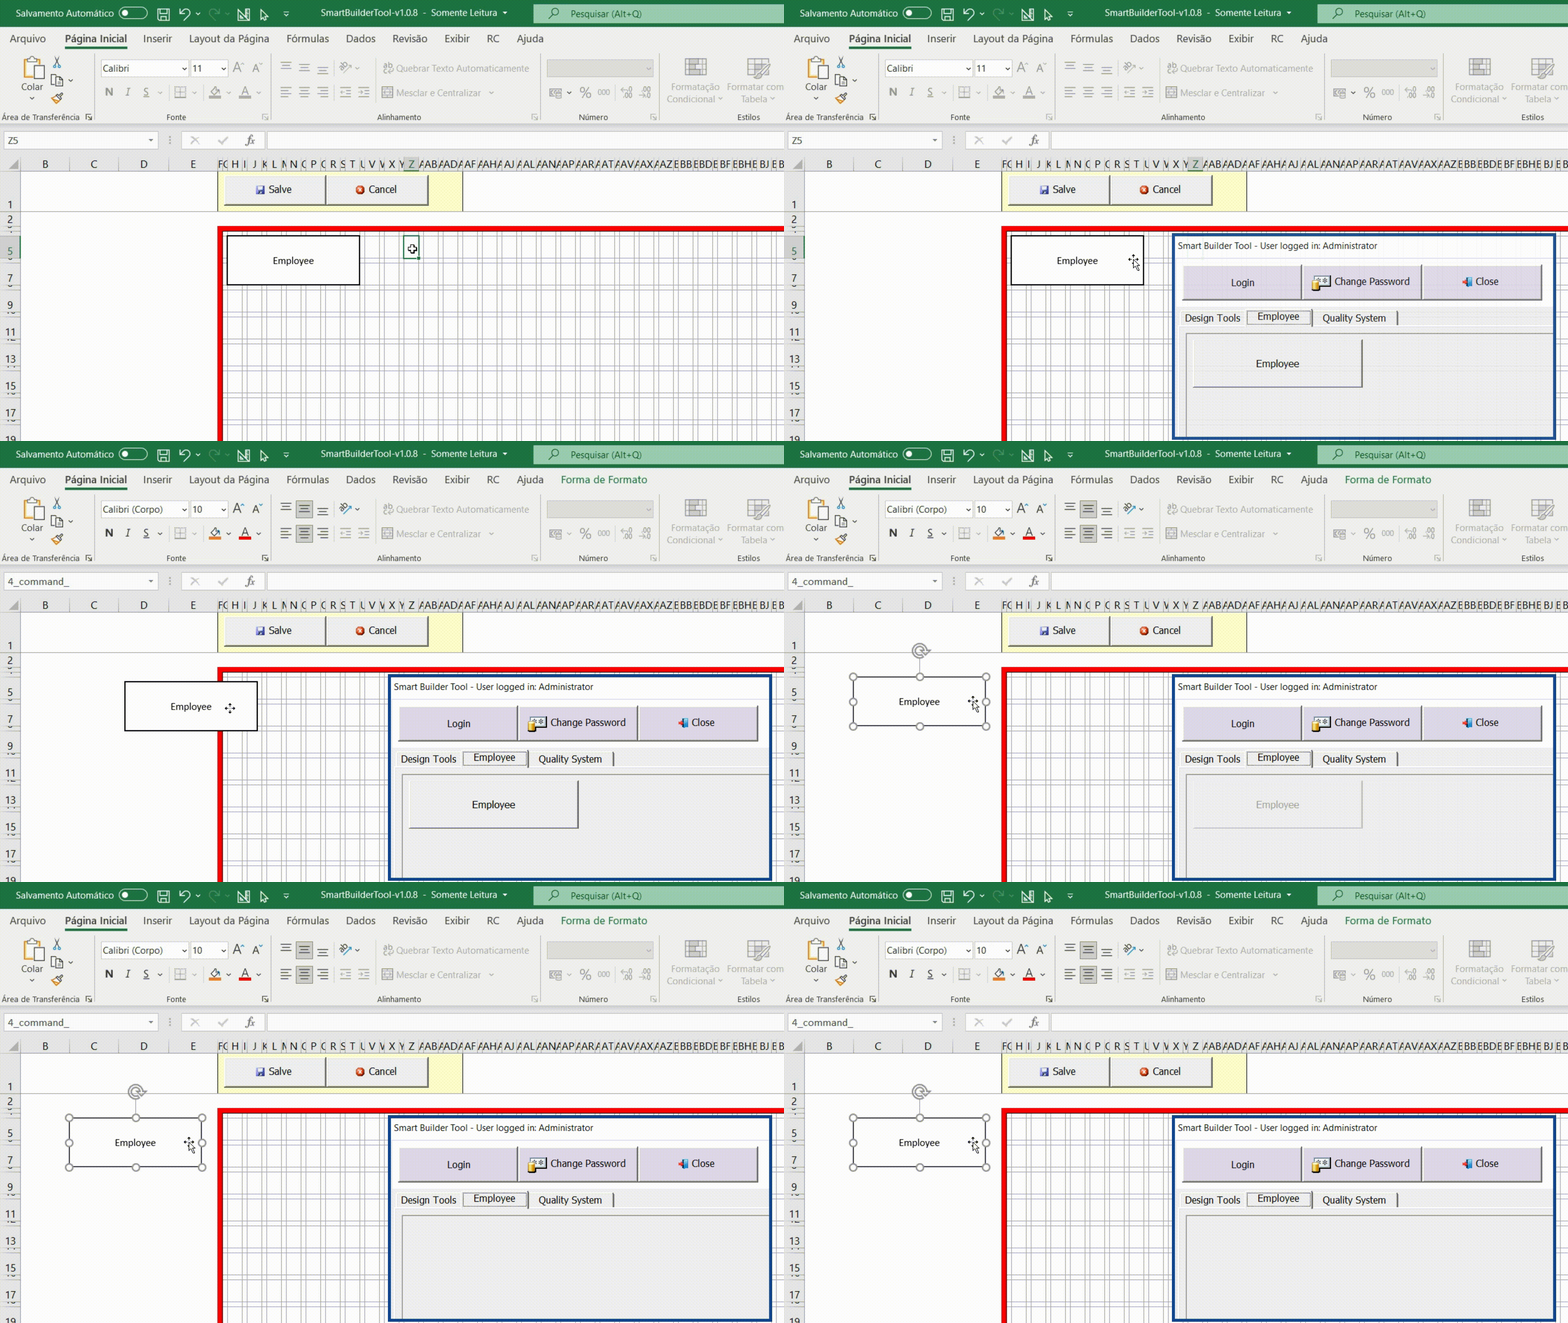
The larger red rectangle in the figure below represents the useful area of the screen where the buttons will be displayed. If any buttons are placed outside this area, they will not be displayed. If any button needs to be hidden, move it to the left side of the red line, so that button will not be displayed.
Format the button font
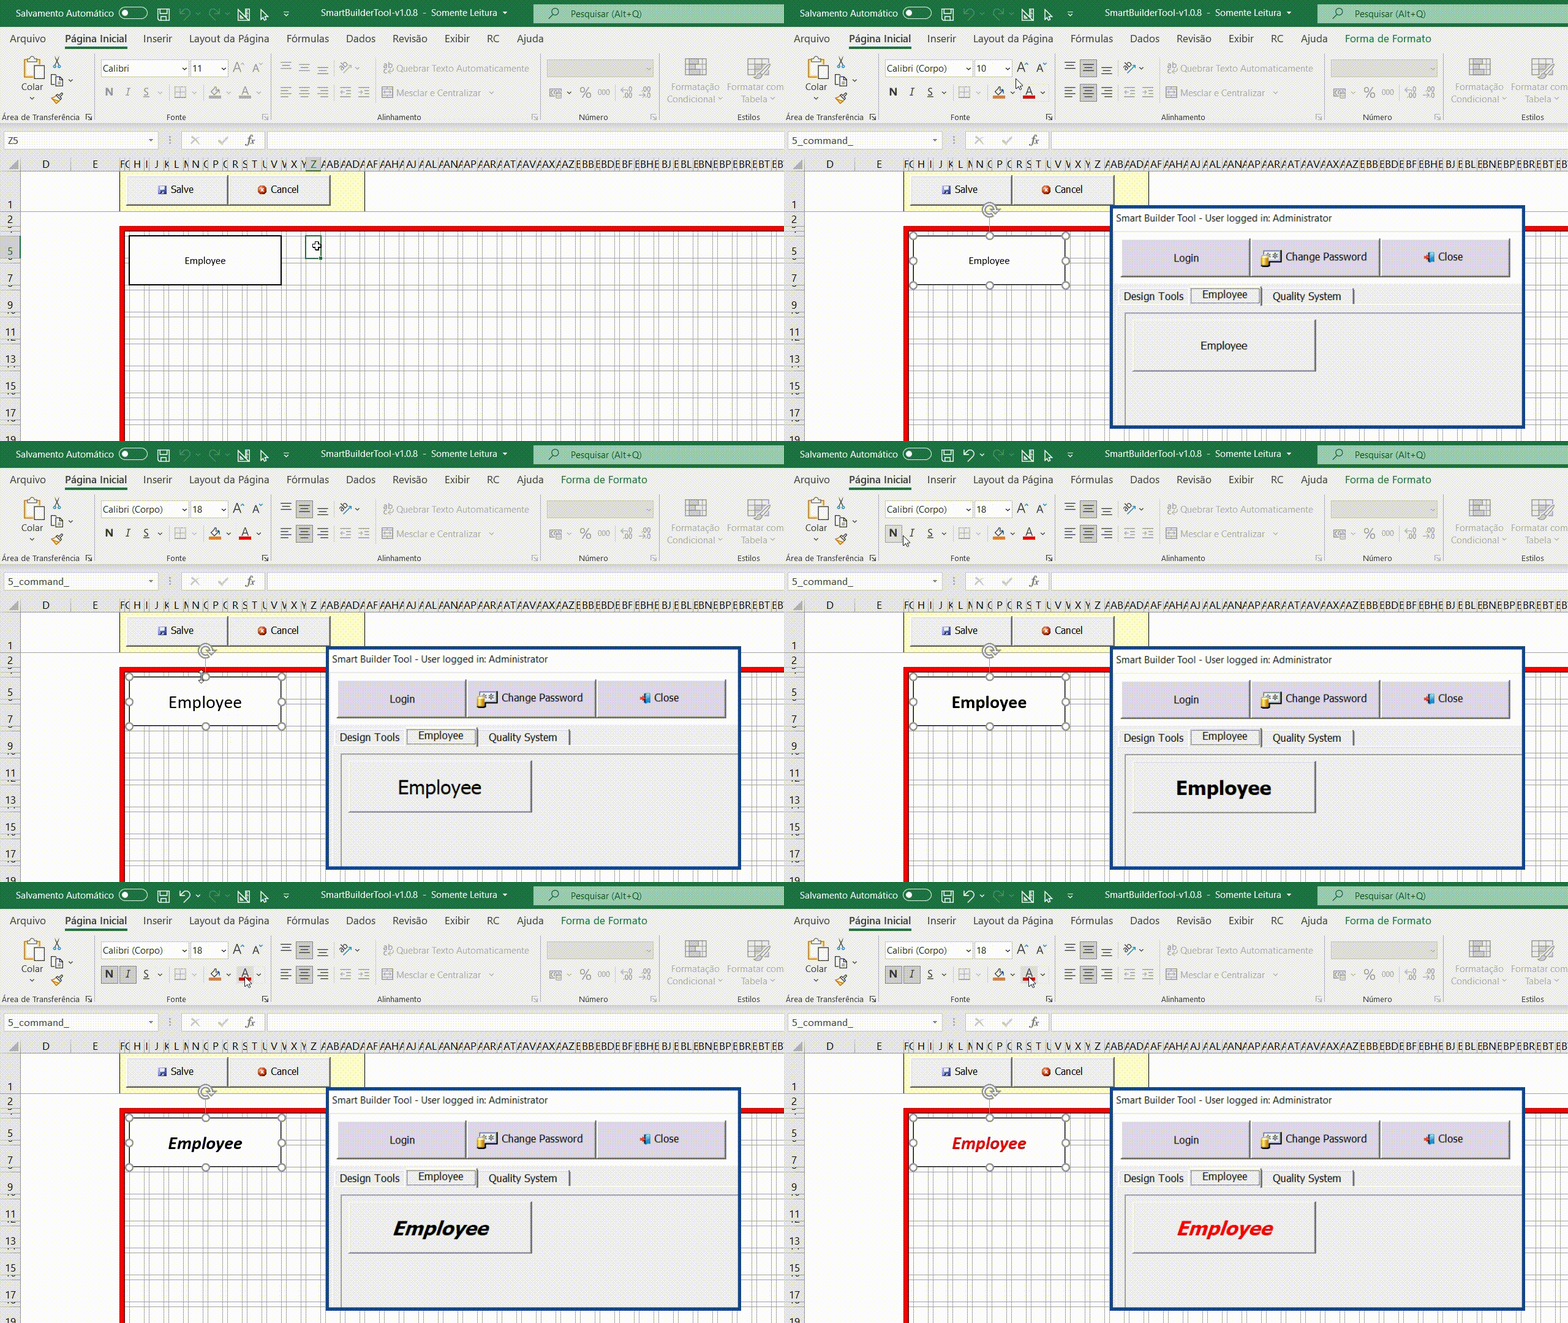
It is possible to change some properties of the button’s font such as bold, italic, size and color as shown in the figure below.


Post your comment on this topic.