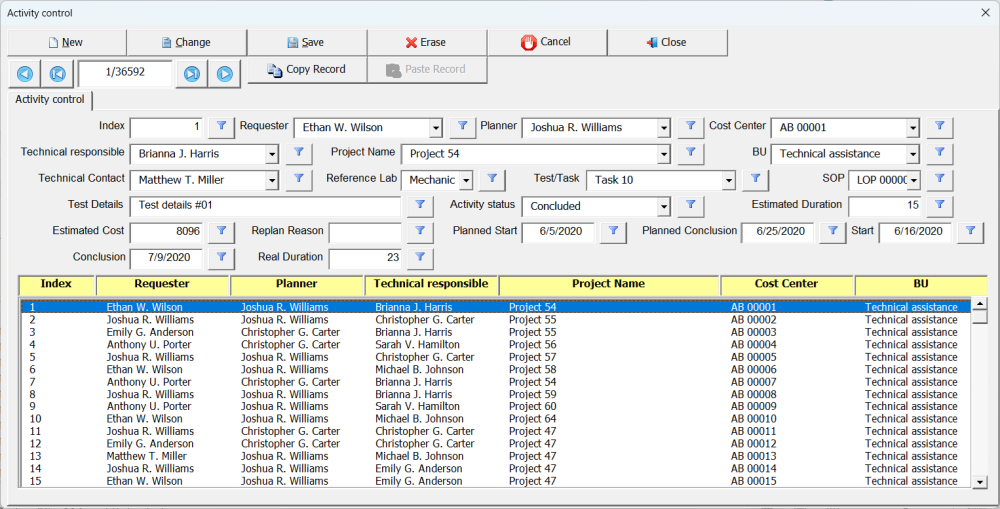
The data entry forms generated by the Smart UI add-in follow the same pattern shown below.
At the top of the form are the data editing and navigation between records buttons.
In the center of the form are the fields used for data entry and visualization. Auxiliary buttons such as filter and calendar are created next to each field.
Finally, below the fields there is a table for viewing a larger amount of data. This table can also be used to navigate between records.

Data editing buttons
The editing buttons are located at the top of the screen and their function is to allow the user to add, change and erase data.

- New
Used to add new data to the database (worksheet)
- Change
Used to change data already existing in the database (worksheet)
- Save
Used to save data in the database (worksheet).
- Erase
Used to erase data in the database (spreadsheet).
- Cancel
Cancels the operation (New/Change) while the data is still being edited.
- Close
Closes the data entry form
- Copy Record
Used to copy data from a given row. Its objective is to facilitate data entry when much of it is repeated.
To copy the data, select the line where the data you want to copy is and click the Copy Record button
- Past Record
Pastes the data that was copied when clicking the Copy Record button.
Navigation Buttons
Use these buttons to navigate between records. You can go to the next record or the last one. Likewise, it is possible to return to the previous record or to the first record.

Filter Buttons
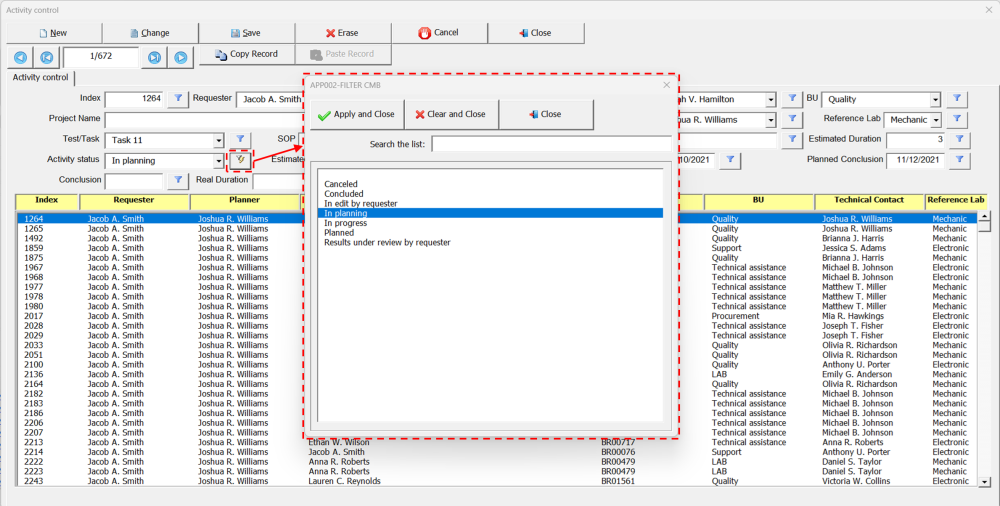
Next to each field there is a filter button. Use this option to filter data. When a field is filtered, the button icon changes to signal that the filter for that field is active.

Calendar Buttons
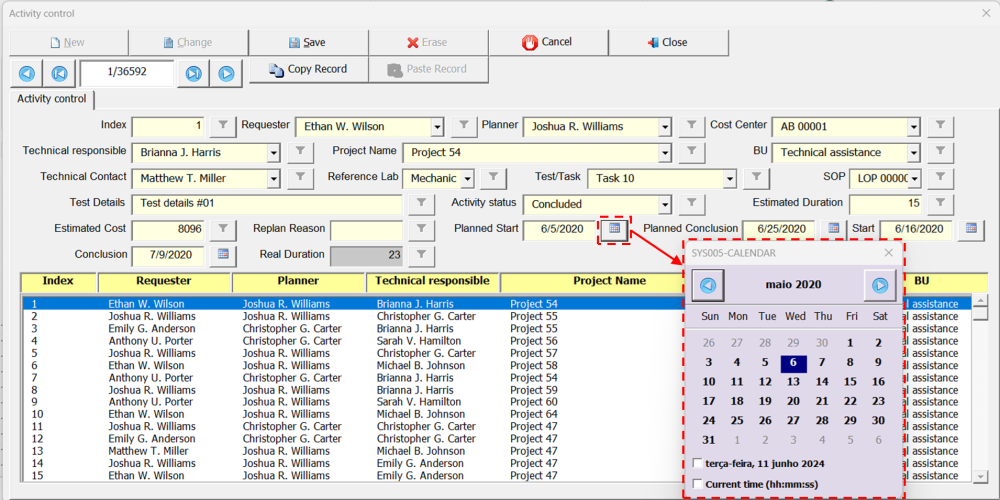
After clicking the button (New or Change), in the fields identified as date type, a calendar button is positioned next to the field in order to make it easier to fill in the information.


Post your comment on this topic.