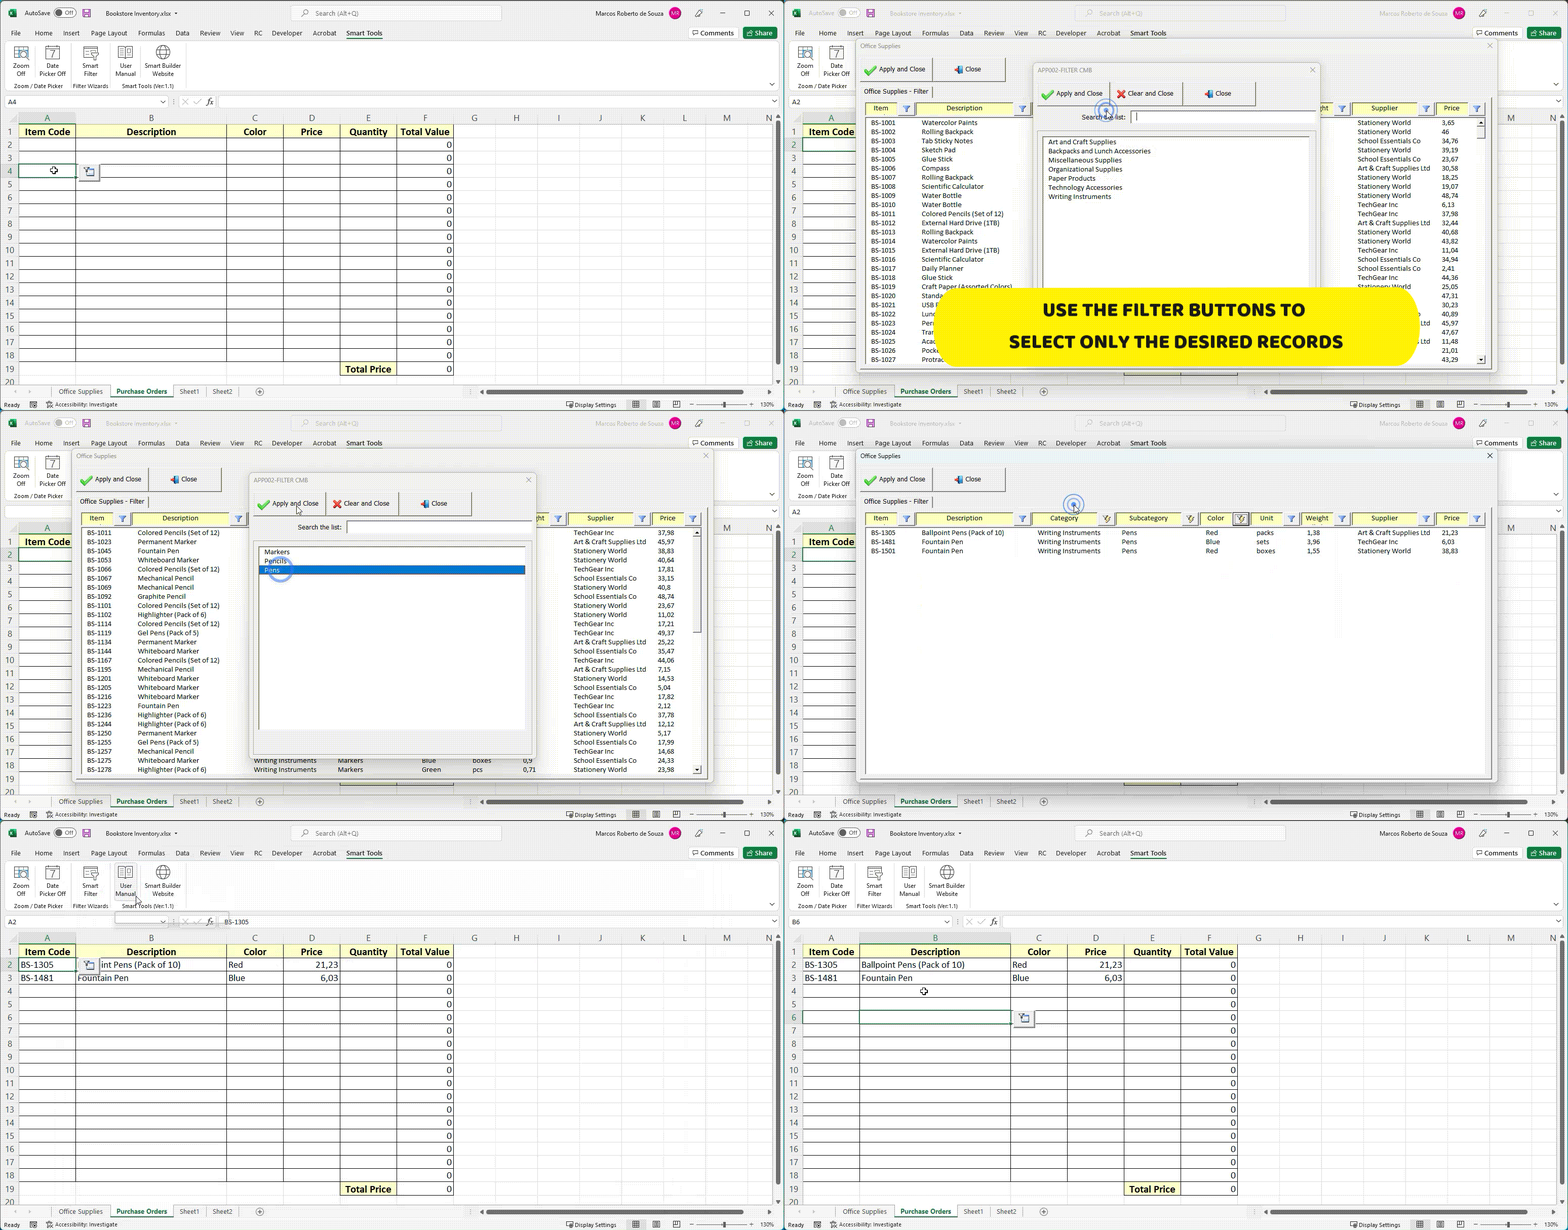
Smart Filter: Simplifying Data Management and Integration
Smart Filter isn’t just another filtering tool; it’s a versatile solution for searching, refining, and transferring data seamlessly between spreadsheets. With Smart Filter, users can effortlessly load data from a source spreadsheet, apply advanced filters to pinpoint specific records, and select the items they need. Once selected, these records are seamlessly copied to a target spreadsheet with minimal effort.
This feature is perfect for tasks such as product catalog management or order creation, where extracting and transferring data efficiently is crucial. Smart Filter streamlines the entire workflow—loading the source data, narrowing down records with precision, and transferring only the relevant information to its destination—all through a simple, intuitive interface.
By saving time, minimizing errors, and enhancing efficiency, Smart Filter provides a smarter, more effective way to manage and integrate your data.

Smart Filter Wizard
How to Configure a Filter Using the Smart Filter Wizard
The Smart Filter wizard simplifies the process of configuring filters, allowing you to search, refine, and transfer data across spreadsheets efficiently. Follow these steps to set up a new filter:
1. Open the Wizard Click the Smart Filter button located in the Smart Tools toolbar to load the wizard.
2. Create a New Filter On the wizard screen, click the New button to start creating a filter.
3. Select the Data Source – Click the right arrow next to the Data Source field. – Select the header of the spreadsheet containing the source data. Only the header should be selected. – Click Apply to confirm. – The selected columns will now appear in the “Columns displayed in filter screen” list.
4. Define the Target Cell – Click the right arrow next to the Target Cell field. – Select the range where the filtered data will be copied. This range will also be where the shortcut button appears. Do not include the header; select only the area for the copied data.
5. Name the Filter Enter a descriptive name for the filter in the Filter Name field.
6. Choose Display Columns From the “Columns displayed in filter screen” list, select the columns you want to appear in the filter interface. These columns provide context and allow you to refine the data by applying filters.
7. Select Columns to Copy From the “Columns copied to target cells” list, choose the columns whose data will be transferred to the target spreadsheet. These are the fields that will be copied once the desired records are selected.
8. Choose Copy or Reference In the Copy or reference values from data source field, select one of the following options: – Copy data source: Copies the data directly to the target spreadsheet. – Reference data source: Creates references to the original data in the target spreadsheet.
9. Save the Filter Click the Save button to complete the configuration.
- Managing Filters
- To modify an existing filter, click the Change button.
- To delete a filter, click the Erase button.
- Click Close to exit the wizard.
- Using the Filter
Once configured, a shortcut button will appear next to any cell within the range defined in the Target Cell field. Clicking this button opens a screen displaying the source data and the selected columns. Use the filter buttons at the top of each column to narrow down the data. After finding the desired records, select them and click Apply and close to copy (or reference) the data into the target spreadsheet.
This intuitive process enables precise and efficient data management, enhancing your productivity with ease.


Post your comment on this topic.