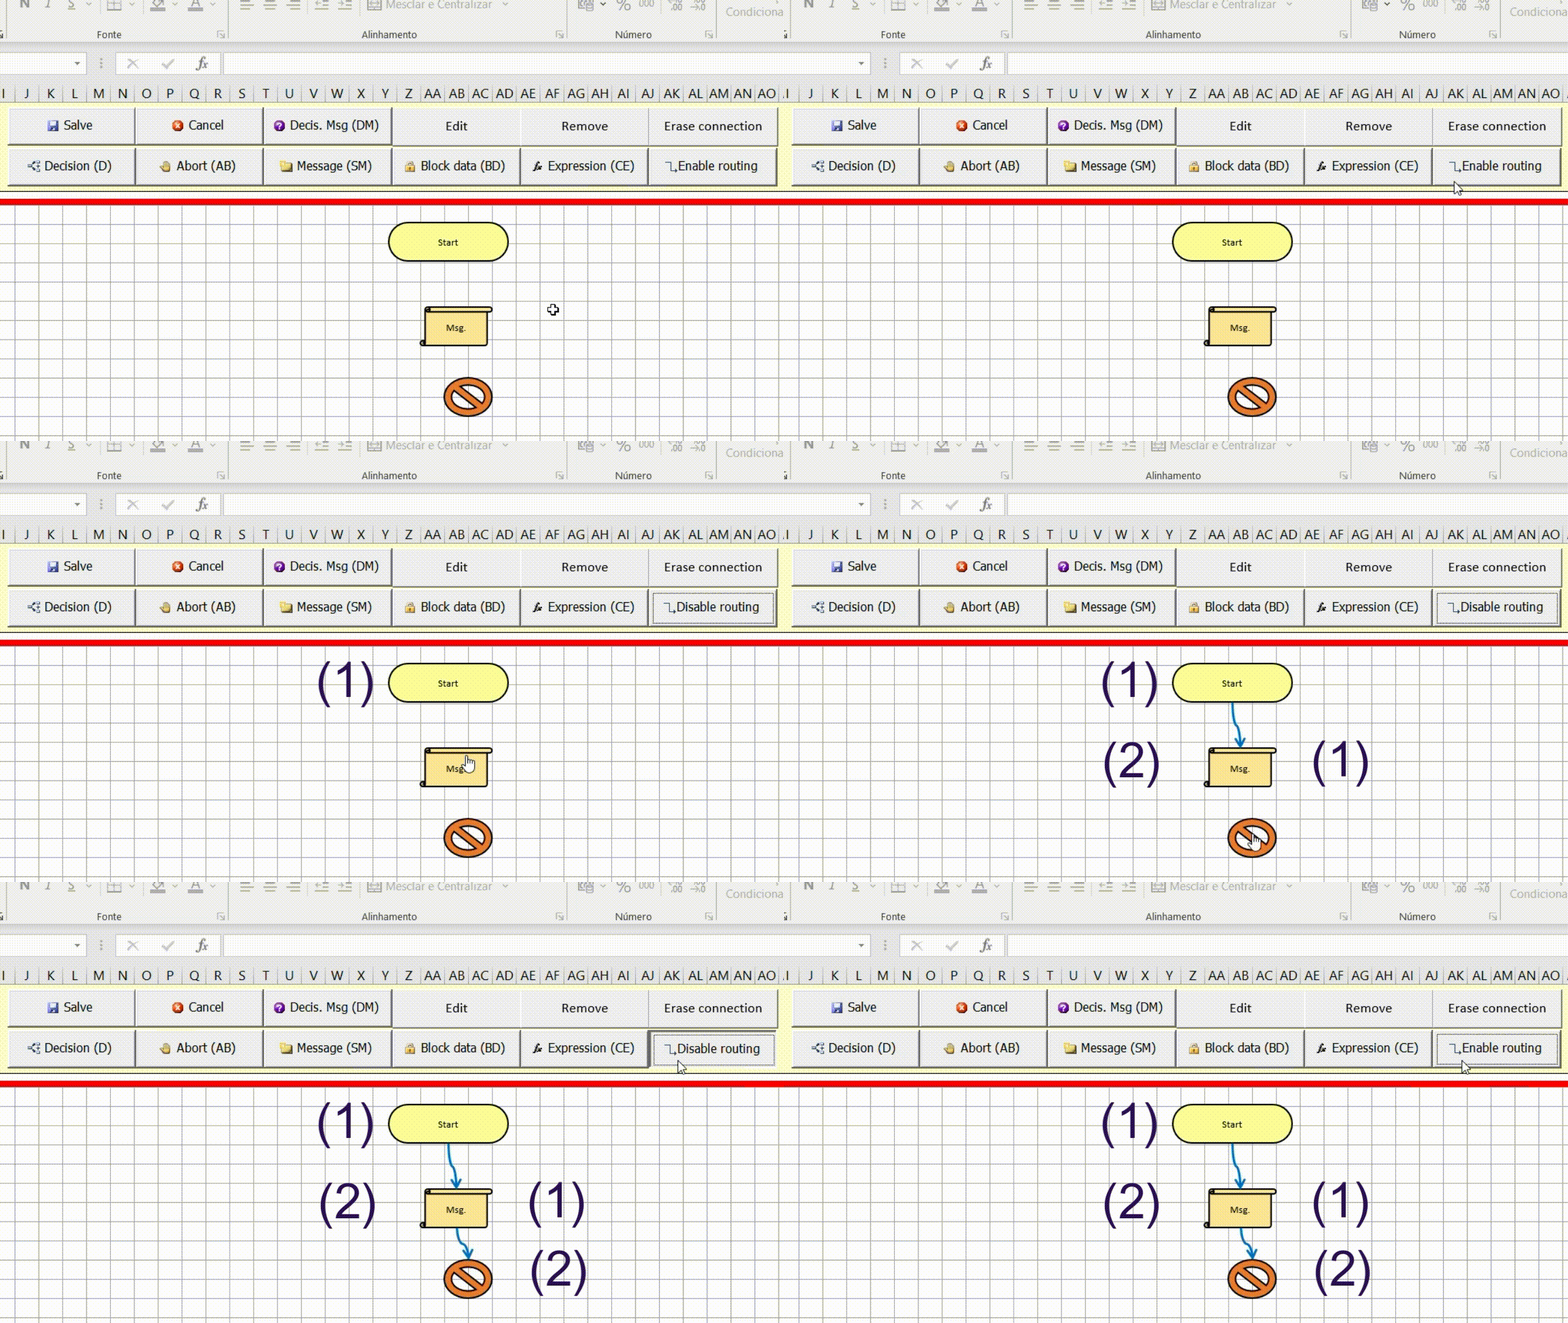
Once the objects have been inserted in the editor, it is necessary to define the order of execution of the tasks. This is done by linking objects, or routing.
Routing must always start with the object (Start). Click the (Enable Routing) button to enable the routing tool. To link two objects, click on the first object and then click on the second object as shown in the following figure.
After routing is finished, click the (Disable Routing) button again. Note that the same button is used to enable and disable routing.

In the previous example, two objects (Message) and (Abort) were inserted. Remembering that the object (Start) is created automatically.
- Object (Start): This object does not execute any task, it is used to define the starting point, that is, the object that is linked to it will be the first to be executed.
- Object (Message): This object is used to show a message to the user.
- Object (Abort): This object is used to interrupt the execution of an event.
The order in which these objects were linked defines their execution order. In this case, the object (Message) will be executed first, then the object (Abort) will be executed.
Through this example we want to make it clear that, first you must add the desired tasks in the editor and then define the order in which these tasks must be executed.


Post your comment on this topic.