After creating the fields, use the layout tool to adjust the size and position of the fields in the interface.
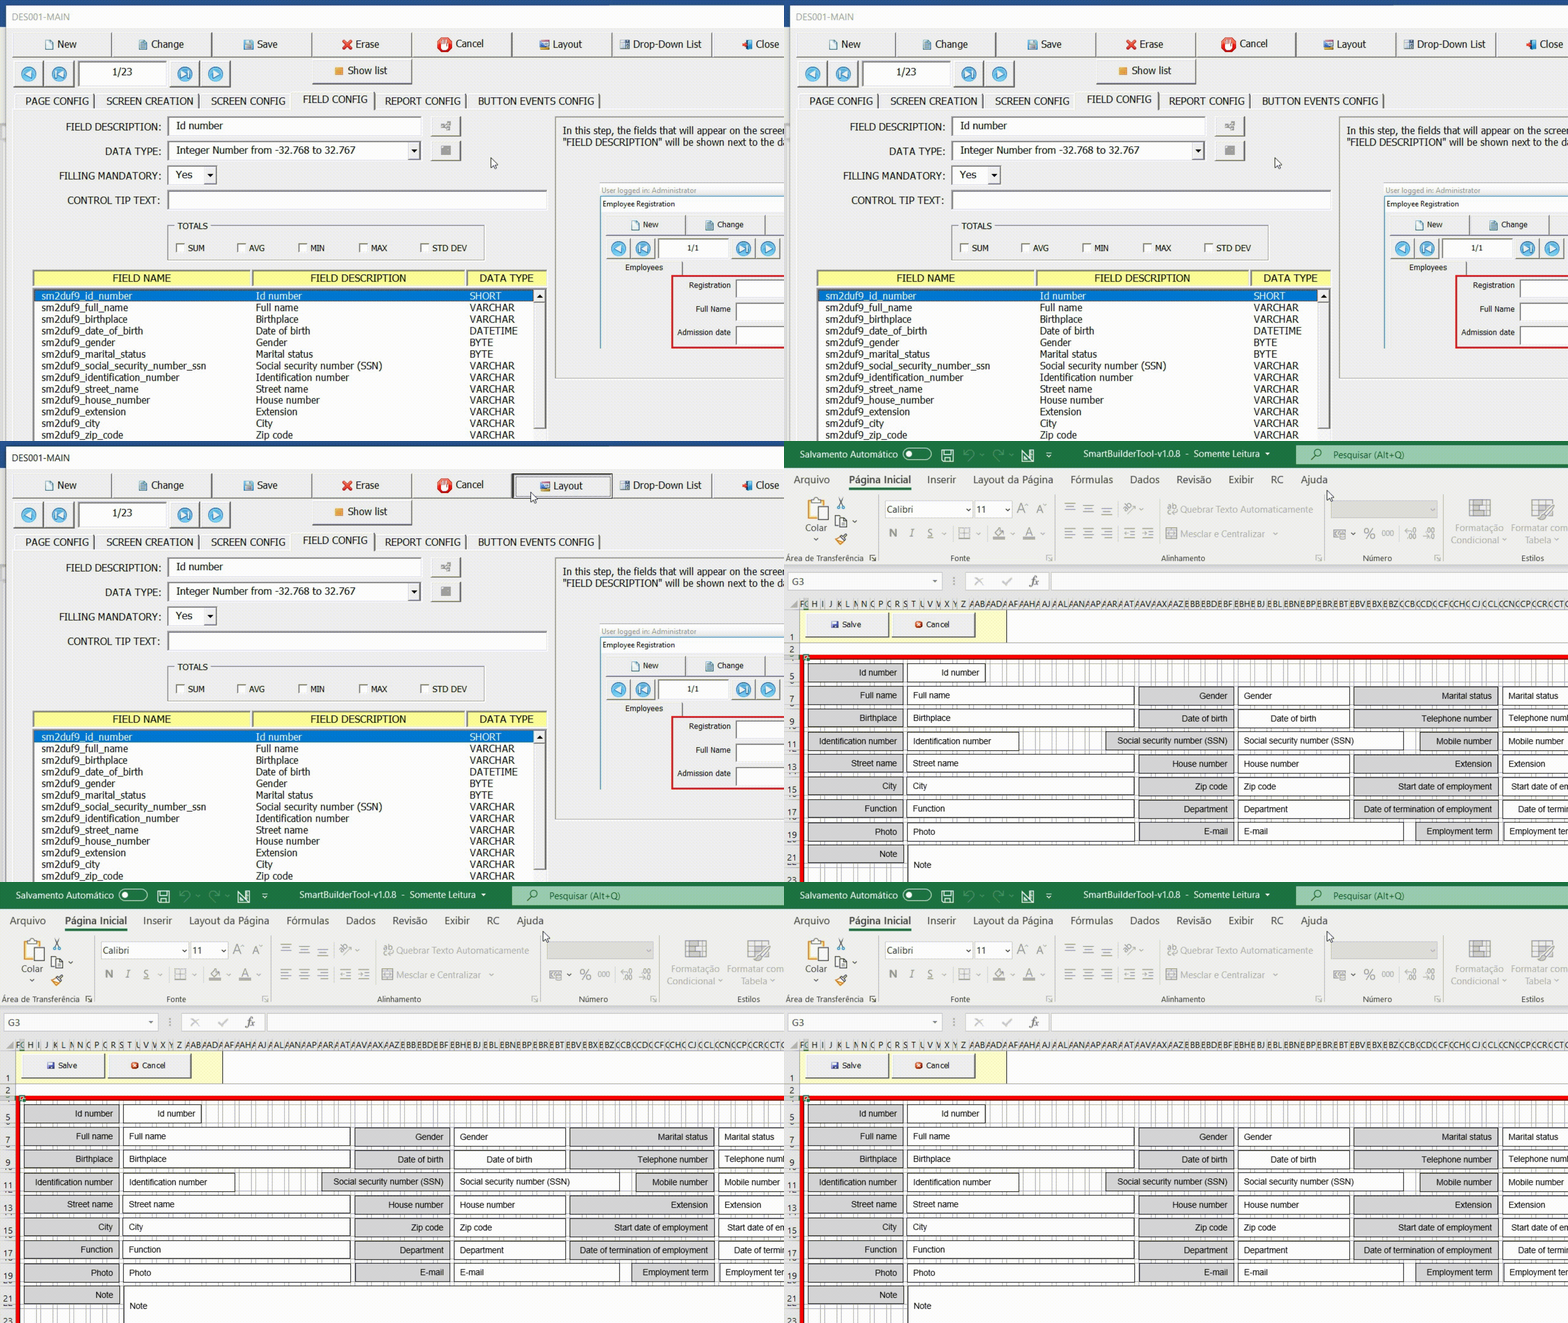
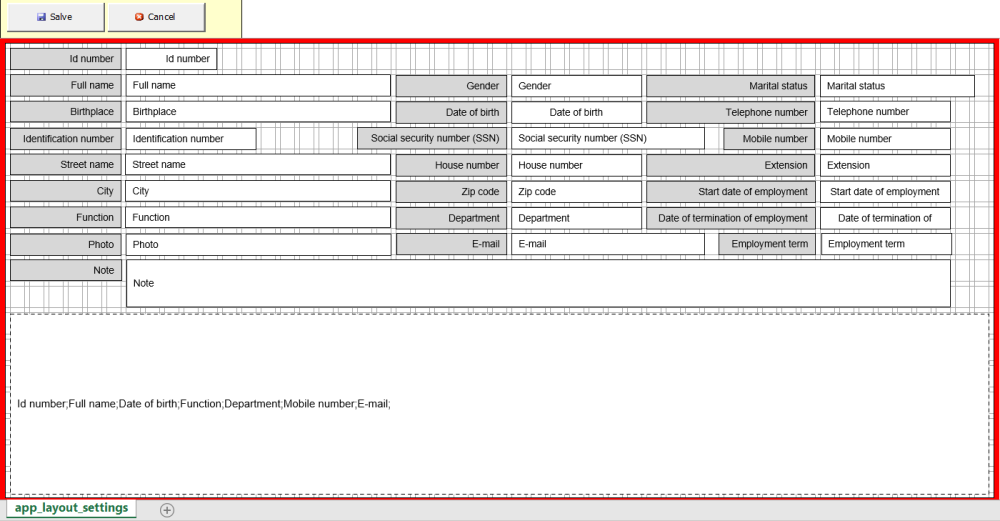
Each interface field is formed by two basic objects (Label and Field).
Objects (Label) have a dark gray background and are used to indicate the purpose of the field.
The objects (Field) identified by the white color are used to show the data.

Adjusting the size and position of an object
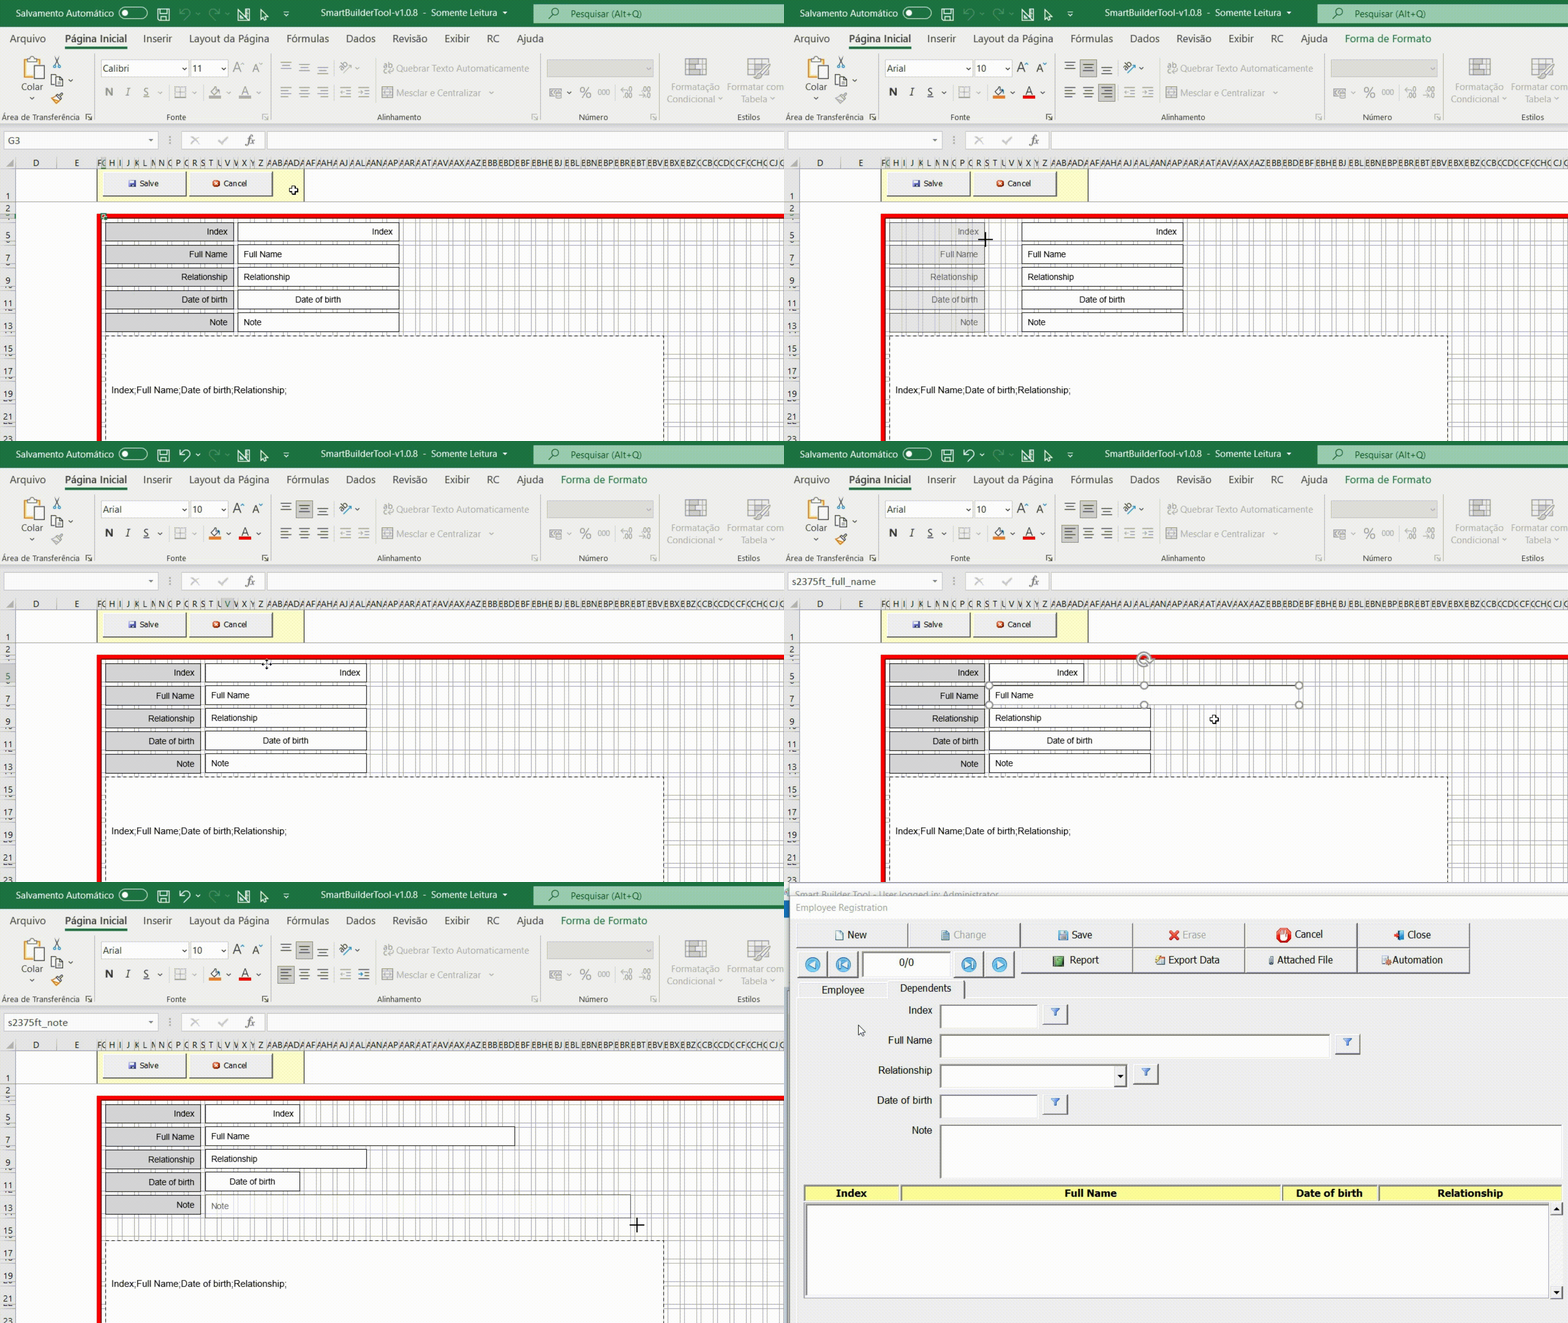
When a field is created, its size and position are automatically set to a default value. However, it is important to readjust the position and size of the fields on the screen for better viewing as shown in the following figure.
Save or discard changes
Once the desired changes have been made, click the (Save) button to save the changes. If you want to discard the changes, click on the (Cancel) button.

Hide Fields
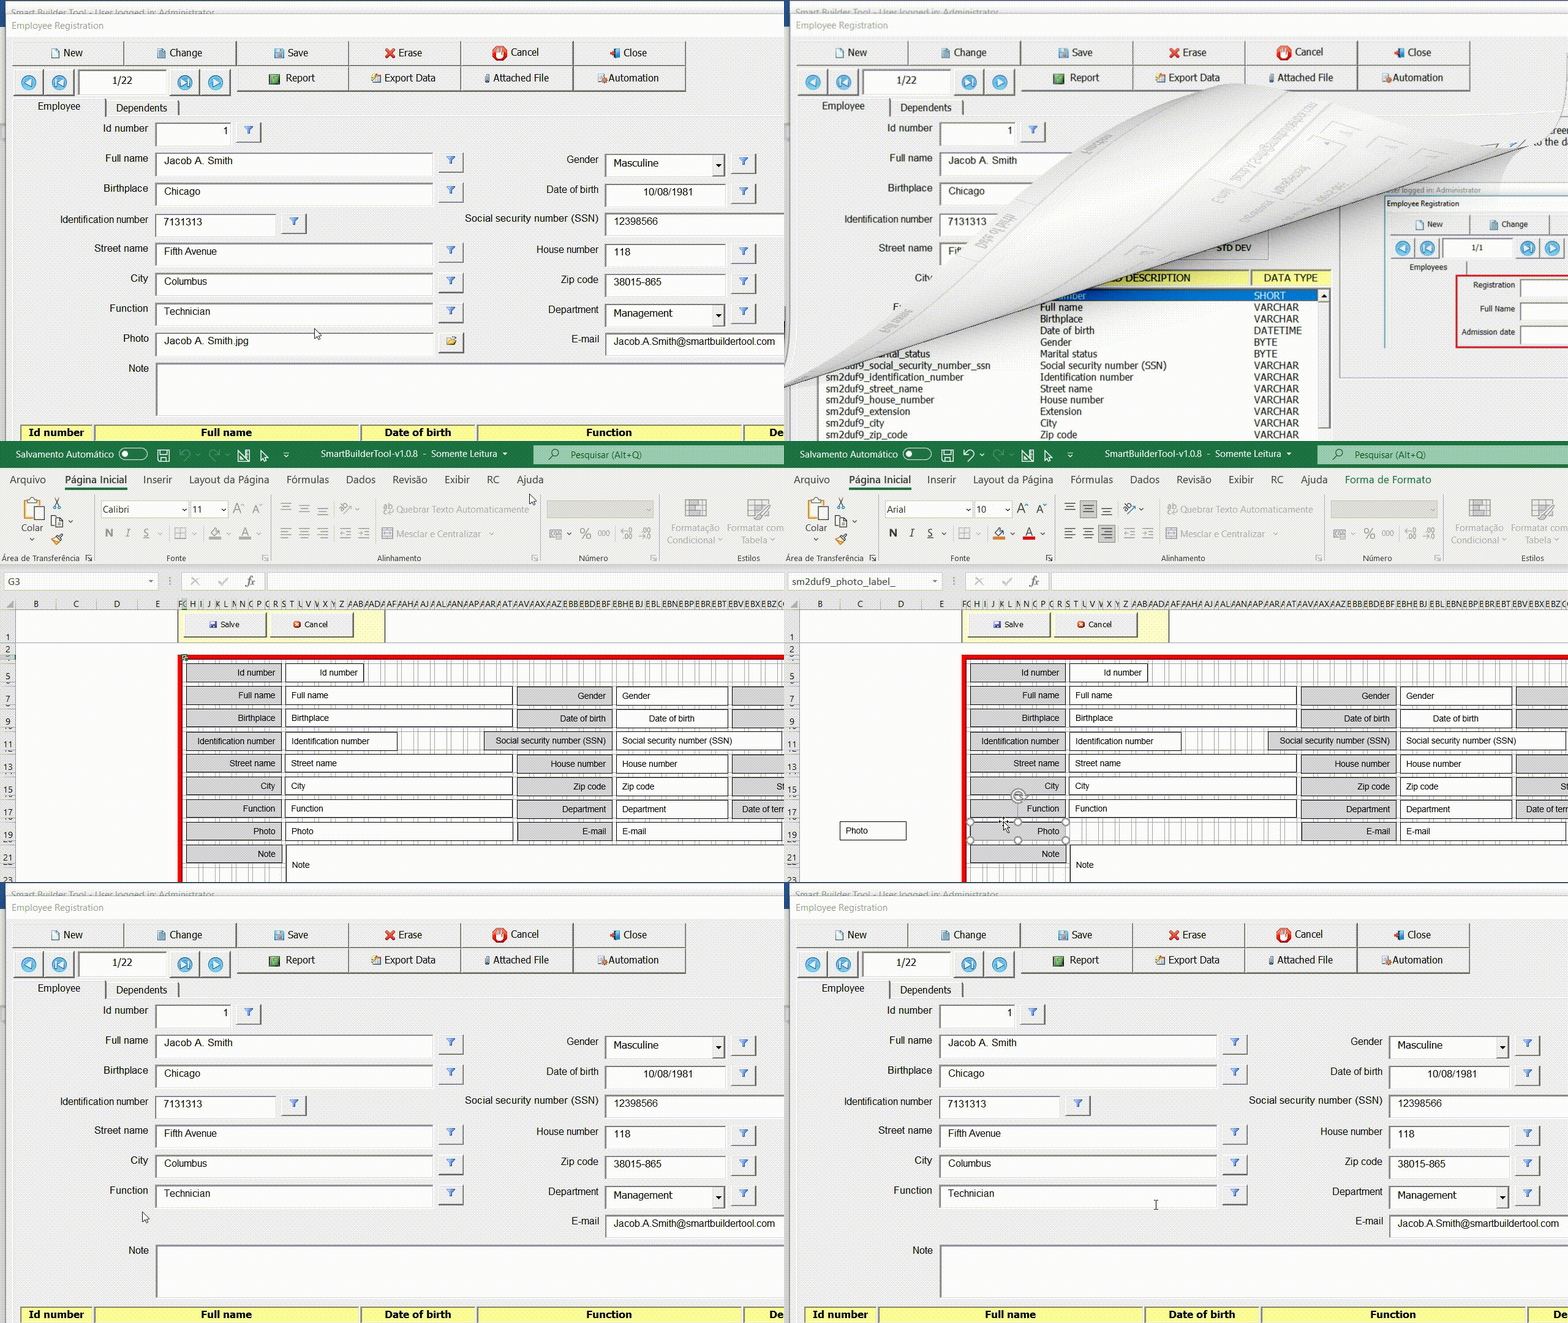
The larger red rectangle in the figure below represents the useful area of the screen where the fields will be displayed. If any fields are positioned outside this area, they will not be displayed. If any field needs to be hidden, move it to the left side of the red line, so that field will not be displayed.
The figure below shows how to hide a field.
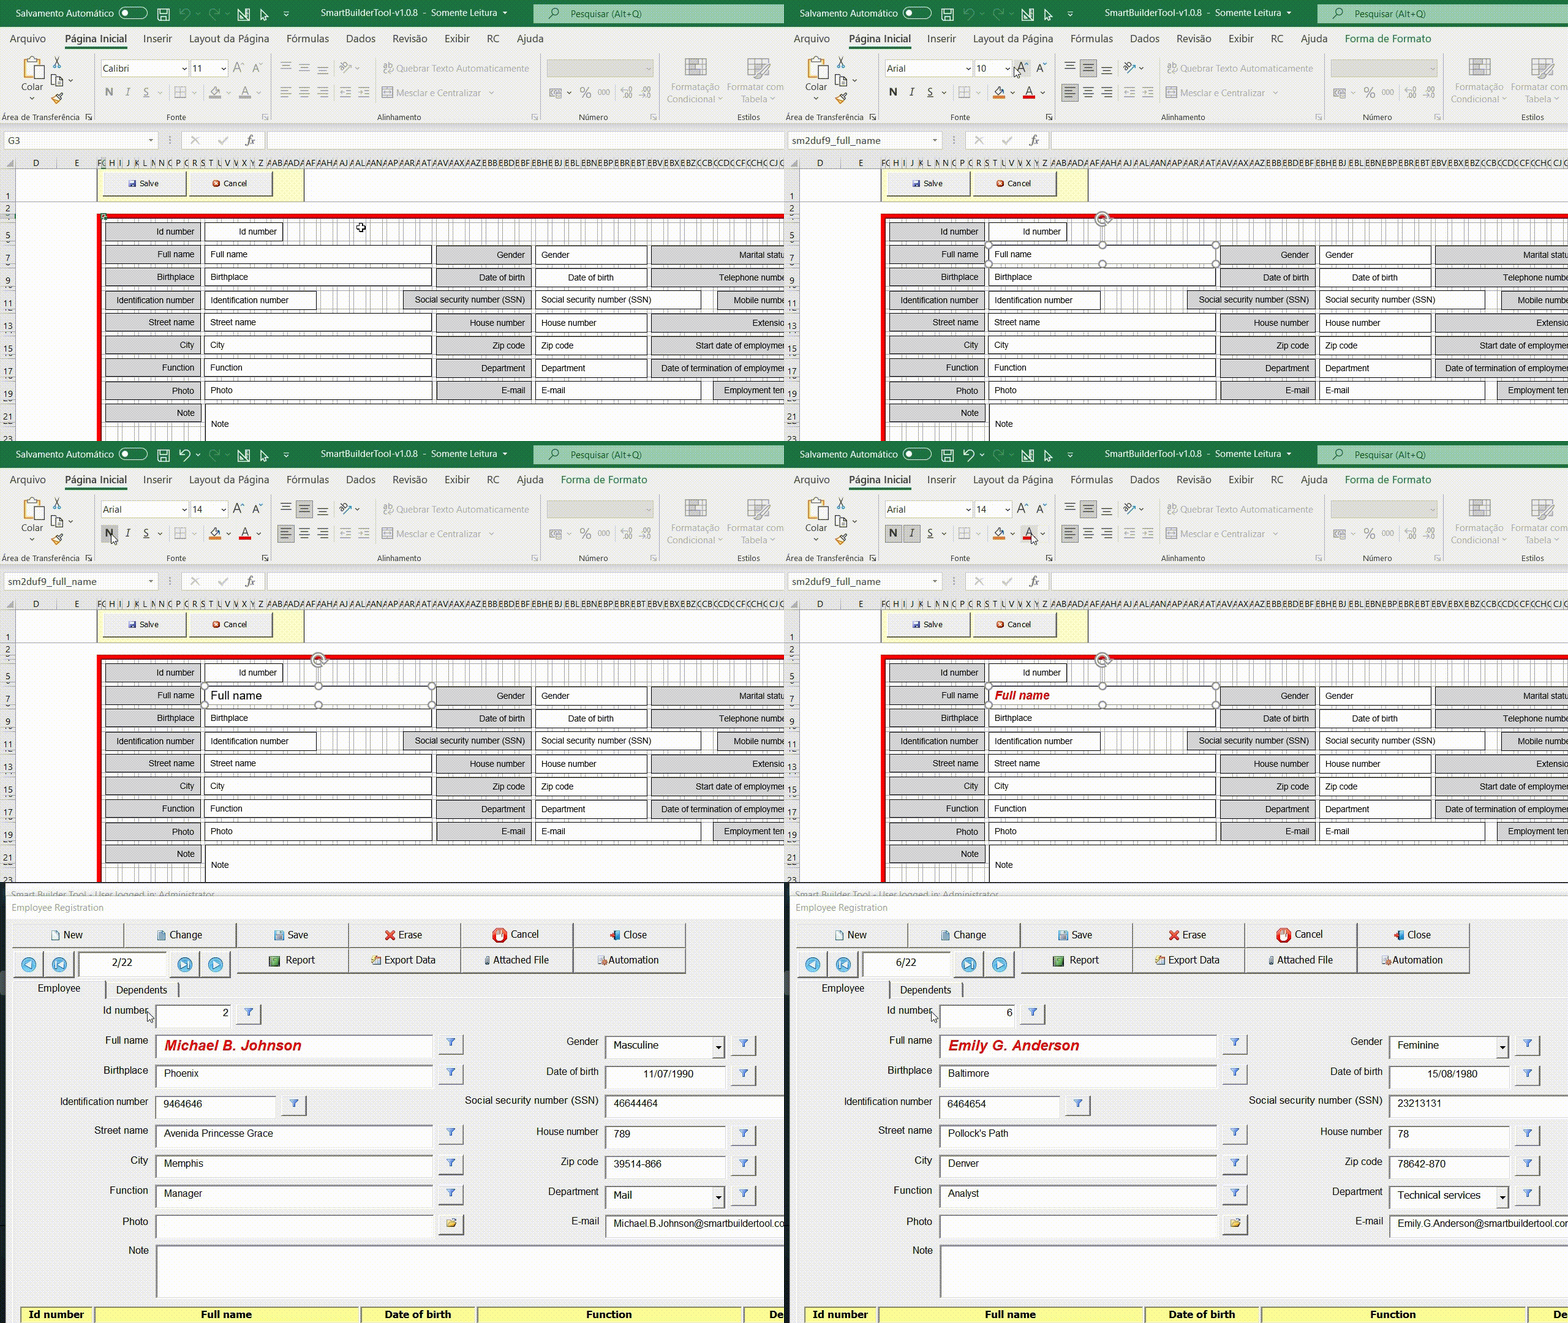
Format the object font
It is possible to change some object font properties such as bold, italic, size and color as shown in the figure below.


Post your comment on this topic.