Installing Social Squared SPFx Client Side Web Part
Social Squared is packaged as an SPFx Client Side Web Part which makes it very simple to install. To install Social Squared, you will need permissions to add Apps to the SharePoint App catalog within your SharePoint environment. It may be that the deployment needs to be carried out by a Tenant or Farm Administrator.
To install the Social Squared package to SharePoint:
- Download the Social Squared SPFx Client Side Web Part if you haven’t done so already.
- Unzip the package. You will find the social-squared.sppkg which is required for deployment to SharePoint Sites. The SocialSquaredTeams.zip is used for Microsoft Teams deployment.
- Navigate to your SharePoint App Catalog. It is likely to be a URL such as: https://your_company.sharepoint.com/sites/appcatalog/SitePages/Home.aspx. Although the name of the App Catalog can vary.
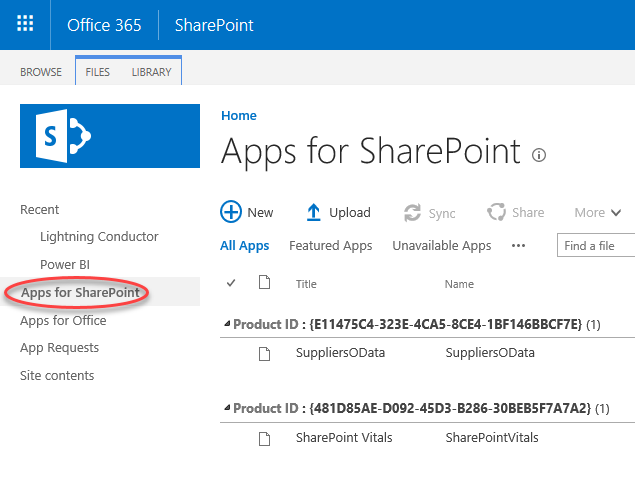
- Click Apps for SharePoint on the left hand navigation pane.
- Click Upload from the Apps for SharePoint list.
- Browse to the Social-Squared.sppkg file that you unzipped in step 2.
- Check the box to make this solution available to all sites in the organization.
- Click Deploy
Congratulations, you have now deployed Social Squared to your organization which means that any user with Design permissions to their sites, can add the Social Squared Client Side Web Part to their SharePoint Sites.


Post your comment on this topic.