
The attachment feature allows users to attach electronic documents to a form or to an ID. Attaching associated documents (lab reports, progress notes, etc.) to a form or ID is not required, but you are encouraged to attach supporting documents to reduce requests for documents. This feature is a way for users to add a document easily and efficiently when necessary (ex. requests from CIBMTR, reduce queries by CIBMTR when lab values are significantly out of range, etc.).
Guidelines when attaching a document
- All identifying information on the document must be removed or obscured prior to attaching (i.e. patient’s name, DOB, social security number, address). If an attached document has identifying information, it will be deleted, and you’ll be asked to reattach the document.
- Attached document must have the CRID clearly located on each page of the document.
- The following file types can be attached and viewed: .pdf, .doc, .docx, .xls, .xlsx, .pptx, .txt, .jpg, .jpeg, .png, .tif, .tiff, .gif
- Do NOT attach error corrections, they will not be keyed if they are attached to a form.
- The same general rules apply for the Donor tab – fields will have different labels, but the functionality is the same
There are several ways to attach an electronic document to a form in FormsNet:
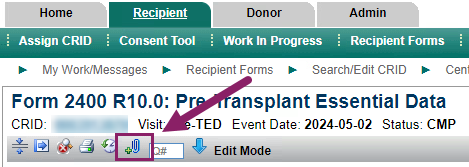
1. Within the form
When opening a form in ‘Edit’ mode you will find a new icon on the menu bar. Simply click on the ‘Add Attachment’ icon to begin.
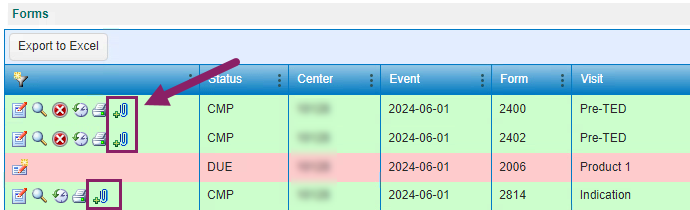
2. On Forms Grid
After searching within the recipient forms grid you will find a new icon on the Forms Grid for forms that have a status of SVD, ERR, MOD, CMP, AUD, and QRY. Simply click on the ‘Add Attachment’ icon to begin.
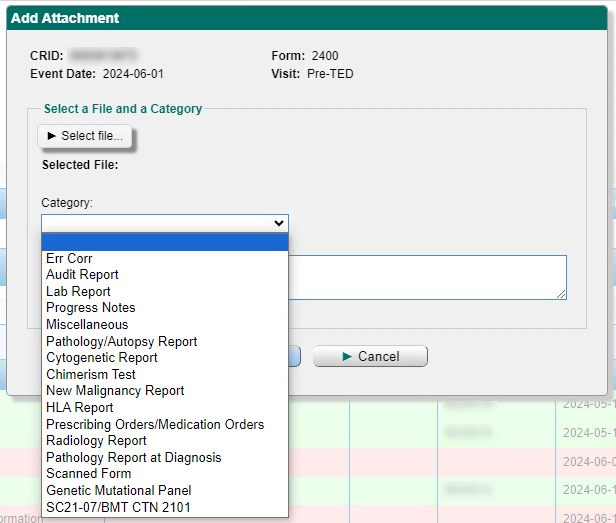
After clicking on the ‘Add Attachment’ icon from either within the form in ‘Edit’ mode or the Forms grid you will get a pop-up screen.
- ‘Select File’ will allow you to browse your computer to locate the file that you would like to attach.
- You will then be required to select a category for the file you are attaching. Once you have selected a file and category you can then upload the document. There is not a limit to the number of documents you can attach to a form.
![]()
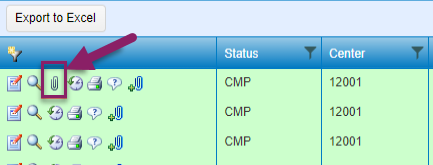
Identify Forms with Attachments
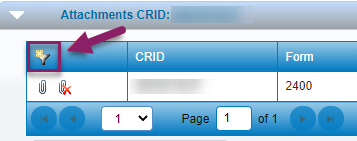
On the Forms grid you will now see a new icon indicating at least one document has been attached to the form. Clicking on the ‘View attachment’ icon will populate the ‘Attachment’ grid with the attached document. If you would like to see attached documents for all forms simply click on the ‘clear all filters and sorts’ icon on the attachment grid.
Opening an Attached Document
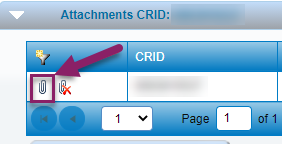
To open a document that has been attached to a form click on the ‘View attachment’ icon found in the attachment grid. The document will open in a new browser tab or window.
Deleting an Attached Document
To delete a document that has been attached to a form click on the paperclip icon with a red X found in the attachment grid
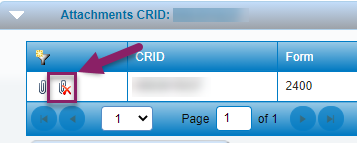
Once you click on this icon you will get a pop-up confirmation box asking you to confirm that you would like to delete the document. If you select ‘Yes’ the document will be permanently deleted from the FormsNet3 system.