In order to install the Lightning Conductor SPFx Client Side Web Part in a SharePoint 2016 environment, the following steps must be performed.
- Extract content of the Lightning Conductor SPFx Client Side Web Part.Zip file to one of the SharePoint WFE servers.
- Open a browser and navigate to your AppCatalog. The URL will vary between tenants, but is likely to be: https://companyname.sharepoint.com/sites/appcatalog.
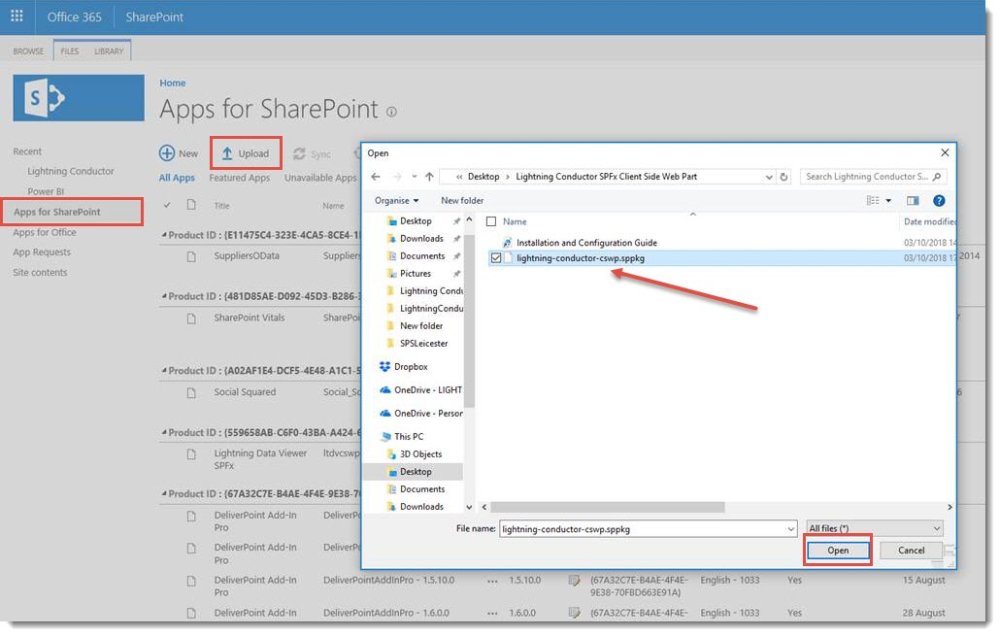
- On the Left hand Navigation Pane, click Apps for SharePoint.
- Click Upload, and browse to the lightning-conductor-cswp.sppkg file that you unzipped.
- Click Open on the Open dialog box.
- Click OK to the Add a document dialog box.
- You should now see a green banner indicating that the web part was uploaded successfully.
- Run SharePoint management shell and execute the PowerShell script deploy.ps1 (from zip file) by providing URL of target web application via parameter -webAppurl
It is assumed that folder “LC” and script “deploy.ps1” (from zip file) will be located in the same folder (like in zip file).
Assuming that script “deploy.ps1” is located in current directory of SharePoint management shell, the command will look like this:
.\deploy.ps1 -webAppUrl URL


Post your comment on this topic.