
Before you can add the Lightning Conductor Web Part to a Microsoft® SharePoint® page, the Lightning Conductor site collection feature must be activated. Use the following steps to activate the Lightning Conductor Web Part site collection feature:
- In the browser, open the top level site of the site collection where your site exists.
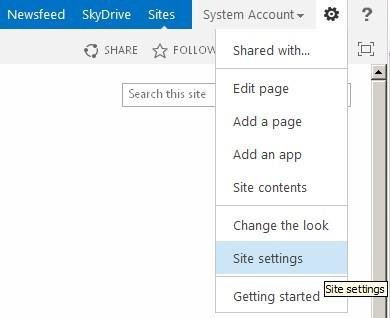
- Click the Settings icon, and then click Site settings.
![]()
- On the Site Settings page, under Site Collection Administration, click Site collection features.
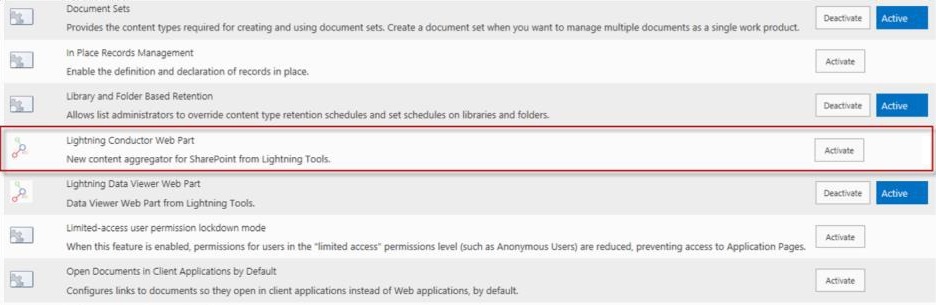
- On the Site Collection Features page, to the right of Lightning Conductor Web Part click Activate.
![]()
The page will refresh and the feature is identified as being Active. You are now ready to add the Web Part to your page.
Once the Lightning Conductor Web Part site collection feature is activated, then in the Web Part gallery you should see five Web Parts:
- LightningConductorAnnouncementsWebPart.webpart
- LightningConductorDocumentsWebPart.webpart
- LightningConductorEventsWebPart.webpart
- LightningConductorTasksWebPart.webpart
- LightningConductorWebPart.webpart

You can view the Web Part gallery from the top-level site of the site collection, by naivgating to the Site Settings page, and under Web Designer Galleries, clicking on Web Parts.
When you add a Web Part to a page, in the Web Part pane, under the Lightning Tools Web Parts category, you should see the following Web Parts:
- Announcements Rollup
- Documents Rollup
- Events Rollup
- Lightning Conductor
- Tasks Rollup

References
Using the Lightning Conductor Web Part →
More information on site collection features →
Post your comment on this topic.