
Added in LCWP version 4.2.0.0 is the ability to connect two Lightning Conductor Web Part instances via a Web Part connection, using a one to many relationship between fields. Previously, we discussed how you can use web part connections to select views. We can also now have one to many relationships between two LCWP instances, where selecting an item in one LCWP will filter the results in a separate LCWP instance.
For example, let’s say you have a Task List where each task may have one or more supporting documents associated with each task. By using a web part connection, users can select a task from a LCWP Task rollup instance in order to display all task related documents in a separate LCWP instance. Follow the steps below to see how this can be accomplished.
Before continuing, the following pre-requisites must first exist:
- Create a SharePoint Task List with content
- Create a SharePoint Document Library with content
- Create a Lookup Column in the Document Library, which retrieves the Task List items.

Take note of the Task List Column selected to be displayed in the Document Library.
- For each document in the Document Library, select a related Task item from the Lookup column so that every document is associated with a Task. Note: A Task may be assigned to more than one document.

Steps for configuring a one to many web part connection between two LCWP instances
Part 1: Configuring the Provider
- Click the EDIT option from the SharePoint menu.

- Add a LCWP instance for the aforementioned Task List to a page, per the steps listed under Adding Web Parts to a page. Follow the appropriate steps for adding the LCWP to a Wiki or Web Part page, whichever is applicable. (Either page type is sufficient)
- From the Web Part drop-down menu on the Task List LCWP instance, click Configure Lightning Conductor.

If Views are enabled, then select Configure View

- On the Data Source tab, configure the rollup source to display the Task List.
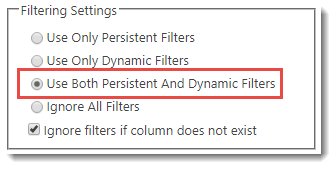
- Under Filtering Settings, select Use Both Persistent and Dynamic Filters
![]()
- Under the Columns tab, select and configure the columns that you want to display for the Task List.
- Under the Display tab, click the Configure Filter Providing Columns link.

- Choose the column[s] that will provide a filter to the Document Library LCWP instance, in this case, the Title field.

- Next, in the Grouping and Linking section, use the Linking Column drop-down menu to select the matching column from the previous step.

- Click Save at the bottom of the Configure LCWP dialog box.


Part 2: Configuring the Consumer
- Click the EDIT option from the SharePoint menu (if not already in Edit mode)
- Add a LCWP instance for the aforementioned Document Library to a page, per the steps listed under Adding Web Parts to a page. Follow the appropriate steps for adding the LCWP to a Wiki or Web Part page, whichever is applicable. (Either page type is sufficient)
- From the Web Part drop-down menu on the Document Library LCWP instance, click Configure Lightning Conductor.

If Views are enabled, then select Configure View

- On the Data Source tab, configure the rollup source to display the Document Library.
- Under Filtering Settings, select Use Both Persistent and Dynamic Filters
![]()
- Under the Columns tab, select and configure the columns that you want to display for the Task List.
- Next, click Configure Filter Consuming Columns from the bottom of the Columns tab.
- Select the Lookup Column that was created in the Document Library, which in this example is the name of the Task List.

- Click Save at the bottom of the Configure LCWP dialog.

Part 3: Configuring the Web Part Connection
- From the Web Part drop-down menu on the Task List LCWP instance, select Edit Web Part.

- Click the Web Part drop-down menu on the Task LIst LCWP instance again, and choose Connections > Send Filter Values To >Document Library LCWP Instance

- From the Web Part drop-down menu on the Document Library LCWP instance, confirm Connections > Get Filter Values From >Task List LCWP Instance is already selected. (This is done automatically when the Send To connection is selected in the previous step).

- Click Cancel to exit Edit Web Part settings.
- If still in Wiki or Web Part Page Edit Mode, click Save.


Testing the Web Part Connection Configuration
If the above steps have been completed successfully, you should now be able to select a task item from the Task List LCWP instance, and the associated documents from the Document Library will be displayed in the Document Library LCWP instance.

In the above image, the Gross Sales Task has been selected, thus filtering the documents in the LCWP instance below to only display those documents that are assigned to the Gross Sales Task. In other words, the Task List Lookup Column in the Document Library has Gross Sales Task assigned to each of the displayed documents. The Contracts Task list column has been added to the Document Library LCWP instance in order to show the connection between the items.
Post your comment on this topic.