
To run tests in a target environment using CT Target, you need to enter information about the target environment.
CT Target builds a test harness using information about the target environment entered by the user and automatically gets the results of running in the target environment.
The target environment can be set in the project properties page or in the new target test project wizard.
Target environment settings
Target environment settings are divided into basic information and detailed settings.

After entering the basic information, detailed settings that require input are displayed.
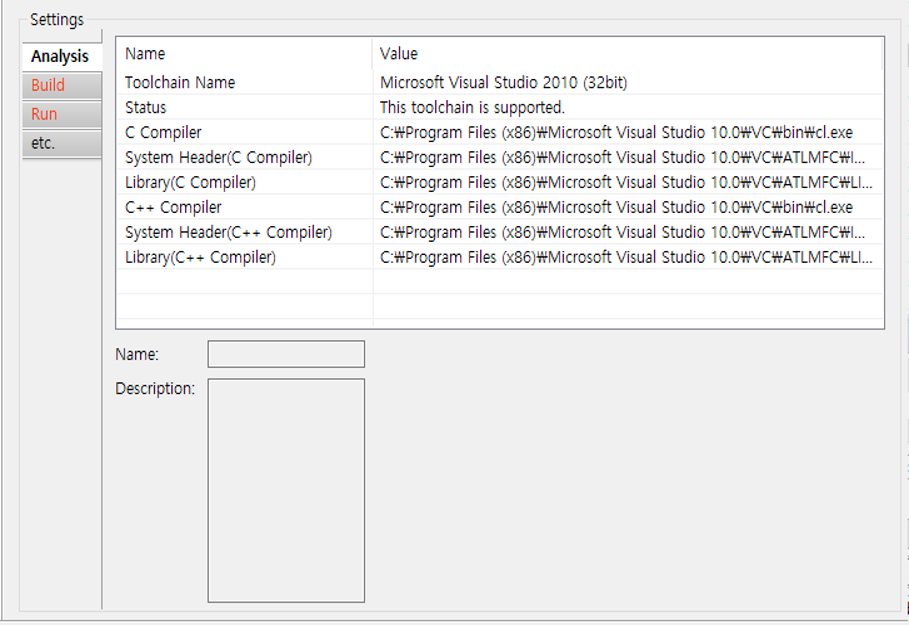
Target environment detailed settings
Target environment detailed settings are divided into the analysis, build, run, and etc.
| Category | Description |
|---|---|
| Analysis | The toolchain information is displayed, and in the case of a target test project, the target compiler related settings required for analysis are displayed. |
| Build | The settings for building the test software are displayed. |
| Run | Settings for running tests and getting results in the target environment are displayed. |
| etc. | Other settings are displayed. (Program entry point, etc.) |
Required settings for each category are indicated in red. Depending on whether the required settings for each category are entered or not, the behavior when clicking the [Run] button is different as shown below.
| Required settings completed category | Description |
|---|---|
| None | Test run impossible |
| Analysis | If you click [Run], it overwrites the original source code with the test code. To perform the test, the user must manually build and run the test. |
| Analysis, Build | If you click [Run], it builds the test code. To perform the test, the user has to manually run the test on the target. |
| Analysis, Build, Run | Automatically run tests in the target environment. |
Import target test results
CT Target saves and imports the result of running the test in the target environment in log format.
If you do not use the debugger, you need the settings for saving the target test results(Log interface) and the settings for importing(Target Log Collector – Preferences).
Log interface
Log interface is a setting for saving the test results in the target environment. Log interface is written in the form of a source code that is actually run in the target environment.

Log interface structure
| Function | Description |
|---|---|
viod cs_io_initialize() |
Initial function for transfer |
void_cs_io_finalize() |
Transfer end function |
void cs_io_flush() |
Remaining data transfer function |
void cs_io_putbyte(codescroll_byte v) |
1-byte data transfer function |
Import target log automatically
The target log, which is the result of the test execution, can be automatically imported through the target log collector. For the target log collector settings, please refer to [Target Log Collector] in Target Log Collector and Target Test Preferences.
Import target log manually
If the target log cannot be imported automatically, you can import the target log manually.
Import from a log file
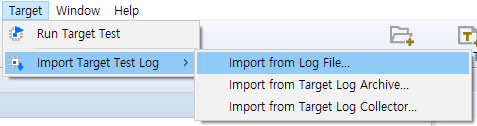
- After selecting an analyzed project, click [Target Test] -> [import Target Test Log] -> [Import from Log File…] in the global menu.
![]()
- Select a target test log file and click the [OK] button.
![]()

Import from a target log archive
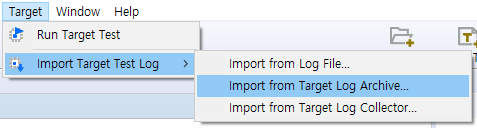
- After selecting an analyzed project, click [Target Test] -> [import Target Test Log] -> [Import from Target Log Archive…] in the global menu.
![]()
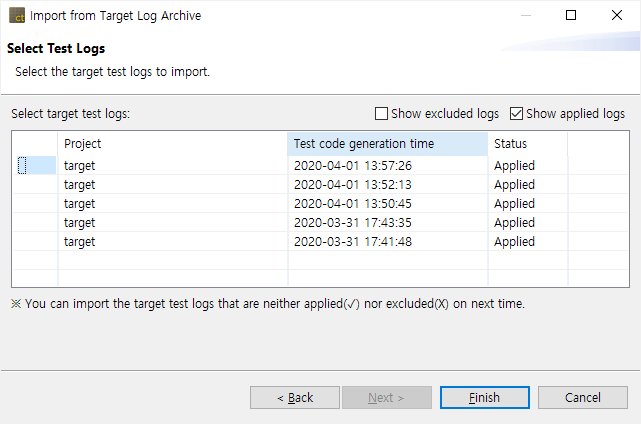
- Select a target log archive file and click the [Next] button.
![]()

- Check a target test log file and click the [OK] button.
![]()
Import from target log collector
- To get logs from the target log collector, you need to select ‘Use the default target log collector’ from [Preferences] -> [Target Test] -> [Target Log Collector].
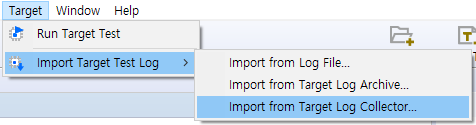
- After selecting an analyzed project, click [Target Test] -> [import Target Test Log] -> [Import from Target Log Collector…] in the global menu.
![]()
- Click the [Yes] button to import all the new target test logs or click the [Show details] button.
![]()

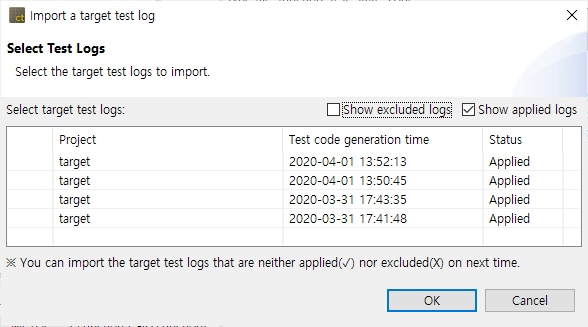
- If you click the [Show details] button, check the target test log to be imported and click the [OK] button.
![]()
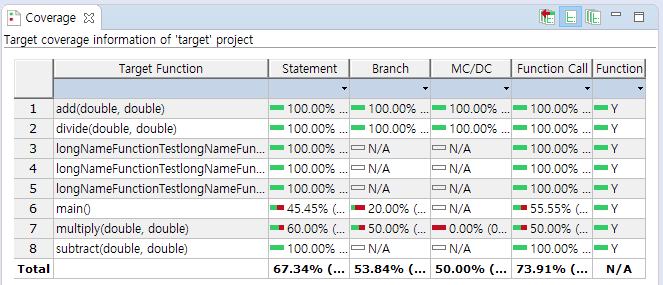
Result
After the import is completed, you can check the target coverage information in the coverage view.
Need more help with this?
Don’t hesitate to contact us here.