
Export a Project
The project can be exported including the project settings and the test. The exported project can be imported in CLI environment by using projectIE.exe.
p(banner tip). For more information, see projectIE document.
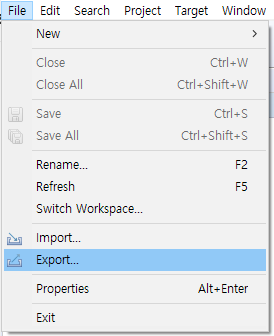
- Click [File] -> [Export] menu.
![]()
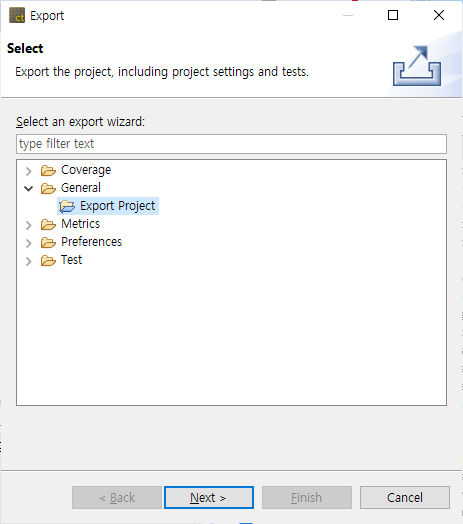
- Click [General] -> [Export Project].
![]()
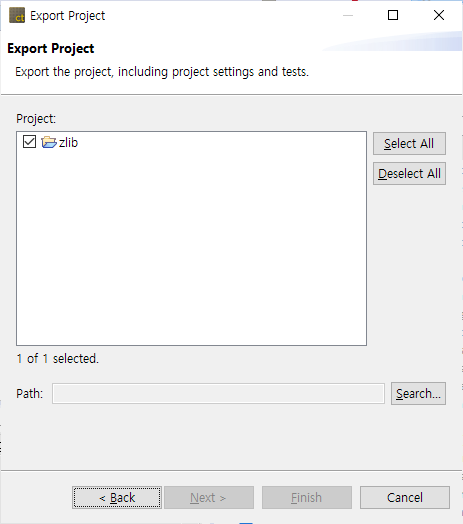
- Select the project to be exported and the export path and click [Finish].
![]()
Create a test result report
You can create the test result report in various formats by using Export.
- Click [File] -> [Export] menu.
![]()
- Click [Test] -> [Create Test Report].
![]()

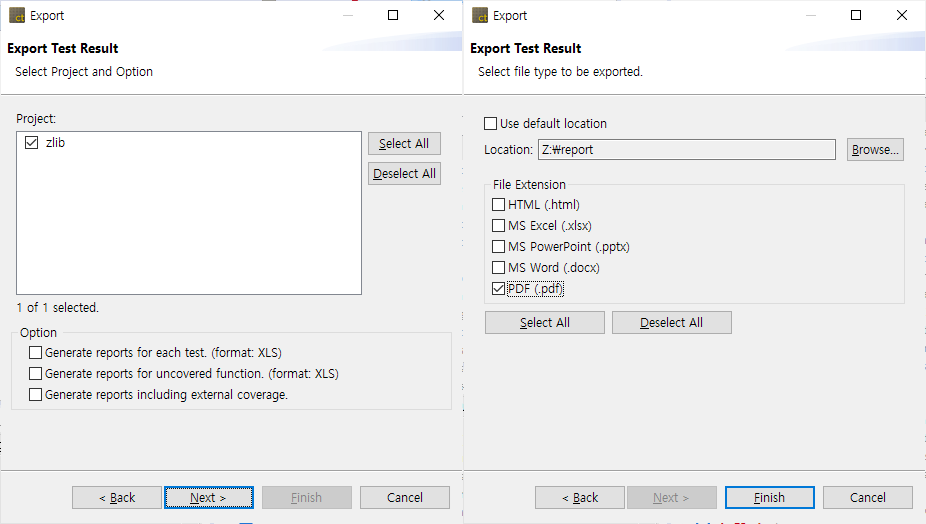
- Select the project that you want to create the report, and as an option, select Create Report for each Test, Create Report for uncovered function, and Create Report containing the external coverage, and then select the report creation path and the report extension.
![]()
- In [Project], select the project that you want to create a report.
- In [Option] group, select the desired checkbox among [Generate reports for each test], [Generate reports for uncovered function], and [Generate reports including external coverage].
- Generate reports for each test: Generates the report for each test in the selected project.
- Generate reports for uncovered function: Generates the report for the uncovered function in the selected project.
- Generate reports including external coverage: Generates the report containing the external coverage in the selected project.
- Selecting the checkbox [Use default location] specified “User Account\Export” directory by default.
- [File Extension] provides the report file format with html, pdf, docx, pptx and xlsx (※ if you need to create the report with the extension of doc, ppt and xls, please contact the support team). The report file extension can be selected in duplicate.
- Click [Open Folder] button in the message “Report has been created” to check the report in the folder where it is saved, or click [Confirm] to finish the export.
![]()
Export Test
The test information created in the project can be exported at once. Before a project is not analyzed or if there is no test information (Unit/Integration Test, Stub) created, the export cannot be carried out.
- Click [File] -> [Export].
![]()
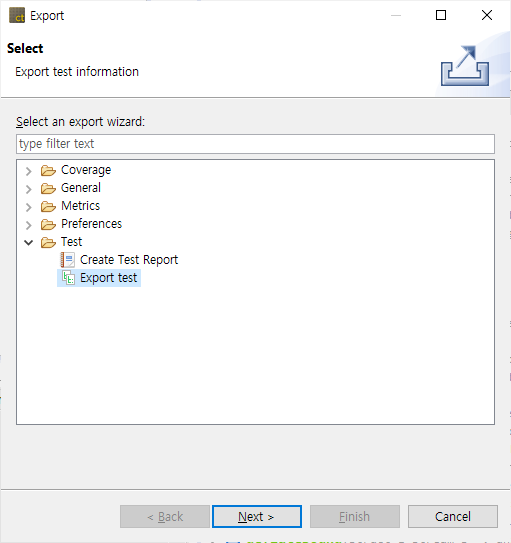
- Click [Test] -> [Export Test].
![]()
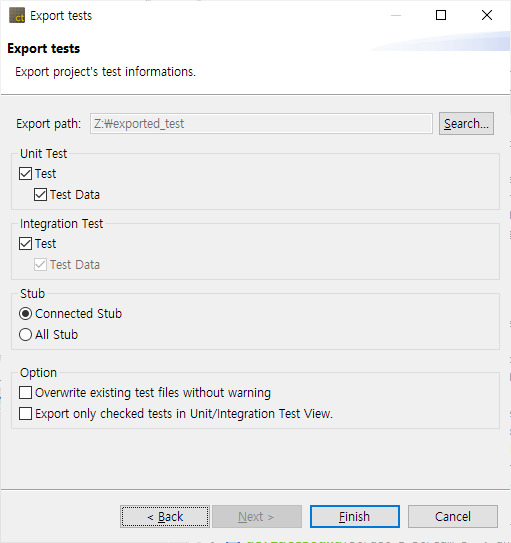
- Select the export path, the unit test items, the integration test items, the stub items, and the options, and click [Finish].
![]()
- In [Export path], enter the path to export the test.
- In [Unit Test] group, check whether to export [Test] and [Test Data] respectively.
- In [Integration Test] group, check whether to export [Test].
- When exporting the integration test, it is exported with the test data in a set.
- [Stub] group, select the stub to be exported among [Connected stubs] and [All stubs].
- Connected stubs: The stubs connected with the test to be exported. If the stubs have no link with the test or the test to be exported is not selected, it does not export that stubs.
- All Stub: It exports all the stubs created in the project.
- In [Option] group, choose whether to overwrite the existing test file when they exist, and whether to export only the tests checked in the Unit/Integration Test view.
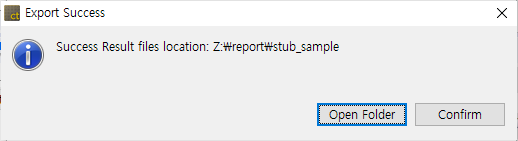
- Click [Open Folder] button in the message “Test has been exported successfully.” to check the test exported in the folder where it is saved, or click [Confirm] to finish the export.
![]()

Export Coverage
You can export the coverage information measured in the project as a file in the form of Coverage Shared Data (*.csd) format.
- Click [File] -> [Export].
![]()
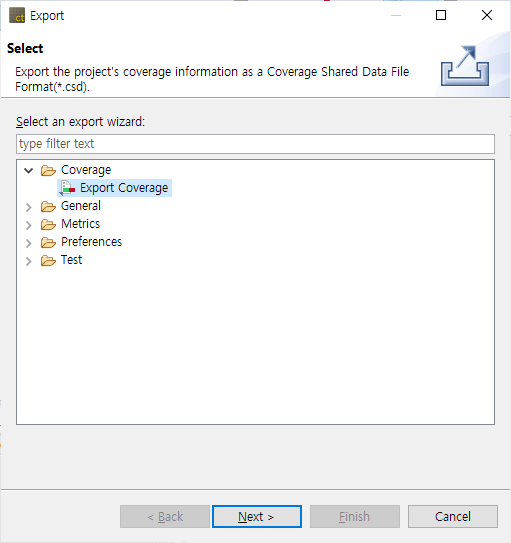
- Select [Coverage] -> [Export Coverage] and click [Next].
![]()
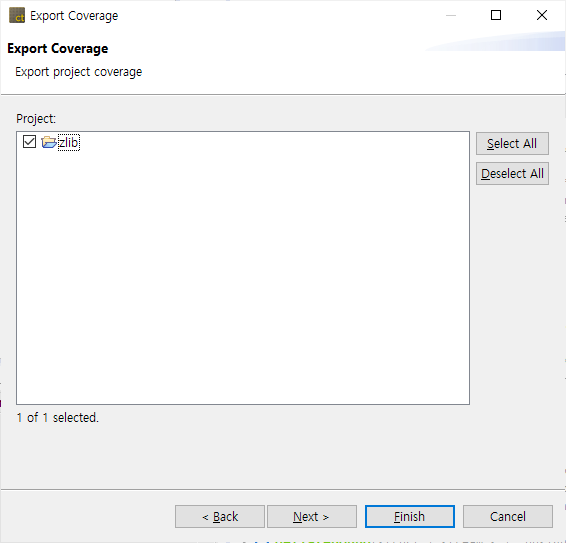
- Select the project that you want to export coverage information and click [Next].
![]()
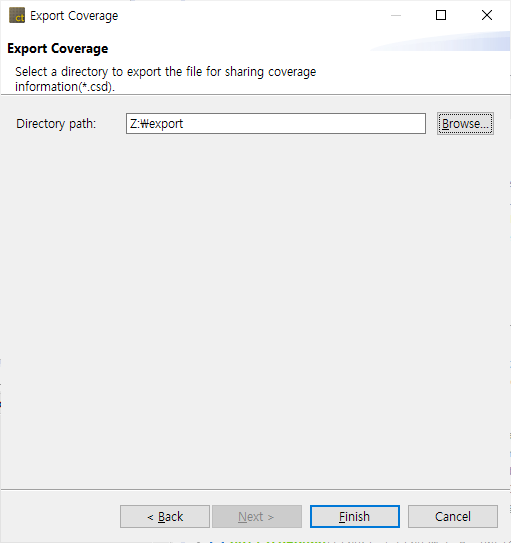
- Enter the directory path to export and click [Finish].
![]()
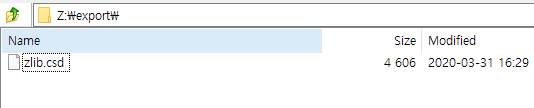
- A file with the same name as the project name is created.
![]()
Metric
It exports the metric result of the project in a report file.
- In the main menu, click [File] -> [Export].
![]()
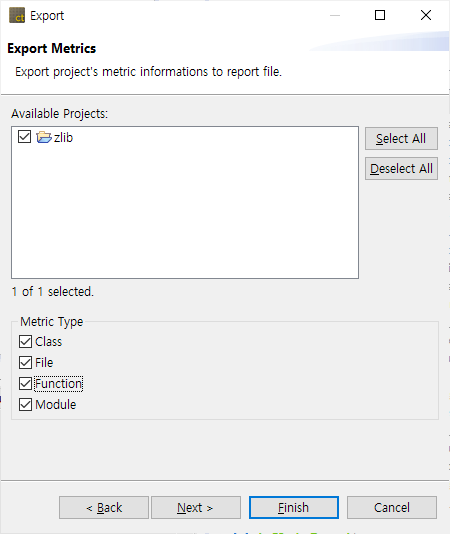
- Click [Metrics] -> [Metrics] and click [Next].
![]()
- Enter the path where the report is exported to.
- Select the report format.

- Click [Finish].
Toolchain
You can export the information of the toolchain created.
- In the main menu, click [File] -> [Export]. The Export wizard is opened.
![]()
- Click [Preferences] -> [ToolChain] and click [Next].
- The list of toolchains registered currently is displayed.
- Check the system header and the toolchain to be imported and enter the export path.
![]()

- Click [Finish].
Need more help with this?
Don’t hesitate to contact us here.