
Locate the foam tiller/spacer pieces. Glue the halves together using dowels to align the parts so that you have two identical spacers. Sand a small round over onto the edges, and then laminate 2 layers of 6oz fiberglass covering all surfaces. The goal is to cover all the foam and end up with the parts being the same thickness as the rudder blades. The grove only needs one layer of glass. Once laminated fair, prime, and paint the parts being sure to keep them the same finished thickness as the rudders.

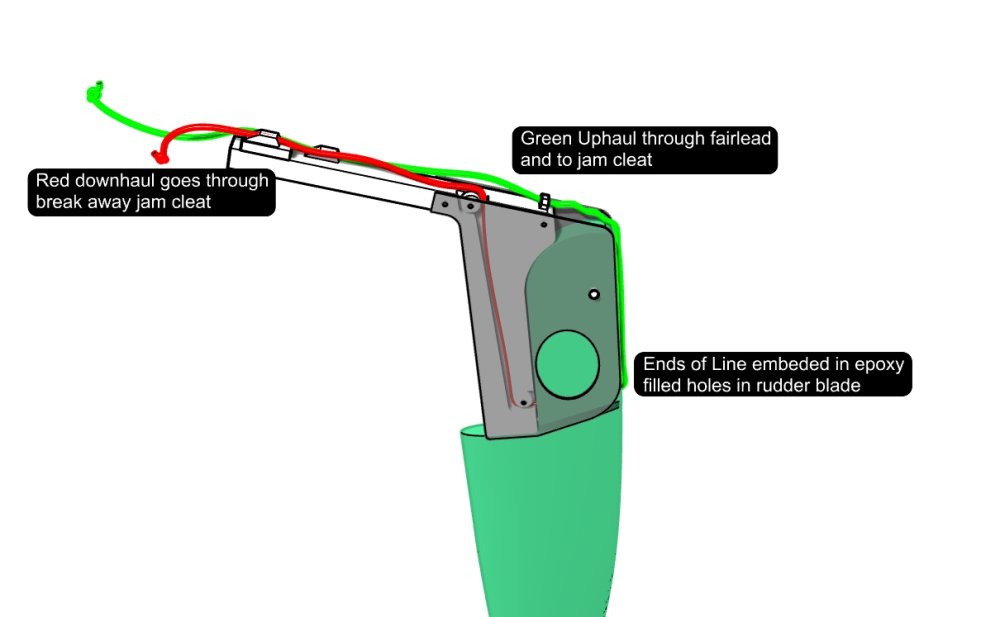
Attach uphaul and downhaul lines into the rudder blades as shown. Lines should be 4mm polyester. Make sure to position them in the correct place, drill an oversized hole in the edge of the foil, fill the hole half full of epoxy, and then poke the end of the line into the hole as deep as you can. Clean up the squeezed-out epoxy and let full cure.
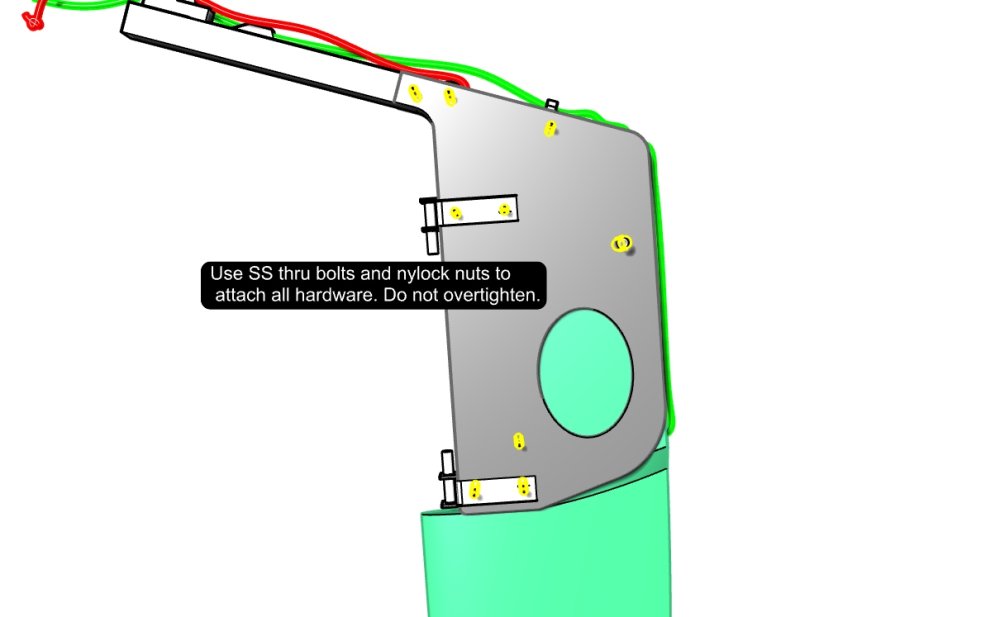
Bolt the assembly together using stainless steel bolts and nylock nuts. Do not overtighten and DO NOT glue in place as you want to be able to disassemble the rudder and fine-tune the fit of the rudder blade.
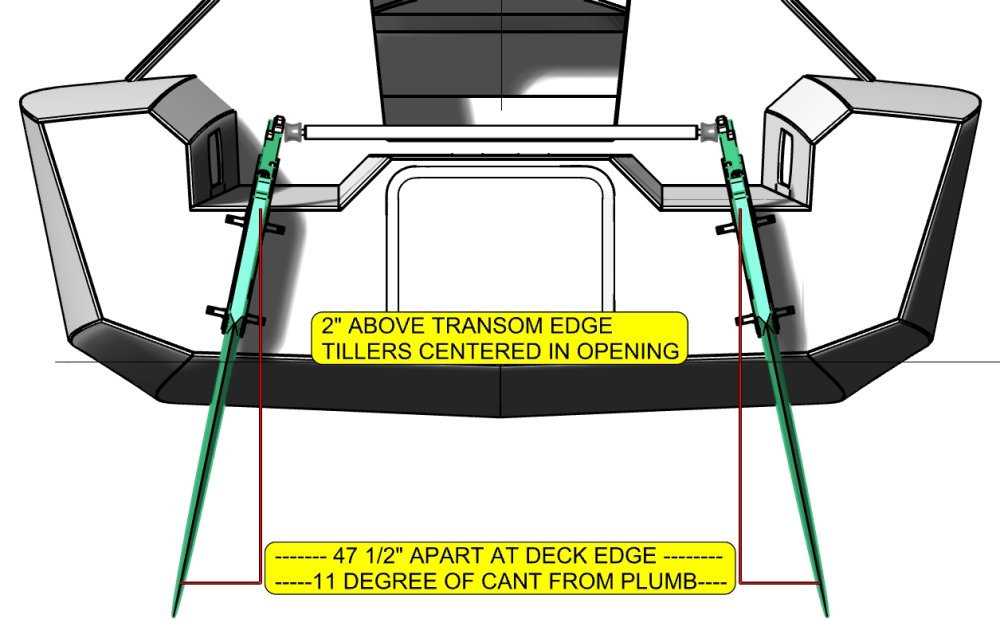
Rudder assemblies get through-bolted onto the transom with generous backing plates on both sides of the foam hull. The backing plates should extend a minimum of 1” around the hardware. They can be made from 3/16” fiberglass plate which is ideal. Alternatively they can be made from stainless steel, or aluminum. The backing plates help distribute the load of the gudgeons over a larger area of the hull. Use a generous amount of Silkaflex 291 or 5200 to bed all the hardware. DO NOT OVER TIGHTEN THE BOLTS! You should see a bit of squeeze out all around. Clean up the squeeze out with alchohol and paper towels.
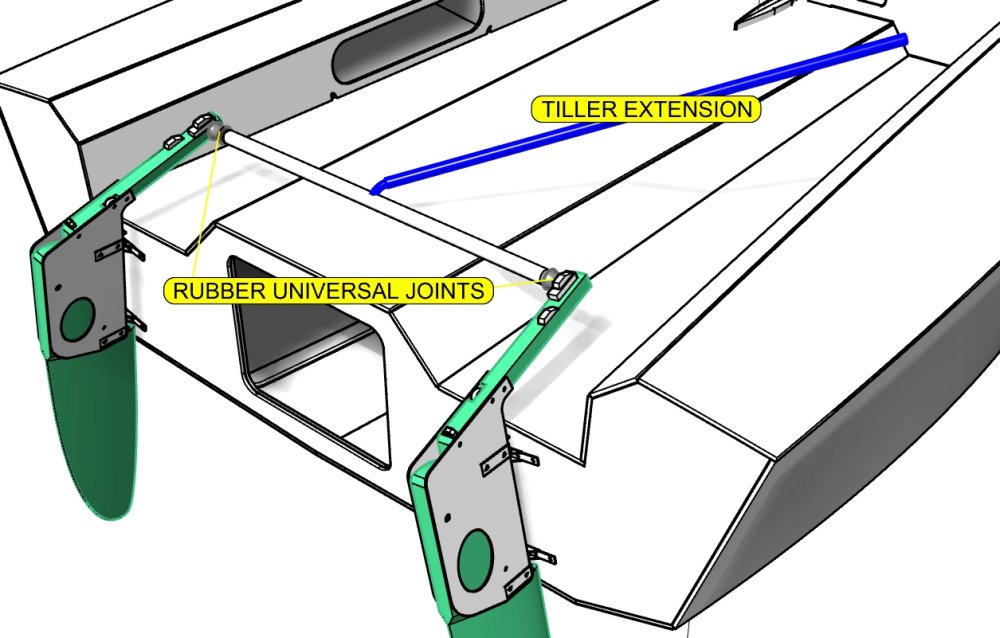
The small tiller arms of the rudder assemblies get tied together with cross-arm. The cross arm can be made from carbon fiber or aluminum tubing. The end caps of the cross-arm should be bolted securely into place on the tube. Use windsurfer type universal fittings to join the cross arm to the tiller arms. Link to supplier. You should include a provision to fine tune the alignment of the rudders. This can be done by threading a hole in the center of the end caps and using a piece of threaded rod to attach the tiller arms. You can then adjust the alignment by tightening those all thread pieces. Make sure to include some lock nuts so that your settings do not change while sailing. There are many schools of thought in setting up the rudder alignment. The most standard setup is to add 1-2 degrees of toe in to the rudders to help in stability and rudder feel.
Post your comment on this topic.