
Having a nice set of foils (rudder and daggerboard) will help your Skate perform to its potential. This is especially important when sailing upwind such as short tacking into a marina. The CNC cut foil blanks in your kit are true NACA 0012 foils which are great for this application. They perform efficiently over a broad range of conditions and resist stalling. A flat plank can also work as a rudder and daggerboard, and you do see this on many boats this size. But you can really tell a difference between flat planks and a nice set of foils like is outfitted on the Skate. The boat will be a silky smooth joy to sail. Pointing many degrees higher into the wind while keeping her speed up. She can also pinch even higher with just a gradual loss of speed as you do so. Thus when there is a gust of wind you can pinch a little, stay upright, all the while keeping your speed up. Because of the significant sailing benefit of nice foils, it is important to spend some extra time nicely laminating and finishing them.
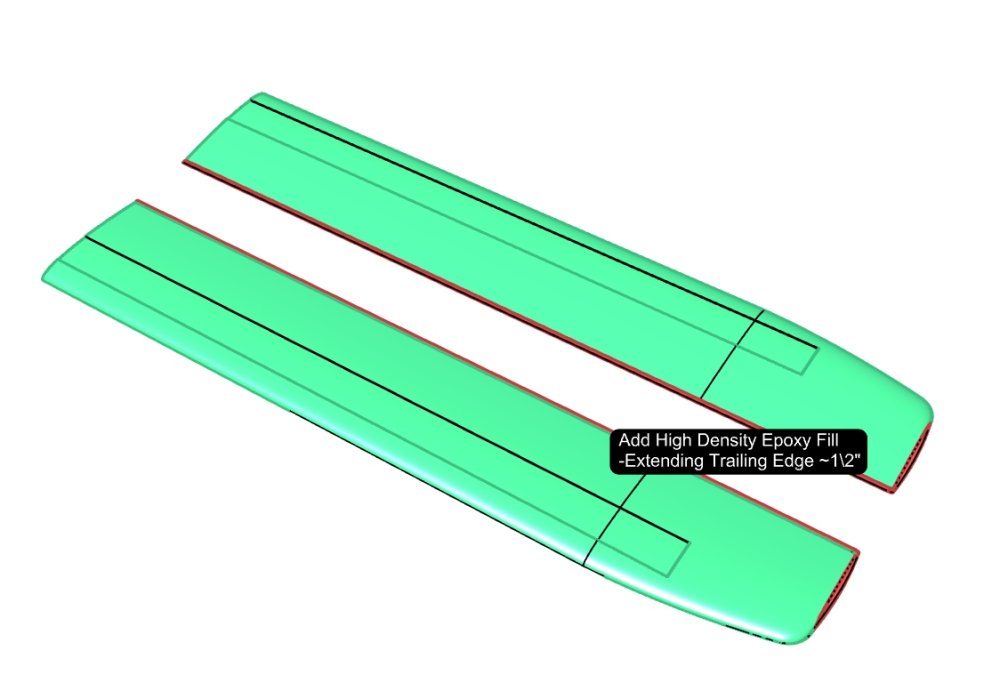
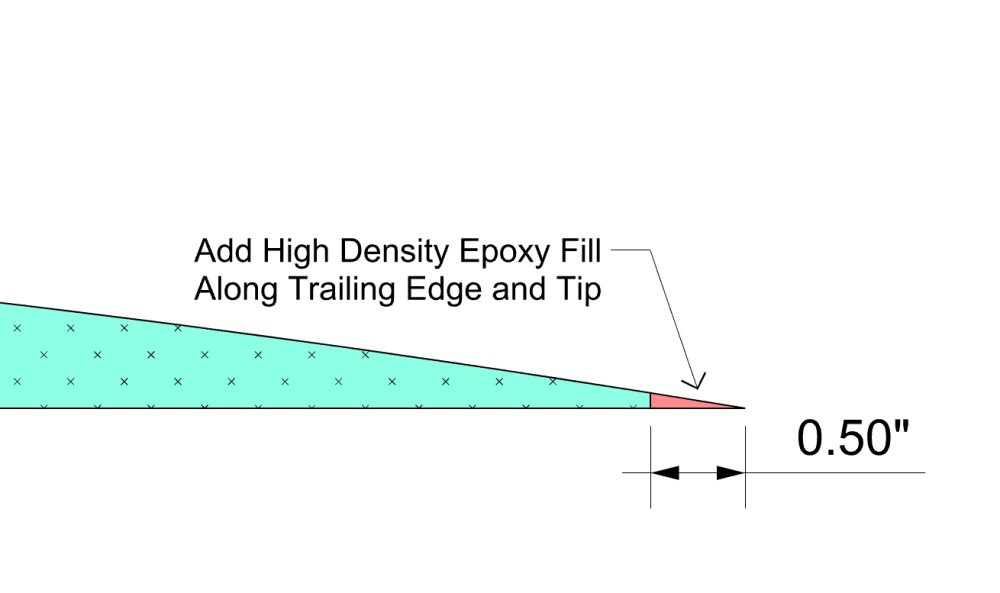
Lay foil halves onto a waxed flat table—rudder and daggerboard halves. It is important that the table is flat to help insure a straight foil assembly. Use a sanding block to square up the trailing edges— ideally the trailing edge of the foam core should be about 1/8” thick on each foil half. Use epoxy thickened with high density filler to extend the trailing edge about 1/2”. Also fill the tips of the foils trying to do a clean job of extending the existing surfaces.
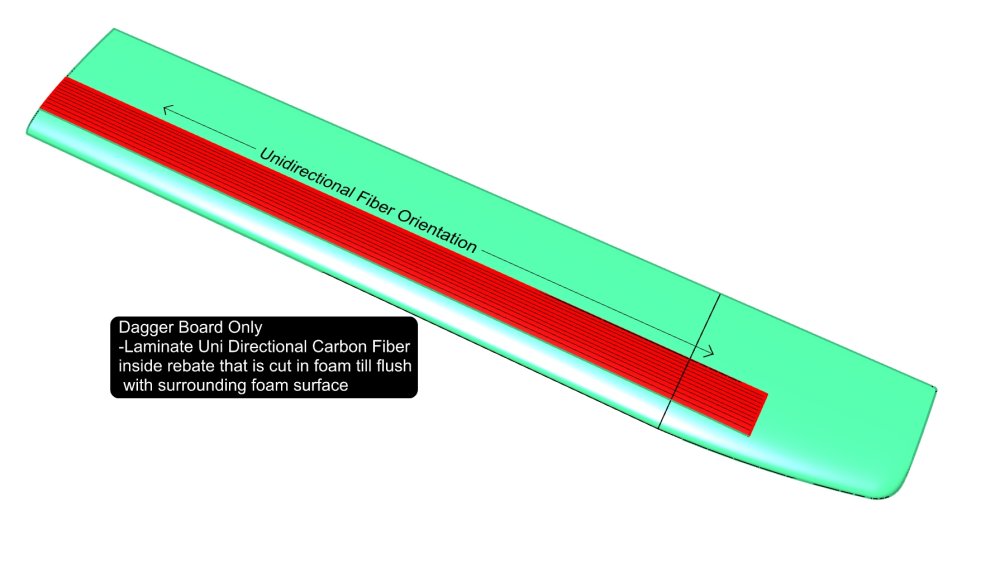
Once the fill has cured, sand and detail until it blends in with the rest of the foil foam surface. You are aiming to get a nice fair surface that blends nicely between the epoxy fill and the foam. You may need to apply some small fills in places. Once this is cured then it is time to laminate the carbon fiber uni-directional stack into the Daggerboards. You may have noticed that there is a slight rebate along the daggerboard foam. Pre-cut strips of unidirectional to fit in this rebate. This can be carbon fiber or S-glass uni. It is best to use the lighter weight uni’s from 6-10 oz as they are easier to fully saturate by hand. It may take up to 12 layers per half to fill up this rebate. Apply a generous amount of unthickened epoxy into the rebate. The foam will soak up quite a bit of epoxy, so continue to brush on epoxy until there is a thin shiny film on the surface. Lay down your first layer of carbon uni into the wet epoxy. Use a squeegee starting in the middle of the uni and pulling/stretching toward each end till it is laying flat. You should see the carbon has partially saturated from the epoxy beneath it. Apply some more epoxy until that layer is fully wet out and then add another dry layer. Again use the squeegee to pull out the uni-directional fabric till it is laying down flat and wet out fully. Continue till the rebate is filled in till it is flush with the surrounding foam. If at anytime you feel the epoxy from a previous layer start to harden—STOP AT THAT LAYER. You can come back the next day to finish the remaining layers.
Once the epoxy has setup, prep all the foil halves on the flat table to get ready for laminating. Make sure that all epoxy has been sanded and there are no shiny or high spots on the foils. Mix up a batch of epoxy resin and apply a thick coat of epoxy on one of the foils. Reapply until there is a uniform shiny layer of epoxy on all the foam. Now lay dry cloth into the wet epoxy and use a squeegee to lay down the cloth. Use the roller as needed to add epoxy onto the cloth until fully saturated. Make sure that you keep an eye on the laminate as the foam is rather thirsty and may pull resin from the laminate making it dry in spots. Trim the edges of the laminate so that it is just shy of touching the laminate table. Double-check check the fiberglass is fully saturated and laid down smoothly. Now move to the next foil half and repeat till all foil halves are laminated. Wait a few hours and then come back to roll on a nice smooth fill coat of epoxy.
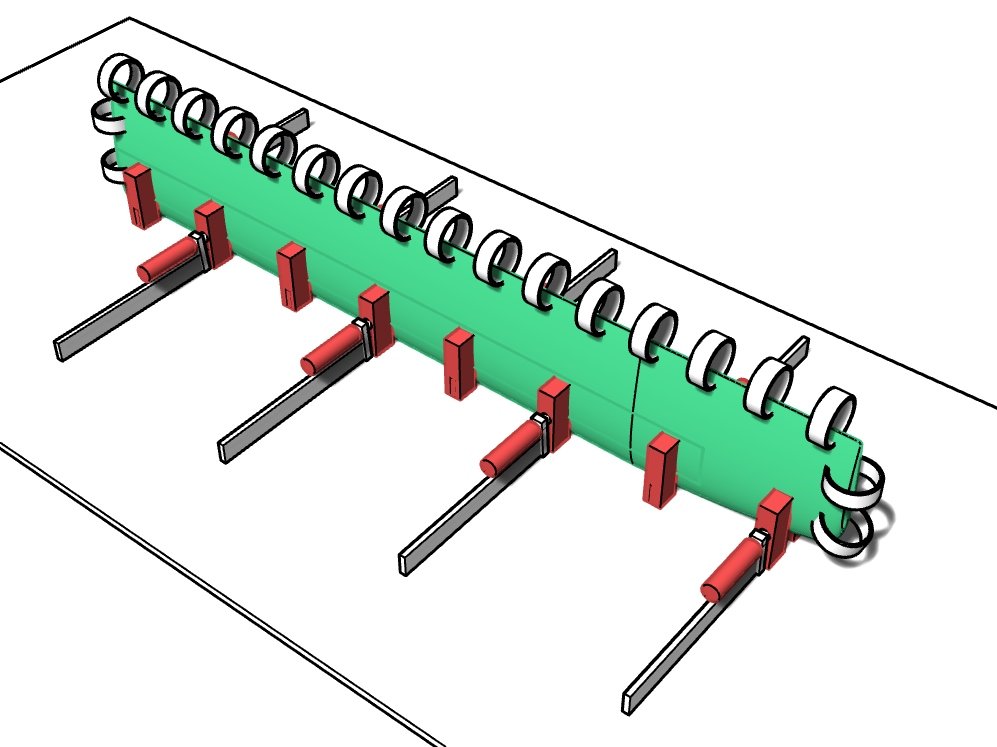
Once the epoxy has fully cured you can carefully separate the foil halves from the table. Block sand all edges of the foil till they are smooth and fair. Test fit the halves of each foil together to make sure the centerline seam goes together nicely. Now mix up some epoxy thickened to a maple syrup consistency. Apply a generous coat of epoxy to both glue surfaces and then carefully clamp the halves together with the trailing edge up. Be careful not to overtighten the clamps and continuously check the alignment of the halves as you go. Ideally, you want to see just a bit of squeeze out around the entire foil. Clean up any excess. Site down the trailing edge to make sure it is completely straight. It is important to have very lightweight and gentle clamps along the trailing edge. Clamps that are too heavy or powerful may make the trailing edge take on a scalloped look. Once satisfied everything is lined up, walk away and let fully cure. Repeat with the other foils.
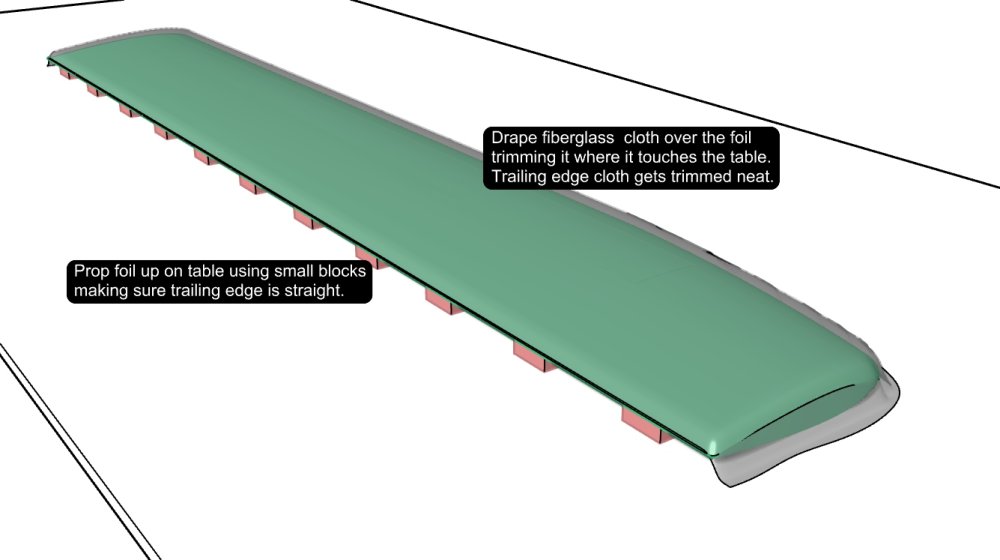
Once cured, remove the clamps and sand the foil. Pay attention to the leading edge and try to maintain the machined shape. Sand off any stray epoxy and make sure the entire foil is sanded to 80 grit and as nicely shaped as possible. Now lay out the foils on a table using little blocks along the trailing edge to stabilize the foil and assure the trailing edge stays straight. Wet a foil out with epoxy using a roller and then drape fiberglass cloth over it. Use scissors to trim the cloth so that it does not touch the table. Trim the fiberglass at the trailing edge neatly so that it does not extend past the trailing edge. Make sure the fiberglass is fully saturated with epoxy and laying as flat and smooth as possible. If it is the daggerboard then apply one more similar layer (3 layers per side total). Rudders only need one layer per side at this stage (2 layers per side total) Make sure the glass at the leading edge extends on the foil past the centerline seam at least 1/2”. Once the epoxy cures trim and sand the glass edge nicely. Flip and do the other sides. Once cured, sand and fair the foils.
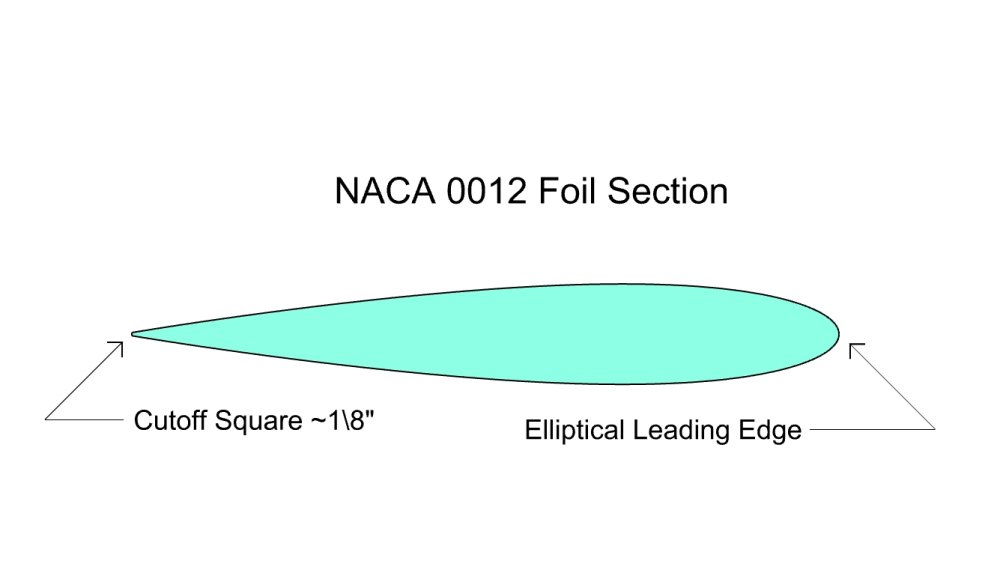
Use a sanding block to square up the trailing edge. Do not round off- you want this to be sharp cornered to encourage clean separation at the trailing edge. Also, spend adequate time tuning the leading edge to create a perfectly fair ellipse. This can take many rounds of filler and sanding to get right, but is one of the most important areas of the boat to maximize performance.

Embed a G10 tube with min 3/8” ID at the top of the daggerboard. This should go through the thickest part of the board where some of the thick laminate is beneath. Use structural epoxy to bond this in. It is ok to allow the ends to protrude slightly from the daggerboard. Use as thick of a line as possible to create a grab lope through this tube. A thick line feels better in your hand but more importantly, will help keep the daggerboard from sliding too far into the trunk. Rig a 1/4” thick bungee cord around the back of the daggerboard. This helps keep the board from slipping when the board is lifted. Alternatively, you can embed a couple more flush tubes in the board which you can use to pin the board at different heights.
Post your comment on this topic.
Brandon wrote: Jul 17, 2024
Use carbon unidirectional or S-glass unidirectional in the rebate in the foam. It is best to use cloth weights between 6 and 10oz as they are easier to saturate with resin when hand laminating. The S-glass will be a bit easier to laminate because you can visual see when it is fully wet out and if there are any bubbles behind it.
Kurt wrote: Jul 17, 2024
Do you have a recommendation for the oz weight of the unidirectional for the the rabbit lamination?