The Data Viewer SPFx Client Side web part can be used with Microsoft Teams to display content within your Team site.
There are two methods for adding the Data Viewer to your Teams site: One is by adding the Data Viewer SPFx Client Side web part to your company’s App Catalog, which makes the app availalbe in your SharePoint Online environment, as well as Microsoft Teams. Or, you can upload the Data Viewer directly to your Teams site. Using the App Catalog is the preferred method, as it does not limit the Data Viewer just to Teams.
Adding the Data Viewer via the App Catalog
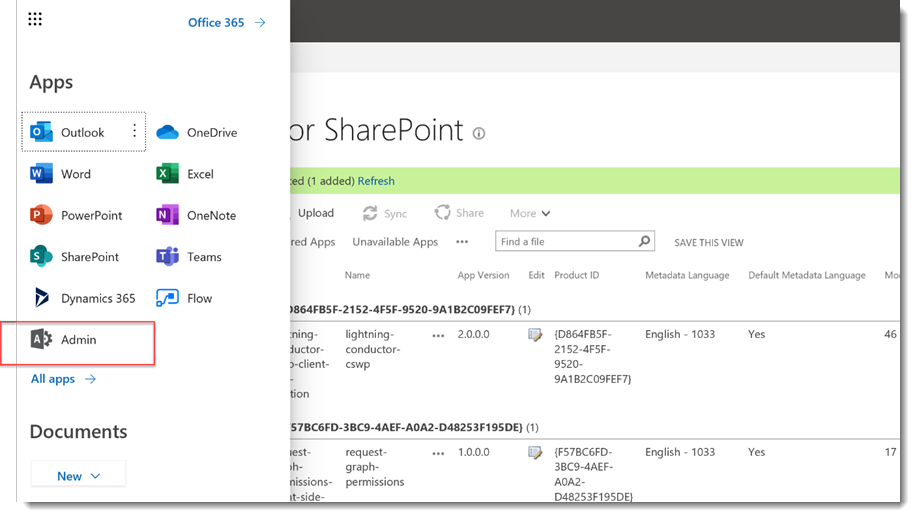
- Navigate to your Admin Portal.
- Navigate to the SharePoint Admin Center.
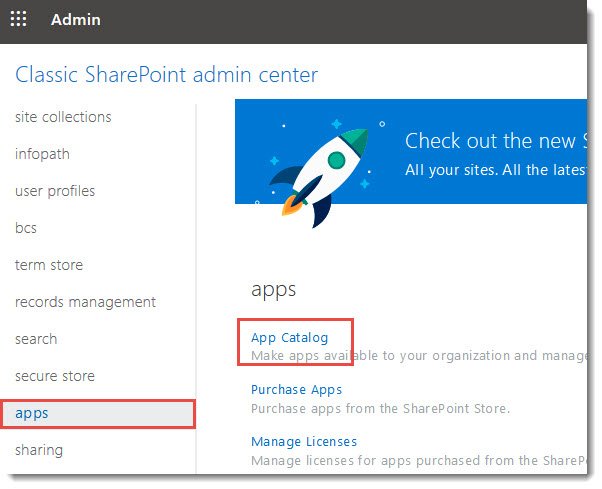
- Using the Classic SharePoint Admin Center, navigate to the apps category in the left hand side navigation panel, and then App Catalog.
- Select Apps for SharePoint from the left navigation menu
- Locate the Data Viewer Client Side Web Part (CSWP) and select it by clicking to the left of the row.
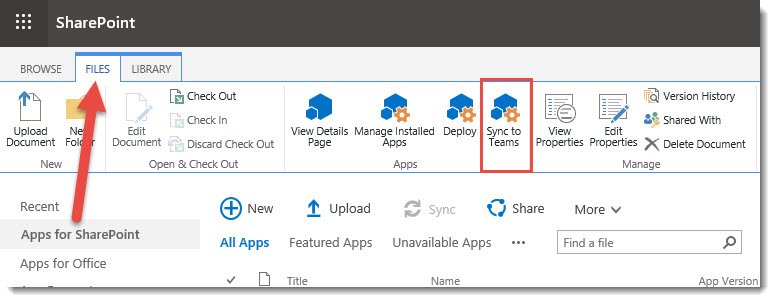
- Select the Files tab from the toolbar, and click Sync to Teams.
- Navigate to your Teams site.
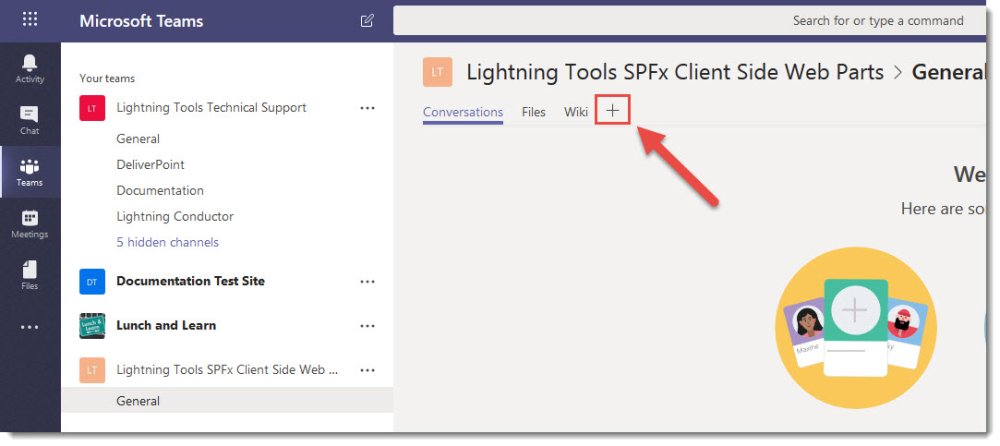
- Click the + icon to Add a tab.
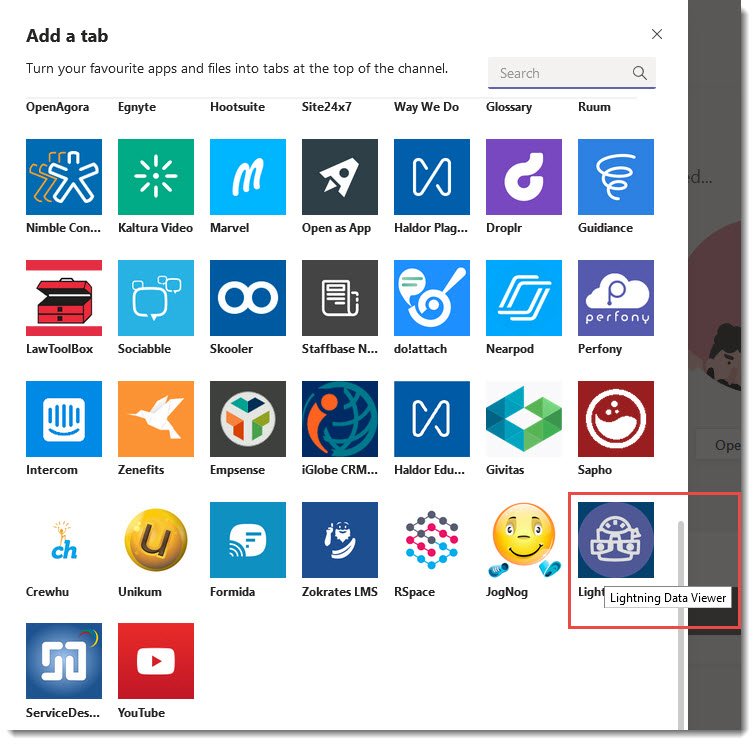
- The Add a tab dialog window appears with various apps to add as tabs at the top of the channel. Scroll down and locate the Data Viewer. (If you do not see the Data Viewer, check that the App was Synced to Teams in the previous steps.)
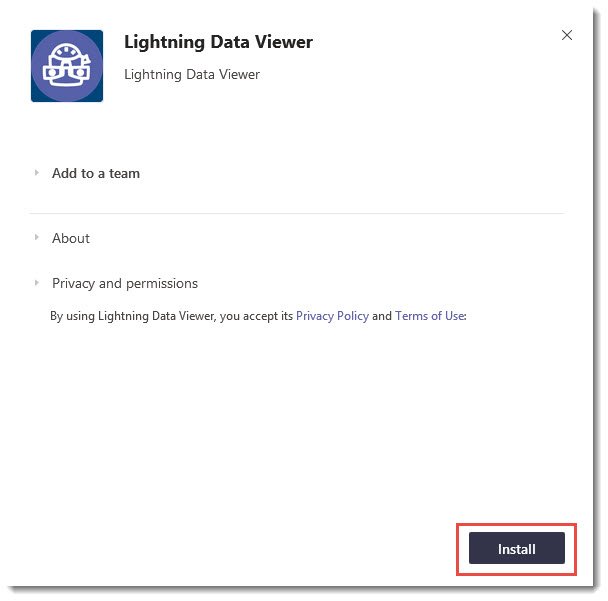
- Click Install on the Data Viewer dialog window.
- Click Save on the final dialog window.
- You should now see the Data Viewer listed in as a tab at the top of your Team channel.
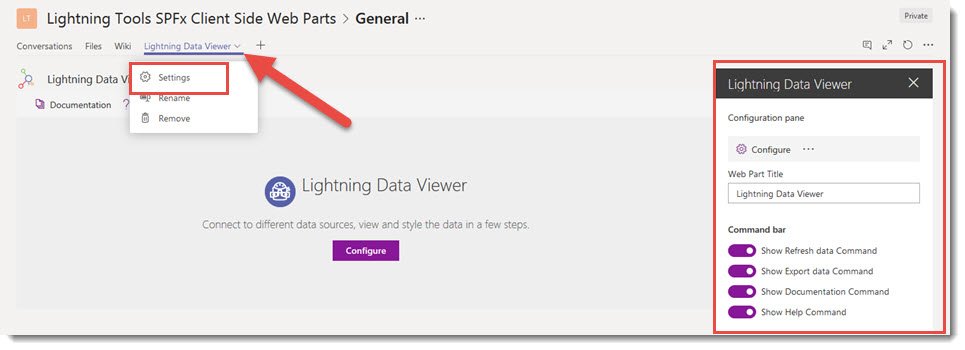
- You can now configure the Data Viewer App by selecting the Data Viewer tab, and then clicking on the drop down menu and Settings. This will display the settings on the right side of the pane.
Add the Data Viewer directly to Microsoft Teams site.
In order to use the Data Viewer SPFx Client Side web part solely in a Teams site, follow the steps below:
- Navigate to your Teams site.
- Click the + icon to Add a tab.
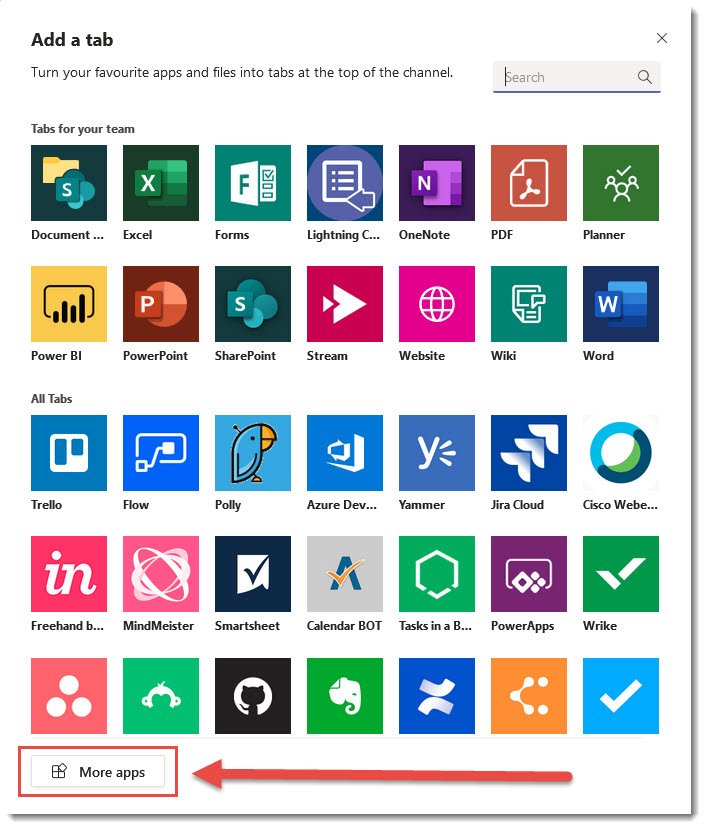
- The Add a tab dialog window appears with various apps to add as a tab to the top of your channel. Click on More apps at the bottom of the dialog window.
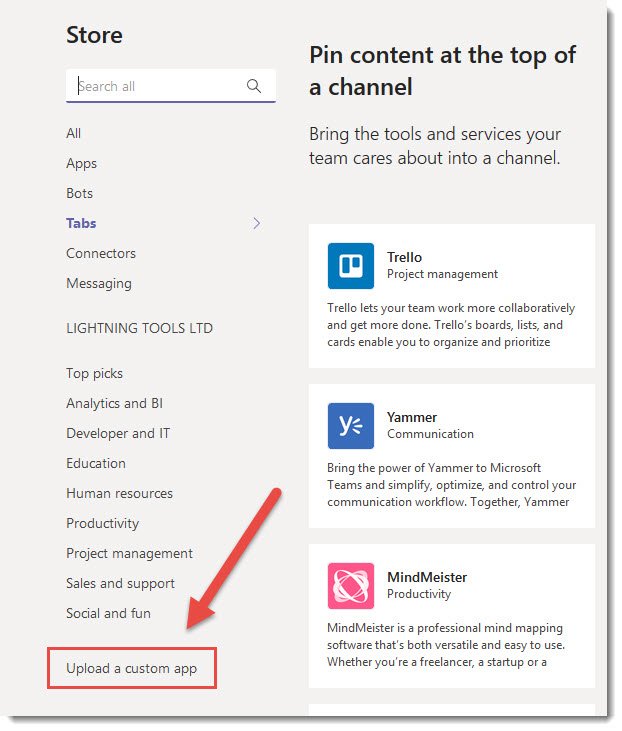
- The Store will appear. Select Upload a custom app from the left navigation.
- Navigate to the teams_DVxFx.Zip file from within the Data-Viewer-Client-Side-web-part.zip file received from Lightning Tools and choose Open.
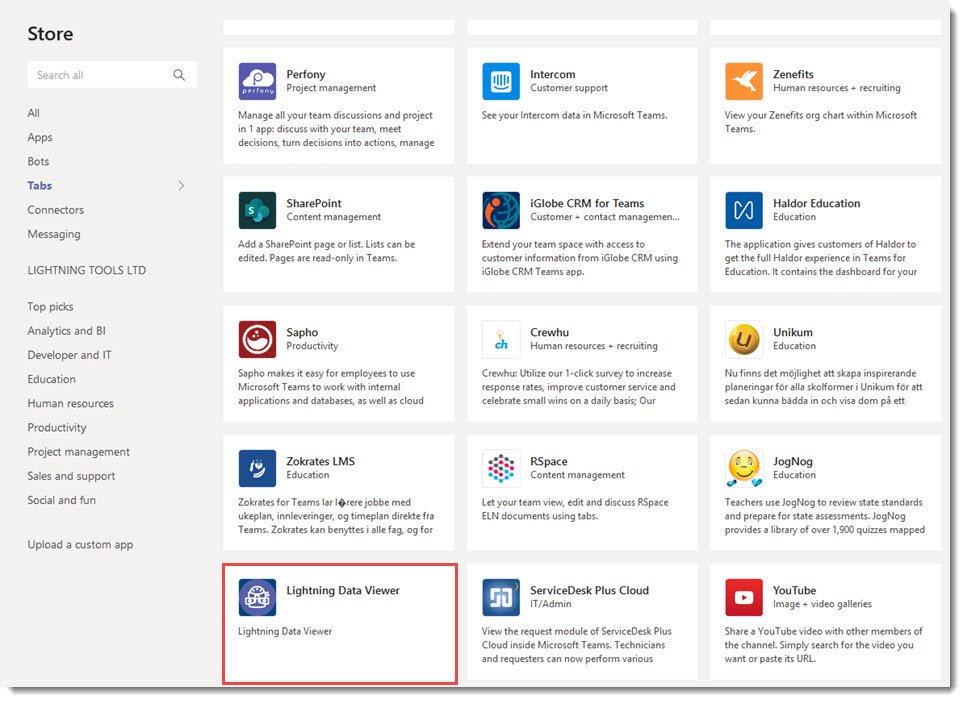
- Locate and select Data Viewer from the store.
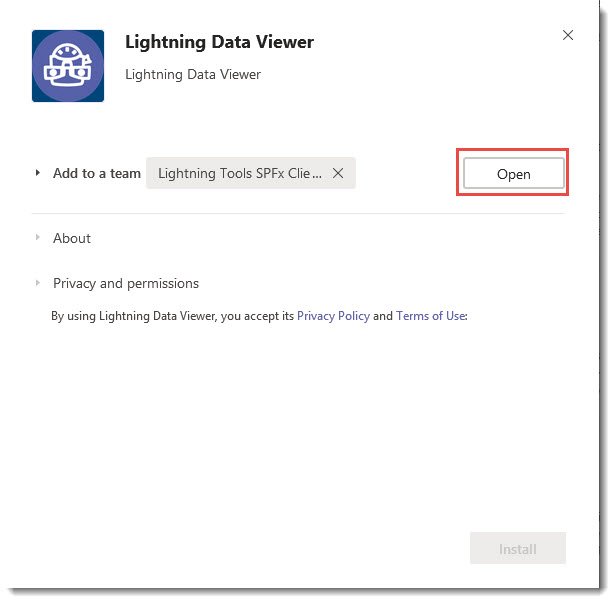
- Click Open on the dialog window.
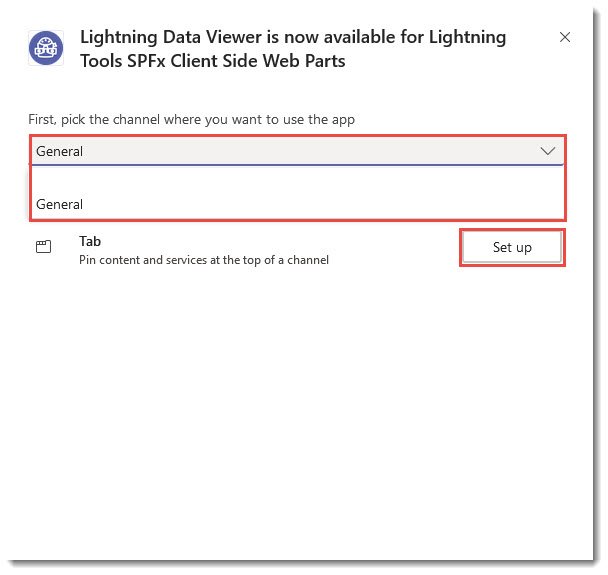
- On the next dialog window, select the Teams channel you wish to display the Data Viewer. Then click Set Up.
- Click Save on the final dialog. The Data Viewer should now appear as a tab along the chosen channel of your Teams site.




Post your comment on this topic.