
To create and upload you own custom XSLT view for the Data Viewer App use the following steps:
- Select the Web Part tab on the Data Viewer App Configuration dialog.
- In the Display Provider section, select XSL display provider.
- On the Data Source tab, navigate to a site and select a list or library.
- On the Columns tab, select the columns that the XSL will use.
- Select the Display tab,
- In the XSL Styles section, select one of the predefined styles.
- Click the code icon
 to view the XSLT source.
![]()
 to view the XSLT source.
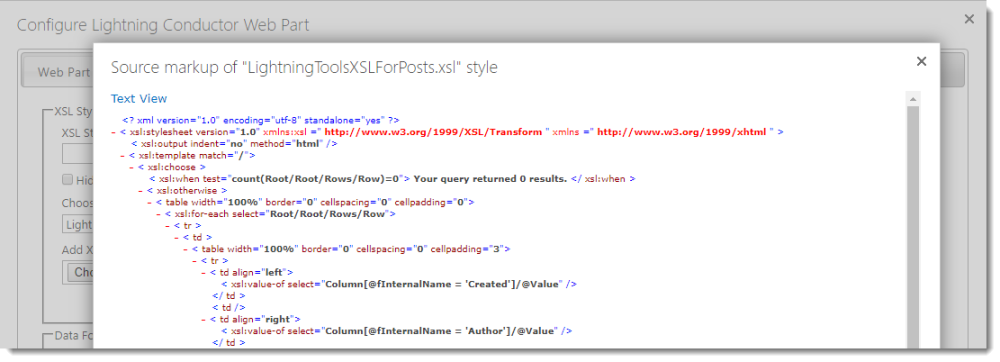
 to save your new style sheet file to the Style Library at the top level site of the site collection.
In the Choose XSL Style list, select the file you have just uploaded.
to save your new style sheet file to the Style Library at the top level site of the site collection.
In the Choose XSL Style list, select the file you have just uploaded. Tip: To view a preview of the content rendered using the XSL file, click the magnify icon
 .
Configure any column, sorting or filtering requirements, and then click Save.
.
Configure any column, sorting or filtering requirements, and then click Save.Feedback
Copyright © 2025 Lightning Tools
—
Powered by 
Post your comment on this topic.